Is your Amana freezer light not working but you have no idea what to do about it? Well, you are in the right place. In this article, we will look at this problem and show you how to fix it.
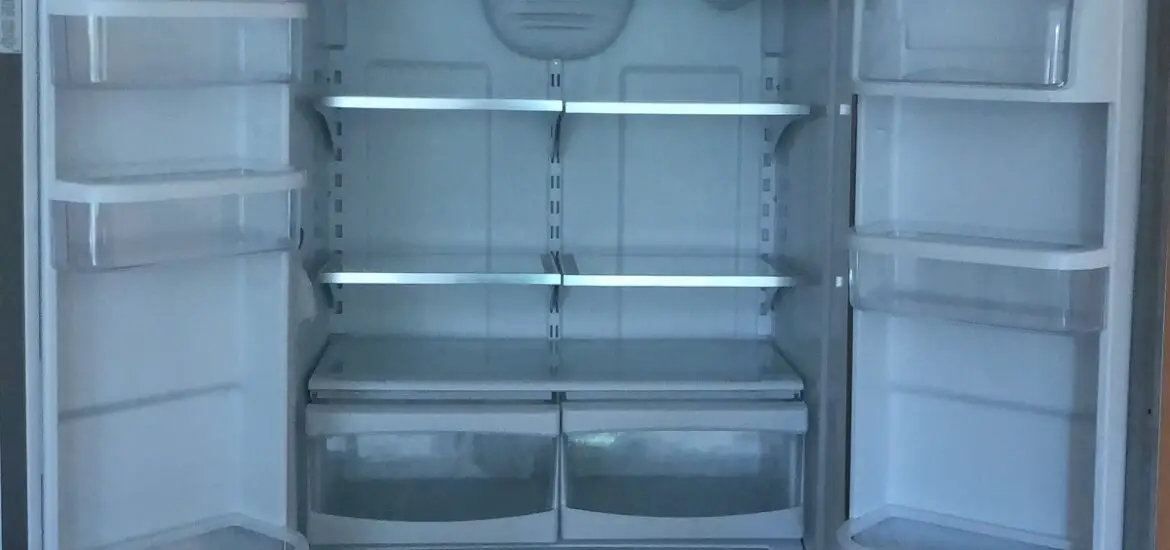
Table of Contents
Amana Freezer Light Not Working — Causes And Solutions
Below, we have listed the possible reasons why your Amana freezer light is not working and what to do about them.
1. Light Bulb
The most likely reason why your Amana freezer light is not working is because of a faulty light bulb. Below, we have listed the steps you need to follow in order to replace your Amana freezer light bulb…
Step 1: Disconnect the power to the freezer for safety. You can do this by unplugging the power cord from the outlet or switching the circuit breaker off.
Step 2: Also put on some gloves for safety.
Step 3: Open up your Amana freezer.
Step 4: Press on the front and back of the light bulb cover and lower it down in order to remove it. If this doesn’t work on your model, press down the lens on the sides of the cover, push back, then pull it down.
Step 5: Unscrew the light bulb by turning it counterclockwise.
Step 6: Get a new light bulb for your Amana freezer. Make sure to get the recommended bulb type for your Amana freezer or it could burn out.
Step 7: Screw the new light bulb into to the socket.
Step 8: Reposition the cover of the light bulb.
Step 9: Shut the freezer.
Step 10: Reconnect the power to the freezer by plugging the cord in or switching the breaker back on.
If the steps above for replacing an Amana freezer light bulb don’t work on your freezer model, follow the steps listed below…
Step 1: As always, make sure to disconnect the power to the freezer by unplugging the power cord from the outlet.
Step 2: Open the door of the freezer.
Step 3: Pull the ice bucket towards yourself and take it out of the freezer completely.
Step 4: Remove the light bulb cover by pulling it down.
Step 5: Unscrew the light bulb from the socket by turning it counterclockwise.
Step 6: Get a new light bulb for your Amana freezer and screw it into place.
Step 7: Reposition the cover of the light bulb.
Step 8: Slide the ice bucket back into the freezer.
Step 9: Shut the freezer door.
Step 10: Plug the power cord back in.
Also follow the steps above to replace the light bulb in your refrigerator if one light of your Amana french door refrigerator is not working.
2. Light Bulb Socket
If the light of your Amana freezer still won’t work after replacing the light bulb, you should check the socket next. Follow the steps listed below to test and replace the light bulb socket in your Amana freezer…
Step 1: As always, make sure to unplug the power cord before starting the repair.
Step 2: Open the freezer by pulling the bottom drawer forward.
Step 3: Lift the bin out of the freezer and set it to the side.
Step 4: Get a flat blade screwdriver.
Step 5: Use the screwdriver to press down the metal tabs which hold the rails of the drawer in the place.
Step 6: Pull out the the drawer and the rail assembly.
Step 7: Using a quarter inch nut driver, take out the screws which hold the support rails of the freezer rack in place. There is one screw on each side.
Step 8: Pull the rack forward then depress the tabs holding the support bracket of the rack in place. There are two plastic tabs on the right side of the rack, and on the left side.
Step 9: Lift up the rails to fully remove the rack from the freezer.
Step 10: If your freezer light bulb has a cover, remove it to gain access to the bulb. If not, simply unscrew the light bulb from the socket.
Step 11: Carefully pull the light socket down then disconnect the wires connected to the light socket.
Step 12: Test the light socket for continuity using a multimeter. If the socket doesn’t have continuity or the display of the multimeter doesn’t change, get a new light socket.
Step 13: Connect the wires to the terminals of your new Amana freezer light socket.
Step 14: Position the freezer socket in the housing and push it into place.
Step 15: Screw the light bulb back into the freezer’s light socket.
Step 16: Lift the rack and reposition it on the rails.
Step 17: Once the rack is properly positioned, push down on the rails to snap the support brackets back into place.
Step 18: Push the rack back in and return the two screws which hold the rails in place.
Step 19: Lift the drawer assembly and reposition it on the side rails.
Step 20: Push the drawer closed then open it again.
Step 21: Snap the sides of the drawer back to secure it to the rails.
Step 22: Reposition the bin in the freezer.
Step 23: Shut the freezer drawer.
Step 24: Plug the freezer’s power cord back in.
If you would like a visual of how to replace the light socket in your Amana freezer, watch the video below.
If the steps above for replacing an Amana freezer light socket don’t work on your freezer model, follow the steps listed below…
Step 1: First, make sure to unplug the freezer’s power cord from the outlet.
Step 2: Open the door of the freezer.
Step 3: Take out the ice bucket from the freezer by pulling it forward.
Step 4: Set the ice bucket aside.
Step 5: Carefully pull down the cover of the light bulb and set it aside.
Step 6: Turn the light bulb counterclockwise to unscrew it from the socket.
Step 7: Take out the screws which hold the metal panel of the auger motor.
Step 8: Lift the assembly forward and disconnect the wire plug connected to it.
Step 9: Set the assembly on a flat and sturdy surface.
Step 10: Using a pair of needle nose pliers, squeeze the light socket clip through the slot in the auger motor assembly to detach.
Step 11: Note where each wire goes on the light socket then disconnect them.
Step 12: Test the freezer light socket for continuity using a multimeter. If the multimeter’s display doesn’t change, the light socket is faulty.
Step 13: Get a new light socket for your Amana freezer.
Step 14: Connect the wires to the terminals of the new light socket. Make sure to connect each wire to the right terminal.
Step 15: Position the light socket in the auger motor assembly and push it into place.
Step 16: Lift the auger motor assembly back into the refrigerator.
Step 17: Reconnect the wire plug to the refrigerator.
Step 18: Reposition the auger motor assembly on the posts and hold it in place with the screws.
Step 19: Screw the new light bulb into the freezer light socket.
Step 20: Push the light bulb cover back into place.
Step 21: Return the ice bucket to the freezer and shut the door.
Step 22: Plug the power cord back into the outlet.
Note: The replacement of the Amana freezer light socket takes place from the last two minutes of the video below.
Watch the video below for a visual of how to replace the light socket in your Amana freezer.
3. Door Light Switch
If the light socket isn’t faulty, the next component to check is the door light switch. We will show you how to replace the door light switch in an Amana freezer drawer, and an Amana upright freezer. Below, we have listed the steps you need to follow in order to replace the door light switch in your Amana freezer drawer…
Step 1: Before starting the repair, unplug the freezer’s power cord from the outlet for safety.
Step 2: Pull the freezer drawer forward.
Step 3: Once you pull the freezer drawer, you will see the door light switch right in front of you. To detach it, get a putty knife and flat blade screwdriver.
Step 4: Using the flat blade screwdriver and putty knife, carefully pry the door light switch off.
Step 5: Note where each wire goes on the door light switch then disconnect them.
Step 6: Test the light switch for continuity using a multimeter. If the light switch doesn’t have continuity or the multimeter’s display doesn’t change, get a new light switch.
Step 7: Connect the wires to the new light switch, making sure that each one goes to the right place.
Step 8: Push the switch into place.
Step 9: Push the freezer drawer forward to close.
Step 10: Plug the freezer’s power cord back into the outlet.
The video below will show you how to replace the door light switch of your Amana freezer drawer.
Follow the steps below to replace the door light switch of your Amana upright freezer…
Step 1: First, make sure to disconnect the power to the freezer by unplugging the power cord from the outlet.
Step 2: Open the door of the freezer.
Step 3: The door switch should be on the upper left side of the freezer. To detach it, you will need a flat blade screwdriver.
Step 4: Using the flat blade screwdriver, carefully pry off the door light switch.
Step 5: Note where each wire goes on the door light switch. To make it easier, take a picture.
Step 6: Next, get a pair of needle nose pliers.
Step 7: Using the pair of pliers, disconnect the wires connected to the door light switch.
Step 8: Test the door light switch for continuity using a multimeter. If the multimeter’s display doesn’t change, the door light switch doesn’t have continuity. This means that it is faulty and should be replaced.
Step 9: Get a new door light switch for your Amana freezer.
Step 10: Connect the wires to the terminals of the new light switch. Make sure to connect each wire to the right terminal.
Step 11: Position the light switch in the freezer housing and snap it into place.
Step 12: Shut the door of the freezer.
Step 13: Reconnect the power to the freezer by plugging the power cord back into the outlet.
If your Amana freezer light still won’t work after testing and replacing the above components, contact a technician.
Watch the video below for a visual of how to replace the door light switch in your Amana upright freezer.
Amana Refrigerator Light Not Working — Causes And Solutions
If your Amana fridge light is not working, there are multiple possible causes. Below, we have listed them and what to do about them.
1. Open Door
Before concluding that there is a fault with the refrigerator light, shut the door. On some Amana refrigerator models, the light turns off when the door has been left open for a long time. This is to conserve energy. To determine if this is the case, shut the door then open it again. If the light still won’t turn on, keep reading to learn the other possible causes.
2. Light Bulb
If your Amana refrigerator light is not working, the light bulb or LED light is most likely the cause. Below, we show you how to replace the LED light or bulb in your Amana refrigerator…
Step 1: First, unplug the refrigerator’s power cord from the outlet for safety.
Step 2: Open the door of the fridge.
Step 3: The light bulb is at the top of the fridge. Using a Philips head screwdriver, take out the screw or screws which hold the light cover in place. If there isn’t a screw, press on the sides of the cover to release the tabs which hold it in place. However, if there isn’t a cover, skip this step.
Step 4: Set the light cover aside.
Step 5: If your fridge uses a light bulb, simply unscrew it from the socket. However, if it uses an LED light, use a flat blade screwdriver to gently push back the tabs which hold it in place.
Step 6: Disconnect the wire plug from the LED light.
Step 7: Get a new light bulb or LED light.
Step 8: If your fridge uses a light bulb, simply screw the new one into the socket. However, if it uses an LED light, connect the wire plug to the new one.
Step 9: Position the LED light in the housing and push it into place.
Step 10: Reposition the light cover and secure with the screw.
Step 11: Shut the fridge door.
Step 12: Plug the fridge’s power cord back into the outlet.
The video below will give you a visual of how to replace the LED light in an Amana refrigerator.
3. Light Socket
If replacing the light bulb doesn’t fix the problem, the next component to check is the light socket. Follow these steps to test and replace the light socket in your Amana refrigerator…
Step 1: First, make sure to unplug the power cord from the outlet.
Step 2: Open the door of the fridge.
Step 3: Using a Philips head screwdriver, take out the screws which hold the control panel in place. There are a few screws underneath the panel.
Step 4: Carefully pull the control panel forward and lower it down.
Step 5: Disconnect the wire plug from the control panel assembly.
Step 6: Unhook the green grounding wire from the metal tab as well.
Step 7: Using a stubby Philips head screwdriver, take out the screw which holds the damper control arm to the control panel assembly.
Step 8: Unscrew the light bulb from the socket and set it aside.
Step 9: Disconnect the wires connected to the terminals of the light socket.
Step 10: Use a pair of needle nose pliers to bend the tab which secures the light socket.
Step 11: Test the light socket for continuity using a multimeter. If the socket doesn’t have continuity, get a new one.
Step 12: Position the new light socket in the control panel assembly and push it into place.
Step 13: Connect the wires to the terminals of the new light socket.
Step 14: Screw the light bulb into the socket.
Step 15: Reposition the damper control arm and hold it in place with the screw.
Step 16: Reconnect the wire plug and hook the grounding wire back to the metal shield.
Step 17: Reposition the control panel assembly and secure it with the screws.
Step 18: Shut the door and plug the refrigerator back in.
Watch the video below for a visual of how to replace the light socket in an Amana refrigerator.
If the light in the crisper drawer is the faulty one, follow these steps to test and replace the socket…
Step 1: First of all, unplug the refrigerator’s power cord from the outlet.
Step 2: Open the fridge door.
Step 3: Take out the crisper drawer and set it aside.
Step 4: Also take out the shelf as well.
Step 5: Insert your hand into the bottom of the light bulb cover to detach the tabs which secure it.
Step 6: Set the light bulb cover aside.
Step 7: Unscrew the light bulb from the socket you want to replace.
Step 8: Gently pull the light socket forward and disconnect the wires from the terminals. Make sure that the wires don’t fall through the rear of the refrigerator.
Step 9: Get a multimeter and turn the dial to the lowest ohms setting.
Step 10: Touch the probes of the multimeter to the terminals of the light socket. If the multimeter’s display doesn’t change when you do this, the light socket doesn’t have continuity. This means that it is faulty.
Step 11: Get a new light socket for your Amana refrigerator.
Step 12: Take the new light socket to the refrigerator and connect the wires to the terminals.
Step 13: Position the new light socket in the refrigerator’s rear.
Step 14: Screw the light bulb into the new socket.
Step 15: Reposition the tabs on the light bulb cover into the slots in the refrigerator’s rear.
Step 16: Snap the bottom tabs of the cover into place.
Step 17: Slide the shelf back into the refrigerator.
Step 18: Return the crisper drawer as well.
Step 19: Shut the door of the refrigerator.
Step 20: Plug the power cord back into the outlet.
4. Door Light Switch
A faulty door light switch is another possible reason why your Amana refrigerator light is not working. If you have checked the components above but they aren’t faulty, follow these steps to test and replace the door light switch…
Step 1: As always, make sure to unplug the refrigerator’s power cord from the outlet.
Step 2: Open the door of the refrigerator.
Step 3: Get a putty knife.
Step 4: Using the putty knife, carefully pry the door light switch off the side of the refrigerator.
Step 5: Disconnect the wire plug connected to the door light switch.
Step 6: Test the door light switch for continuity using a multimeter. If the multimeter’s display doesn’t change when you do this, the door light switch is faulty.
Step 7: Get a new door light switch for your Amana refrigerator.
Step 8: Take the new door light switch to the refrigerator and connect the wire plug to it.
Step 9: Position the door light switch in the refrigerator and push it into place.
Step 10: Shut the door of the refrigerator.
Step 11: Plug the refrigerator’s power cord back into the outlet.
Watch the video below for a visual of how to replace the door light switch in an Amana refrigerator.
If the steps above for replacing an Amana refrigerator don’t work on your model, follow the steps listed below…
Step 1: Before you start the repair, make sure to disconnect the power to the refrigerator by unplugging the power cord from the outlet.
Step 2: Open the door of the refrigerator.
Step 3: Take out the screws which hold the control panel assembly in place. There are a few screws located underneath the control panel.
Step 4: Gently pull the control panel assembly towards yourself then lower it down.
Step 5: Disconnect the wire plug connected to the control panel assembly. You may need a flat blade screwdriver for this.
Step 6: Carefully pull out the green grounding wire from the metal plate in the top of the refrigerator.
Step 7: While supporting the control panel assembly, take out the screw which holds the damper arm to it.
Step 8: Push the light switch plunger in, then use the flat blade screwdriver to carefully pry the light switch off the control panel assembly.
Step 9: Note where each wire goes on the light switch then disconnect them. You can take a picture to make it easier.
Step 10: Get a multimeter and turn the dial to the lowest setting for ohms.
Step 11: Touch the probes of the multimeter to the terminals of the light switch. If the display of the multimeter doesn’t change when you do this, or it doesn’t show a reading, the light switch is faulty.
Step 12: Get a new light switch for your Amana refrigerator.
Step 13: Connect the wires to the new light switch making sure that each wire goes to the right place.
Step 14: Push in the plunger on the new light switch.
Step 15: Position the new light switch on the control panel assembly and push it into place.
Step 16: Reposition the damper control arm on the control panel assembly and secure using the screw.
Step 17: Reconnect the wire plug to the control panel assembly.
Step 18: Insert the grounding wire back into the metal shield at the top of the refrigerator.
Step 19: Reposition the control panel assembly on the refrigerator and hold it in place with the screws.
Step 20: If a spacer was included with the new light switch, place it on the inner liner of the door. This will help ensure that the light switch is pushed in properly every time the door is closed.
Step 21: Shut the door of the refrigerator.
Step 22: Plug the power cord back into the outlet.
Watch the video below for a visual of how to replace the door light switch in an Amana refrigerator.
5. Dispenser Control Board
If you have checked the above components but none is faulty, the dispenser control board may be the reason why your Amana refrigerator light is not working. Below, we have listed the steps you need to follow in order to replace the dispenser control board in an Amana refrigerator…
Step 1: As always, make sure that the refrigerator is unplugged before starting the repair.
Step 2: Get a flat blade screwdriver.
Step 3: Using the flat blade screwdriver, carefully detach the tabs under the dispenser control board which secure it. The dispenser control board is on the exterior of the refrigerator door.
Step 4: Disconnect the wire plug connected to the dispenser control board.
Step 5: Closely inspect the dispenser control board for burns, cracks, or any type of damage. If the dispenser control board is damaged in any way, it should be replaced.
Step 6: Get a new dispenser control board for your Amana refrigerator.
Step 7: Connect the wire plug to the new dispenser control board.
Step 8: Insert the tabs on the top of the dispenser control board into the refrigerator.
Step 9: Push the dispenser control board into place.
Step 10: Plug the refrigerator’s power cord back into the outlet.
The video below will give you a visual of how to replace the dispenser control board in an Amana refrigerator.
If the steps above for replacing a dispenser control board don’t work on your Amana refrigerator model, follow the steps listed below…
Step 1: First, make sure to unplug the refrigerator’s power cord from the outlet.
Step 2: Carefully pull out the drip tray underneath the refrigerator dispenser.
Step 3: Get a quarter inch nut driver.
Step 4: Using the quarter inch nut driver, take out the two screws which hold the cover of the dispenser in place. The screws are at the bottom of the dispenser cover.
Step 5: Get a flat blade screwdriver.
Step 6: Insert the flat blade screwdriver into the opening in the side of the dispenser cover then carefully pry it off.
Step 7: Disconnect the wires from the dispenser control board in order to fully remove the cover.
Step 8: Set the dispenser cover assembly on a cloth lined surface.
Step 9: Use the flat blade screwdriver to push in the tab which holds the ribbon cable in place.
Step 10: While doing this, pull out the ribbon cable from dispenser control board.
Step 11: Carefully push back the plastic tabs on the dispenser cover to release the control board.
Step 12: Remove the dispenser control board and closely inspect it for burns, cracks, or any form of damage. If the dispenser control board appears damaged in any way, it should be replaced.
Step 13: Get a new dispenser control board for your Amana refrigerator.
Step 14: Position the new dispenser control board on the cover and carefully push it into place.
Step 15: Connect the ribbon cable to the new dispenser control board.
Step 16: Take the dispenser cover back to the refrigerator.
Step 17: Reconnect the wire plugs to the dispenser control board.
Step 18: Position the cover on the refrigerator, slide it down just a bit, then push the tabs in to secure.
Step 19: Return the two screws at the bottom of the dispenser cover which hold it in place.
Step 20: Reposition the drip tray then push it into place.
Step 21: Plug the refrigerator’s power cord back into the outlet.
Watch the video below for a visual of how to replace the dispenser control board in an Amana refrigerator.
6. Main Control Board
This is the last reason why an Amana refrigerator light won’t work. If you have checked all the above components but none is faulty, the main control board is most likely the cause of the problem. Follow the steps listed below to replace the main control board in an Amana refrigerator…
Step 1: First, disconnect the power to the refrigerator. Do this by unplugging the power cord from the outlet or switching the circuit breaker off.
Step 2: Open the door of your Amana refrigerator.
Step 3: Unscrew the light bulb from the housing of the control board.
Step 4: Get a quarter inch nut driver.
Step 5: Using the quarter inch nut driver take out the screws which hold the housing of the control board in place. There is one screw on each side.
Step 6: Disconnect the wire harness from the top of the refrigerator. You may need a flat blade screwdriver to do this.
Step 7: Using the flat blade screwdriver, carefully pry off the control board from the housing.
Step 8: Disconnect all the wire plugs from the control board.
Step 9: Get a new control board for your Amana refrigerator.
Step 10: Connect the wire plugs to the new control board.
Step 11: Position the new control board in the housing and push it into place.
Step 12: Take the control board assembly to the refrigerator and connect the wire harness to the top of the refrigerator.
Step 13: Position the control board housing on the top of the refrigerator and hold it in place using the two screws.
Step 14: Screw the light bulb back into the socket.
Step 15: Shut the door of the refrigerator.
Step 16: Plug the refrigerator’s power cord back into the outlet.
Watch the video below for a visual of how to replace the main control board in an Amana refrigerator.
If the steps above for replacing a main control board don’t work on your Amana refrigerator model, follow the steps listed below…
Step 1: First, unplug the refrigerator’s power cord from the outlet to avoid the risk of electrocution.
Step 2: Open the two doors of the refrigerator.
Step 3: If you have any food on the top shelf of the refrigerator, take it out.
Step 4: Push the tab on the light bulb cover and push forward to detach. The light bulb cover is on the top wall of the refrigerator.
Step 5: Set the light bulb cover aside.
Step 6: Unscrew the two light bulbs from the sockets and set them aside.
Step 7: There are two slots on the back on the control panel. Insert a flat blade screwdriver into the first slot and depress the tab.
Step 8: While doing this, carefully pull down on the control panel.
Step 9: Do the same with the other side.
Step 10: Lower the control panel assembly and release the tabs on the front as well.
Step 11: Disconnect the wire plugs connected to the control board. You may need the flat blade screwdriver for this.
Step 12: Place the control panel assembly on a cloth lined surface.
Step 13: Carefully pull back the plastic tab which holds the top part of the control board in place.
Step 14: While pulling back on the tab, release the top part of the control board from the panel.
Step 15: Also do the same to the bottom portion of the control board.
Step 16: Get a new control board for your Amana refrigerator.
Step 17: Before touching the new control board, make sure to put on some protective gloves. Since the new control board is static sensitive, touching it with your bare hands could damage it.
Step 18: Since the control board comes in one piece, you will need to bend it to get it back and forth like the old board.
Step 19: Position the top part of the control board on the control panel and push it into place.
Step 20: Do the same with the bottom part of the control board.
Step 21: Take the control panel assembly back to the refrigerator.
Step 22: Connect the wire plugs to the new control board.
Step 23: Position the front tabs of the control panel assembly in the slots.
Step 24: Then hit the two sides of the control assembly to snap it back into place.
Step 25: Screw the two light bulbs back into the socket.
Step 26: Reposition the light bulb cover and push it into place.
Step 27: Shut the doors of the refrigerator.
Step 28: Reconnect the power to the refrigerator by plugging the power cord back into the outlet.
Watch the video below for a visual of how to replace the main control board in an Amana refrigerator.