Fridge compressor pinout: It’s a technical term that might sound intimidating at first. But it’s more approachable than you think! It’s simply about understanding your fridge better, especially the heart of it all – the compressor.
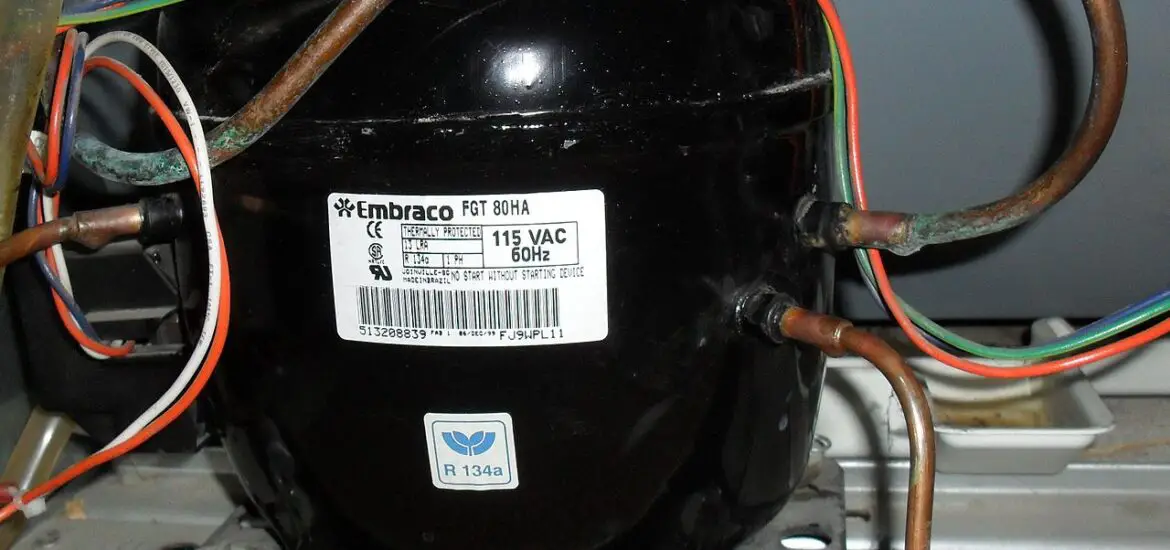
Table of Contents
Introduction to Fridge Compressor Pinout
We’ve all been there. The fridge starts acting up and we’re left in a state of panic. To get a better grip on such situations, it’s essential to understand certain parts of your fridge. More specifically, we’re talking about the compressor pinout.
Brief Overview of Fridge Compressor Pinouts
Fridge compressor pinouts are diagrams or instructions that illustrate how to connect electrical pins on a refrigerator’s compressor. They guide you on how to wire these pins correctly to ensure the compressor works well.
What is a Fridge Compressor Pinout?
A fridge compressor pinout is a kind of map that gives you the lay of the land when dealing with the wiring of your fridge compressor. It’s about connecting the right wire to the right pin. Got it? Good!
Importance of Knowing the Compressor Pinout
Knowing the compressor pinout is like having a secret cheat code. It can save you from potential hassles, unnecessary service calls, and even improve the lifespan of your refrigerator!
Understanding the Basics of Fridge Compressors
Like the heart in our bodies, the compressor is crucial to the fridge’s operation. But what does it do, exactly? And what role do the pinouts play?
The Role of the Compressor in a Refrigerator
The compressor is like the workhorse of your fridge. It’s tasked with maintaining the refrigeration cycle that keeps your food cold and fresh.
How Compressors Work
Think of the compressor as a pumping device. It takes in refrigerant gas, compresses it, and pushes it out to the condenser. A bit like your heart pumping blood, right?
Identifying the Compressor in Your Fridge
Locating the compressor isn’t a game of hide and seek. It’s usually at the back of your fridge. A rounded, bulky component – that’s your compressor!
The Significance of Compressor Pinouts
So, why should you care about compressor pinouts? Well, without a proper connection, your compressor could end up playing dead.
Function of Each Pin in the Compressor
Each pin in the compressor serves a specific role, just like each musician in an orchestra. There are usually three: one for the common wire, one for the start winding, and one for the run winding. Each one is important for a harmonious operation.
Impact of Wrong Pin Connection
An incorrect pin connection is like fitting a square peg in a round hole – it’s not going to work. It could lead to an inefficient fridge or worse, a completely non-working one.
Guide to Fridge Compressor Pinouts
So how do you read a compressor pinout and connect everything properly? Let’s break it down.
Reading Fridge Compressor Pinouts
Reading fridge compressor pinouts can be like trying to decode a secret message. But once you’ve got the hang of it, it’s straightforward.
Identifying the Different Pinout Labels
The pinout labels are usually marked on the compressor itself. One pin is usually tagged ‘C’ for common, ‘S’ for start, and ‘R’ for run. The labels are there to guide you, so make sure to follow them!
Common Color Codes and What They Mean
Color codes in wiring can make your job easier. Black is usually the common wire, red is for run, and white or yellow is for start. Just like traffic lights, these colors are there for a reason!
Understanding the Refrigerator Compressor Connector
The compressor connector is the bridge that connects the compressor pins to the power source. It’s the magic link that makes everything work.
The Role of the Compressor Connector
The connector ensures the power is transmitted properly to the compressor. It’s like the hands that pass the baton in a relay race, crucial for a seamless.
Properly Connecting the Pins in the Connector
Connecting the pins in the connector properly is like solving a puzzle – you need to make sure every piece fits perfectly. Follow the pinout instructions carefully, and you’ll be good to go.
Check out these other related articles…
How to Know Fridge Compressor Size: Your Comprehensive Guide
Fridge Compressor Blast: Everything You Need to Know
No Sound from Fridge Compressor: Reasons & Solutions
Difference Between Air Compressor and Refrigeration Compressor
Fridge Inverter Compressor vs Normal: A Deep-Dive Comparison
Step-by-Step Guide to Connecting Fridge Compressor Pinouts
Now, let’s get our hands dirty and tackle this step by step.
Safety Precautions Before Starting
Safety first, right? Before you dive into this, make sure you’re equipped with the right tools and follow the necessary safety measures.
Necessary Equipment
You’ll need a few tools for this job, like a multimeter, wire stripper, and screwdriver. Always better to be prepared!
Safety Protocols
Remember to disconnect your fridge from the power source before you begin. Also, wearing safety gloves and eye protection is a wise move. Better safe than sorry!
Step 1: Identifying the Compressor Pins
First, locate the three pins on your compressor. Remember, they’re usually labeled ‘C’, ‘S’, and ‘R’. Got it? Great, let’s move on.
Step 2: Matching the Pins with the Connector
Now, match the pins with the corresponding slots in the connector. The connector should also be marked in the same way as the pins. It’s a bit like matching shapes in a child’s toy.
Step 3: Connecting the Compressor Pins
Connect the pins to the connector slots. Make sure they fit snugly and securely. And remember, force is not your friend here. If it doesn’t fit, don’t force it.
Step 4: Testing the Connection
Once everything is connected, it’s time to test. Power up your fridge and listen for the sound of the compressor. If it hums to life, you’ve nailed it!
Common Problems and Their Solutions
In the course of connecting your fridge compressor pinouts, you might encounter a few issues. Don’t worry! It’s part of the process. Here are some common problems and their solutions:
The compressor doesn’t start even after correct connection
If your compressor isn’t starting despite a correct pinout connection, it might be a case of a faulty compressor. This generally requires professional intervention. But before you call a professional, check if the compressor is getting power using a multimeter. If it’s not, the issue might be with your power outlet or the fridge’s power cord.
The fridge is not cooling properly even though the compressor is running
This can happen if the start and run wires are switched. You need to disconnect the power, then switch the start and run wires in the connector. After this, your fridge should cool as expected. However, if it doesn’t, the issue could be unrelated to the compressor and might require a professional to diagnose.
The compressor makes a loud noise when it starts
If your compressor makes a loud noise when it starts, it could mean that the start relay is defective. This small device helps the compressor start. To check if it’s the problem, you can disconnect the power, locate the start relay (it’s often attached to the compressor), and shake it. If it rattles, it’s likely defective and should be replaced.
The wires don’t fit into the connector properly
This could happen if the wires are frayed or the connector is damaged. In case of frayed wires, use a wire stripper to cleanly strip the wire and try connecting again. If the connector is damaged, you might need to get a new one. Always remember to disconnect the power before handling the wires to avoid any accidents.
Dealing with fridge compressor pinouts can seem daunting at first, but with a bit of patience and understanding, you’ll be able to overcome these common problems. Always remember, if you’re unsure or if the problem persists, don’t hesitate to call a professional.