Itching to know how to carry out a fridge compressor pressure test? Look no further! This comprehensive guide covers all you need to know. From understanding why this test is crucial to how it’s done, we’ll guide you through the entire process. To sum it up, you’ll need the right tools—a multimeter, manifold gauges, and a vacuum pump. You’ll have to unplug your fridge, locate its compressor, and use the gauges to test the pressure. By analyzing the readings, you’ll know whether your compressor is up to snuff.
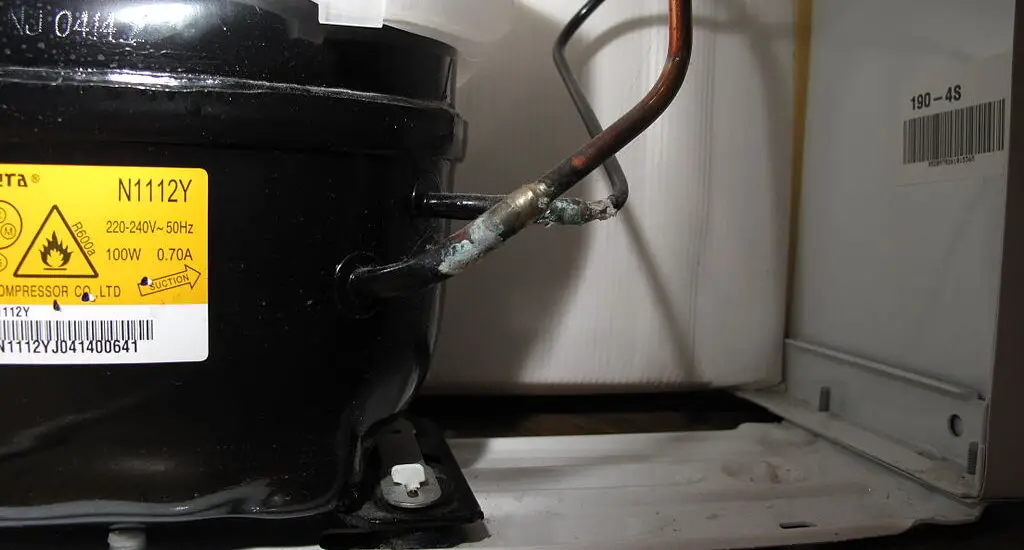
Table of Contents
Understanding the Importance of a Fridge Compressor Pressure Test
Your fridge’s compressor is a vital component. If it’s not working properly, your fridge’s cooling efficiency can take a hit. A pressure test helps identify any potential issues with the compressor, allowing you to keep your fridge in optimal shape.
Role of the Compressor in a Refrigerator
The compressor is to your fridge what a heart is to the human body. It pumps refrigerant through the system, making sure your food stays frosty. And like your heart, the compressor needs the right pressure to work effectively. Too high or too low, and you’ve got problems.
Indications that a Fridge Compressor Pressure Test is Needed
So, how do you know when your fridge is screaming for a compressor pressure test? Look for signs like inefficient cooling, strange noises, or an unexplained surge in your energy bills. If your fridge isn’t as chilly as it should be, makes weird sounds, or seems to be running a marathon—these are all cries for help. It’s time to conduct a pressure test.
Tools and Equipment Required for Fridge Compressor Pressure Test
Carrying out a fridge compressor pressure test requires some key tools, including a multimeter, manifold gauges, and a vacuum pump. In addition, for your safety, it’s crucial to have gloves, safety glasses, and insulated tools. Armed with these, you’re well-equipped to tackle the test.
Multimeter
A multimeter is like your detective’s magnifying glass—it’ll help you unravel the mystery of your misbehaving fridge. This tool tests the electrical resistance and voltage of your compressor, telling you whether it’s working as it should.
Manifold Gauges
Manifold gauges are your pressure test’s best friends. They come in a variety of shapes and sizes, but their job is the same: they read the pressure levels in your compressor. It’s like a doctor checking your blood pressure—essential for determining your health status.
Vacuum Pump
Think of the vacuum pump as the cleanup crew. It’s there to rid the system of any unwanted air and moisture before the pressure test. But remember, not all vacuum pumps are made equal. Select one that suits your fridge and your level of expertise.
Safety Equipment
Let’s talk safety. You wouldn’t ride a bike without a helmet, would you? So don’t start a fridge compressor pressure test without safety glasses and gloves. And while you’re at it, make sure your tools are insulated. Safety first!
Preparing for the Fridge Compressor Pressure Test
Before jumping into the test, there are several preparatory steps to undertake. This includes disconnecting the fridge from its power source to ensure safety and locating the compressor and its pressure ports. Preparation is key in making the testing process seamless and effective.
Disconnecting the Refrigerator
Before you dive in, remember to disconnect your fridge. Think of it as a time-out. It’s just a safety measure to ensure you don’t get an unexpected jolt of electricity. So pull the plug before you start.
Locating the Compressor
Next up, you need to find your compressor. It’s usually at the back, hiding behind a panel. Once you’ve found it, locate the pressure ports—these are the gateway to understanding your compressor’s health.
Check out these other related articles…
Difference Between Fridge and Freezer Compressor [Revealed]
Walk-In Freezer Compressor Icing Up: Powerful Solutions!
How to Fix a Deep Freezer Compressor: A Detailed DIY Guide
Chest Freezer Compressor Running but Not Cooling: Sure Fixes
How to Replace Fridge Compressor: 3 Proven Replacement Steps
Conducting the Fridge Compressor Pressure Test
The crux of the matter lies in conducting the pressure test. Let’s walk you through the process.
Connecting the Manifold Gauges
It’s time to bring in the manifold gauges. Connect them to the pressure ports on the compressor. Make sure they’re as snug as a bug in a rug – you don’t want any air escaping.
Reading the Gauges
Once connected, it’s time to take a reading. A bit like taking your temperature when you’re feeling under the weather. But what’s normal, you ask? Well, it depends on your refrigerator model. It’s best to check the manufacturer’s specifications.
Interpreting Low-Pressure Readings
If the pressure is lower than it should be, it could be due to a number of reasons. Maybe there’s a leak, or maybe the compressor isn’t pumping as it should. Either way, it’ll need a bit of TLC to get back to its best.
Interpreting High-Pressure Readings
What if the pressure is higher than normal? That could indicate blockages or even an overcharged system. Like a traffic jam, these issues will stop your compressor from functioning properly. You’ll need to clear the way for it to work effectively.
Using the Multimeter for Electrical Tests
Remember the multimeter? Now’s its time to shine. Use it to check the electrical continuity and voltage of the compressor. If something’s amiss, your multimeter will let you know. It’s like your very own Sherlock Holmes!
Post-Testing Procedures
After you’ve conducted the fridge compressor pressure test, you need to do the following to ensure you don’t sabotage your initial good works.
Disconnecting the Gauges
Once you’ve done your detective work, it’s time to disconnect the gauges. Be gentle – you don’t want to damage anything. After all, they’ve just helped you a great deal.
Reconnecting the Refrigerator
Reattach any panels or covers you’ve removed and plug the fridge back in. It’s a bit like waking it up after a nap. Now, it’s time to observe if your fridge’s performance improves after the test.
Observing the Refrigerator’s Performance
Keep a close eye on your fridge’s performance. If it’s not back to its cool, efficient self, you might need a pro to take a look. After all, everyone needs a little help sometimes!
Safety Tips and Best Practices
Remember, safety is paramount. Here are some tips and practices you need to follow.
Ensuring Personal Safety
Never forget about your own safety. Always wear your safety gear, and avoid direct contact with refrigerants – they’re not exactly skin-friendly. Look out for yourself while you’re looking out for your fridge.
Safeguarding the Appliance
While you’re busy being a fridge detective, remember to take care of your appliance. Avoid damaging the compressor or other components. Stick to the manufacturer’s guidelines, because they know their product best. It’s their baby, after all!
