Refrigerant charging procedure, heard of it? This seemingly complex term is actually a significant part of maintaining your HVAC system. It’s about ensuring the correct amount of refrigerant, the lifeblood of your cooling system, is in place. Stick with us, as we break it down for you in the simplest possible manner!
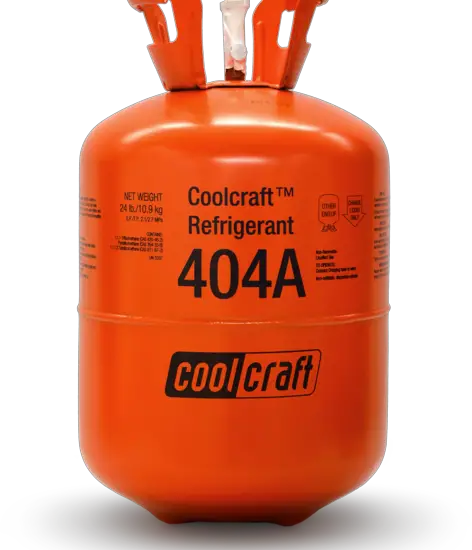
Table of Contents
Understanding Refrigerant Charging
Refrigerant charging isn’t rocket science. It’s the process of filling your HVAC unit with refrigerant, a special fluid that makes the magic of cooling possible. Let’s understand this in detail.
The Importance of Correct Refrigerant Charging
Ever considered what correct refrigerant charging could mean for your HVAC unit and environment?
Impact on HVAC Performance
Think of refrigerant as the heart of your HVAC. It pumps the coolness around, so when it’s not adequately filled, the cooling suffers. More refrigerant isn’t always better though – it’s all about striking the perfect balance.
Importance for Environmental Safety
Refrigerants aren’t exactly the best buddies of our environment, especially the older ones like R-22. If not handled properly, they can contribute to ozone depletion. Got a sense of the big picture now?
The Role of Refrigerant in HVAC Units
So, what does this refrigerant actually do inside your HVAC?
Cooling Cycle Explanation
Picture this. The refrigerant absorbs the heat from your room and gets transformed into a high-pressure gas. It then travels to the outside unit where it loses the heat and becomes a cool liquid again. Neat, right?
Type of Refrigerants
Did you know there are many types of refrigerants? The old school R-22, the commonly used R-410A, and the new, environmentally friendlier R-32, to name a few. Choosing the right one can be a bit of a jigsaw puzzle.
Required Tools for Refrigerant Charging
Charging refrigerant isn’t just about the refrigerant. There are some crucial tools involved.
HVAC Manifold Gauges
Have you seen those two gauges connected by three hoses? That’s your manifold gauge. It’s your window into the refrigerant inside your HVAC.
How Manifold Gauges Work
Imagine a health checkup for your HVAC system. The manifold gauges measure the pressure of the refrigerant, telling you if it’s undercharged, overcharged, or just right.
Choosing the Right Manifold Gauge
Manifold gauges come in all shapes and sizes. The key is to choose one that works with your type of refrigerant. Piece of cake, right?
Refrigerant
Without refrigerant, there’s no refrigerant charging. Simple as that.
Types of Refrigerants and their Properties
Different refrigerants have different properties. R-410A operates at a higher pressure than R-22, for example. And R-32 is far more environmentally friendly than both of them.
Proper Handling and Storage of Refrigerants
Did you know that refrigerants need to be stored in a cool, dry place, out of direct sunlight? And remember, always handle them with care!
Additional Tools
There are some other tools that can make your refrigerant charging process smoother.
Refrigerant Scales
Imagine trying to cook without measuring the ingredients. The same applies to refrigerant charging. That’s where refrigerant scales come in handy.
Leak Detectors
A leak is the worst enemy of a properly charged HVAC system. Leak detectors are the detectives that find these enemies before they can do too much damage.
Safety Measures Before Charging Refrigerant
Safety first, folks! Let’s cover the safety measures before we get into the charging procedure.
Personal Protective Equipment (PPE)
Protecting yourself is of paramount importance when dealing with refrigerants.
Safety Glasses
Refrigerants can be harmful if they get into your eyes. Safety glasses? Definitely a smart move!
Gloves
Gloves are essential too. After all, you wouldn’t want to get frostbite from a refrigerant, would you?
Protective Clothing
Complete your safety attire with some protective clothing. You can never be too careful, can you?
Ventilation and Work Area Safety
A safe work area is as crucial as personal safety.
Ensuring Proper Ventilation
Refrigerants can be harmful if inhaled. So, a well-ventilated workspace is a must.
Work Area Precautions
Keeping your workspace clutter-free and taking precautions against spills are no-brainers, aren’t they?
Step-by-Step Refrigerant Charging Procedure
Now, we finally come to the actual refrigerant charging procedure. Are you excited?
Preparation: As with most tasks, preparation is key. For refrigerant charging, this usually means gathering your tools: a manifold gauge set, refrigerant, refrigerant scale, gloves, goggles, and possibly a leak detector. You should also be aware of the type of refrigerant required for your system and ensure you’re working in a safe, well-ventilated environment.
Connecting the Manifold Gauges: The manifold gauge set is crucial in this procedure. The gauges allow you to read the pressure levels inside the HVAC system. The blue gauge (or low-pressure gauge) is connected to the suction line (the larger of the two pipes on the outside compressor), and the red gauge (or high-pressure gauge) is connected to the liquid line (the smaller pipe).
Checking for Leaks: Before adding any new refrigerant, it’s important to check for leaks in the system using a leak detector tool. This could be an electronic detector or UV dye, which visually reveals leaks when scanned with a UV light. Identifying and addressing any leaks will prevent wastage and further complications down the line.
Charging: With the preparation and initial checks out of the way, we’re ready for charging. This involves releasing the refrigerant into the system. Depending on the system and its current charge level, you may opt for either the liquid charging or the gas charging method.
Determining the Correct Amount of Refrigerant: To determine how much refrigerant your system needs, refer to the manufacturer’s specifications. Overcharging or undercharging can lead to inefficiency and even damage, so a refrigerant scale becomes handy at this point. The refrigerant is usually measured in pounds.
Adding the Refrigerant: Connect the refrigerant cylinder to the manifold gauge set. Open the refrigerant cylinder, then slowly open the low side valve on the manifold gauge set to allow the refrigerant to flow into the system. It’s vital to add the refrigerant slowly to avoid any sudden pressure changes that could damage the system.
Checking and Fine-Tuning: After the refrigerant has been added, it’s crucial to check the system and make any necessary adjustments. This involves monitoring the system as it operates, checking temperature and pressure, and ensuring the refrigerant is properly circulating.
Assessing System Pressure: Check the system pressure after charging using the manifold gauges. Comparing this reading with manufacturer’s specifications can help identify whether the system is properly charged. Both low and high pressure should be in the optimal range for efficient operation.
Final System Check: With everything else complete, a final system check involves going over the entire system one last time to ensure everything is functioning as it should be. This can include checking the temperature drop across the evaporator coil, the operation of the compressor, and the overall airflow from the system.
Remember, refrigerant charging isn’t something to be taken lightly. If you’re not confident or trained in performing these steps, it’s best to leave it to a licensed HVAC professional. Safety and system integrity should always be top priorities.
For more articles on refrigerants, click here.
Troubleshooting Common Issues in Refrigerant Charging
Despite your best efforts, sometimes things can go wrong. Don’t worry, we’ve got you covered!
Overcharging
When an HVAC system is overcharged, it means there is too much refrigerant in the system. Overcharging can reduce the efficiency of the system and cause damage to critical components. This is analogous to overfilling a water balloon — just as the balloon can burst, an overcharged system may break down or fail completely.
Signs of Overcharging
There are several indicators that an HVAC system might be overcharged:
High System Pressure: One of the most immediate and obvious signs of an overcharged system is a higher than normal system pressure. You can observe this through abnormally high readings on both the high-pressure and low-pressure sides of your system’s manifold gauges.
Poor Cooling: An overcharged system does not cool effectively. Instead of improving performance, too much refrigerant will cause a decrease in cooling capacity. This happens because excess refrigerant can flood the compressor and reduce its ability to circulate the refrigerant.
Damaged Compressor: The compressor is essentially the heart of your HVAC system. Overcharging can lead to compressor damage because the extra refrigerant can lead to extraordinarily high pressure, causing the compressor to work harder than it should. Over time, this can lead to compressor failure.
How to Resolve Overcharging
If you suspect your system is overcharged, the best course of action is to consult with a certified HVAC technician. However, if you’re qualified to handle refrigerants, here’s the general process:
Recovery of Excess Refrigerant: Using a refrigerant recovery machine, you can remove excess refrigerant from the system. It’s crucial to avoid venting refrigerants directly into the atmosphere as they can be environmentally harmful.
Adjusting the Charge: Once the excess refrigerant has been recovered, you can adjust the system charge by slowly adding refrigerant back into the system, checking the pressure and temperature readings frequently until they align with the system’s specifications.
System Check: After adjusting the charge, perform a complete system check to make sure the unit is cooling effectively, and the compressor is not under undue stress.
Undercharging
An undercharged HVAC system has less refrigerant than necessary for optimal performance. This means the system won’t be able to properly cool the space. The comparison to a car running on fumes is apt — just as such a car will struggle to function efficiently, an undercharged HVAC system will struggle to cool efficiently.
Signs of Undercharging
Some of the signs that an HVAC system might be undercharged include:
Low System Pressure: One sign of an undercharged system is lower than normal pressure in both the high-pressure and low-pressure sides of the system. This can be identified through a lower than normal reading on the manifold gauges.
Ice on the Evaporator Coil: A classic sign of an undercharged system is ice buildup on the evaporator coil. This happens because there isn’t enough refrigerant to absorb the heat, which causes the coil’s temperature to drop below freezing, causing moisture from the air to freeze on the coil.
Warm Air From Vents: Since the system isn’t absorbing and removing heat from the air as efficiently as it should be, the air coming from the vents will likely be warmer than expected.
How to Resolve Undercharging
If an HVAC system is undercharged, here’s how you might resolve it:
Identify the Type of Refrigerant: Before adding any refrigerant, you need to identify the type of refrigerant your system requires. Different systems use different types of refrigerants, and using the wrong one can cause significant damage.
Use a Manifold Gauge Set: Connect your manifold gauge set to the appropriate service ports on the HVAC system. Monitor the pressure readings to help determine how much refrigerant needs to be added.
Add Refrigerant: Slowly add refrigerant to the system, continually checking the pressure readings. Remember, it’s critical to add the right amount of refrigerant — adding too much could lead to overcharging, which has its own set of problems.
Check System Performance: After adding the refrigerant, check the system performance. Make sure the system is cooling effectively and that there’s no longer ice forming on the evaporator coil.
Conclusion
That’s all, folks! You now know all about the refrigerant charging procedure. Feeling like an expert yet? From understanding the role of refrigerant, choosing the right tools, following safety measures, to actually charging the refrigerant, you’ve covered it all. Quite a journey, right? Remember, regular maintenance and correct charging of refrigerant can make your HVAC system last longer and work more efficiently. After all, who doesn’t love a cool, comfortable home?