If you’re looking to understand the electronic expansion valve controller, you’ve come to the right place. In this comprehensive guide, we will walk you through its working principles, components, and how to install and troubleshoot one.
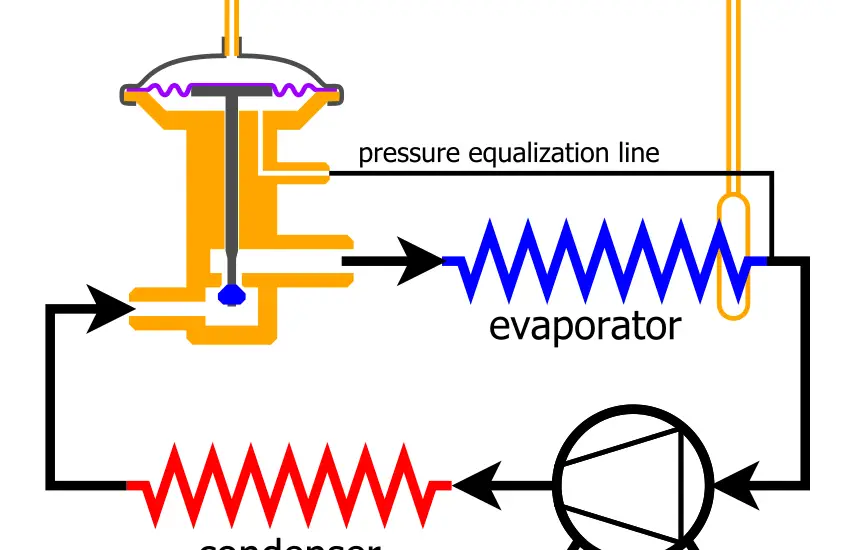
Table of Contents
What is an Electronic Expansion Valve Controller?
An electronic expansion valve controller is a sophisticated device used within HVAC and refrigeration systems to manage the flow of refrigerant between the compressor and the evaporator coil. Its primary function is to regulate the amount of refrigerant released into the evaporator, enabling precise control of cooling or heating operations.
By dynamically adjusting the valve’s position based on real-time data, the controller ensures that the system operates at peak efficiency, reducing energy consumption and wear on the components. Its function is crucial in modern climate control systems, ensuring consistent temperature control and system longevity.
Components of an Electronic Expansion Valve Controller
The electronic expansion valve controller comprises several key components, each playing a specific role:
Valve: This component physically regulates the flow of refrigerant. It opens and closes based on electronic signals from the controller, allowing more or less refrigerant into the evaporator as needed.
Sensors: These are vital for the controller’s function. Temperature sensors measure the temperature of the refrigerant, and pressure sensors measure the system’s pressure. These readings allow the controller to adjust the valve’s position accurately.
Controller: Acting as the system’s brain, the controller processes data from the sensors and adjusts the valve accordingly. Many controllers also have interfaces for manual control, system monitoring, and diagnostics.
These components work in unison, constantly monitoring and adjusting to keep the system operating within the desired parameters.
Check out these other related articles…
5 Expansion Valve Stuck Closed Symptoms: Easy Guide
Bad Expansion Valve Pressures: A Complete Guide
5 Expansion Valve Stuck Open Symptoms: A Comprehensive Guide
4 Stuck Expansion Valve Symptoms: A Complete Guide
Clogged Expansion Valve Symptoms: A Complete Guide
How to Install an Electronic Expansion Valve Controller
Installing an electronic expansion valve controller can be complex and should be approached with care. Here’s a step-by-step guide:
Switch off the Power: To prevent accidental electrical shock, always begin by disconnecting the power to the system.
Connect the Valve: The valve must be securely attached to the refrigerant line. This might require specialized tools and fittings, and it must be done with care to prevent leaks.
Connect the Sensors: The sensors must be placed in specific locations to accurately measure temperature and pressure. They must be connected to the controller using the appropriate wiring, following the manufacturer’s instructions.
Program the Controller: The controller must be configured with the correct settings for your specific system. This might include inputting data such as the type of refrigerant used, the system’s capacity, and other unique parameters.
Test the System: The system must be thoroughly tested once everything is connected and configured. This includes checking for leaks, verifying that the sensors are providing accurate readings, and ensuring that the valve is responding correctly to the controller’s commands.
Troubleshooting an Electronic Expansion Valve Controller
If problems arise with your expansion valve controller, following these troubleshooting steps might help resolve the issue:
Check Connections: Loose or damaged connections between the valve, sensors, and controller can lead to erratic behavior. Carefully inspect and secure all connections.
Verify Sensor Readings: If the sensors provide inaccurate readings, they may need recalibration or replacement. Check the readings against known values to verify their accuracy.
Inspect the Valve: A physical obstruction or damage to the valve can prevent it from operating correctly. Inspect it for visible issues and clear any obstructions.
Consult the Manual: The manufacturer’s manual often includes specific troubleshooting guides and error codes. Refer to these for guidance tailored to your specific model and configuration.