Here’s a comprehensive guide for diagnosing and solving the issue of Freon coming out of car vents, explained in simple terms for easy understanding.
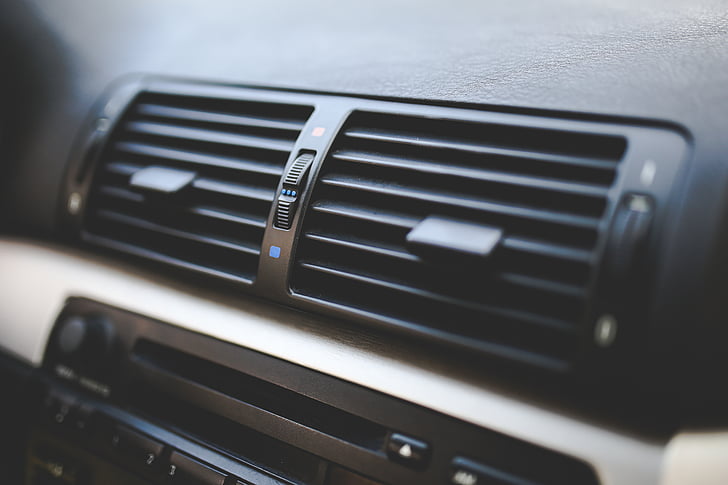
Table of Contents
Identifying the Signs of Freon Coming Out of Car Vents
Freon, or refrigerant, is a colorless gas typically used in car air conditioning systems. It is not detectable by color or significant residue, making it somewhat challenging to notice until it’s too late.
The most common indicator of a Freon coming out of car vents is a sweetish chemical smell, similar to that of chloroform when the AC is running. This is often accompanied by a lack of cooling efficiency.
Other signs might include a hissing or bubbling noise, which indicates escaping gas from a pressurized system. If you notice oil stains on or near the AC components, this could be refrigerant oil mixed with leaked Freon, signaling a possible rupture in the system.
It’s critical to address these signs immediately, as prolonged exposure to Freon can lead to serious health risks, including respiratory issues and skin irritation.
Steps to Addressing Freon Coming Out of Car Vents
Let’s break down the process of dealing with Freon coming out of car vents into manageable steps:
Step 1: Safety First
Before attempting any inspection or repair, ensure your safety and that of the environment. Freon can cause severe cold burns if it contacts the skin and can be toxic if inhaled in high concentrations.
Ventilate your work area by opening doors and windows or working outside. Always wear protective gloves and goggles. Make sure to have a fire extinguisher nearby, as refrigerants are flammable under certain conditions.
Be aware that in many places, it is illegal to release Freon into the atmosphere due to its ozone-depleting properties, so special care must be taken not to puncture any lines or hoses inadvertently.
Step 2: Inspect the AC System
Inspecting the AC system requires a methodical approach. Begin with a visual inspection of all accessible components while the system is off. Look for any signs of wear, damage, or refrigerant oil—which may indicate a leak—on the hoses, seals, and connections.
Check the compressor for signs of excessive wear or damage, such as rust or corrosion. If you’re not familiar with what refrigerant oil looks like, it usually appears as a greasy film and may show up on the lines or pool under the car when it drips down.
Keep an eye out for any parts that are frozen or excessively cold, as this can be a sign that liquid refrigerant is leaking and evaporating, causing a drop in temperature.
Step 3: Consult a Professional
Unless you are a certified mechanic with the appropriate tools and knowledge of your vehicle’s AC system, it’s best to consult a professional. They have the expertise and equipment to perform detailed diagnostics, including using specialized UV dyes to locate leaks or electronic leak detectors like this Elitech WJL-6000S Freon Leak Detector (available at Walmart) that can pinpoint the exact source of the problem.
Professionals are also trained to handle and recycle Freon safely, in accordance with environmental regulations, using a recovery machine. Taking your car to a certified auto repair shop or a dealership with experienced technicians can also ensure that your vehicle’s warranty is not voided by unauthorized repairs.
Step 4: Repair or Replace Damaged Components
Once a professional identifies the source of the leak, they will decide whether to repair or replace the damaged components. Small leaks in hoses or fittings may be repaired, but damaged components like a compressor or evaporator often require replacement.
Technicians will ensure that any new parts are compatible with your specific vehicle model. It’s also an opportunity to replace any worn o-rings or seals, even if they aren’t the direct cause of the current leak, to prevent future issues.
Step 5: Recharge the AC System
After repairs, the system needs to be evacuated of any remaining Freon, as well as air and moisture, which can cause corrosion and reduce cooling efficiency. This is done using a vacuum pump. Then, the system is recharged with the correct type and amount of refrigerant specified by the vehicle manufacturer.
The professional will also add a special oil that lubricates the AC compressor and maintains the seals. The exact procedure may vary based on the type of vehicle and the refrigerant used.
Step 6: Test the Repairs
Testing is crucial to ensure the system operates correctly. The technician will start the car and turn on the AC, monitoring the system’s pressure with gauges, and verifying that it maintains appropriate levels indicating no leaks.
They will check the temperature of the air coming from the vents with a thermometer to ensure it’s reaching the expected cool temperatures. If the system fails to cool, or if pressures are not maintained, further investigation is needed to ensure all leaks have been addressed.
Preventing Future Leaks
Preventing future Freon leaks is essential for the longevity and performance of your AC system.
Regular maintenance is key, which should include a routine check of the refrigerant levels, inspecting the system for potential leaks, and ensuring the cabin air filter is replaced regularly. The cabin filter ensures that the air entering your vehicle is clean and unrestricted, which can help maintain the proper flow and operation of the AC system.
In addition, running the AC system periodically, even during the colder months, can keep the components lubricated and prevent the seals from drying out and cracking. By adhering to these preventative measures, you can save yourself the inconvenience and cost of future repairs.