Keeping a refrigerator clean is an important part of maintaining the unit. This article is on how to clean a Whirlpool refrigerator.
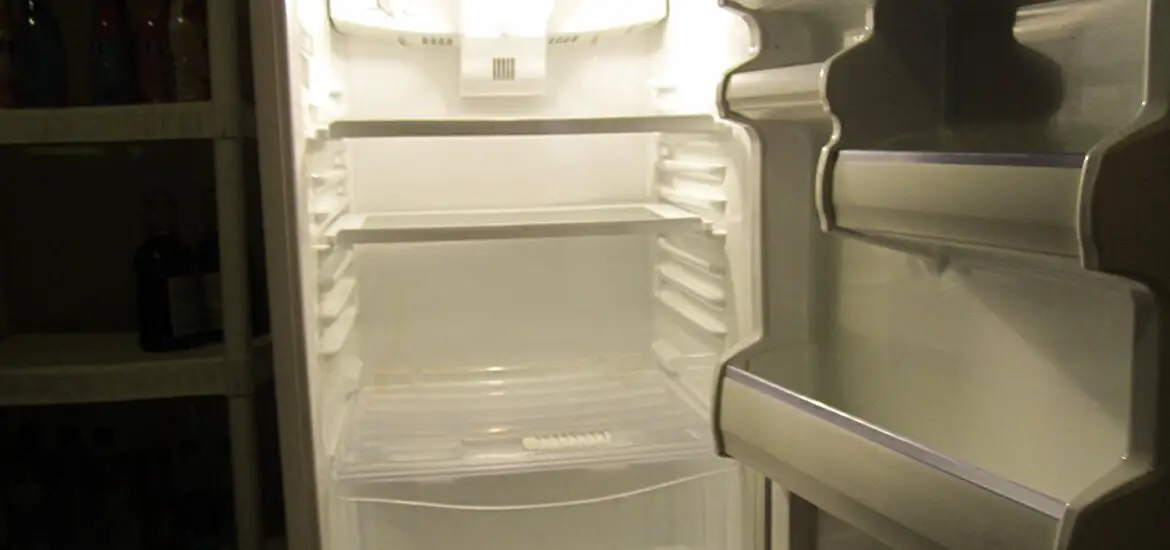
Table of Contents
How to Clean a Whirlpool Refrigerator Water Line
The first step is to turn off the water supply to the refrigerator. That means turning the water supply valve off; you may find it behind the refrigerator or under the sink. Disconnecting the water line before turning off the water will cause a mess. Also, turn off the refrigerator, even though the cleaning process may not take more than half an hour.
Check the user manual for the refrigerator to determine the correct way to disconnect the water line. However, you can usually remove it by gently twisting and turning it until you free it from the port. Keep a container nearby for when you remove the line so that you can catch leftover water in the line.
When the water line is free from the refrigerator, it is time to clean it. Water lines are usually narrow, and it may be a task to clean properly. So, find a narrow brush, the type typically used to clean straw and put it in warm soapy water. Dip the wet brush into the line and scrub it.
After scrubbing the water line, run a few cups of vinegar through it to flush dirt and bacteria. Keep flushing it until any foul odor or dirt clears from the line. Then, run water through the line to flush vinegar residue and other debris until the water is clean. Fix the water line back into the port behind the refrigerator and turn on the water supply valve. You may want to check the water filter and replace it if necessary.
How to Clean a Whirlpool Refrigerator Water Filter
Typically, a refrigerator water filter should be replaced after every six months. Leaving it in use for longer than six months may create problems for the refrigerator. The same applies to replacing a Whirlpool refrigerator water filter, especially when you live in areas with poor water quality.
However, some areas have soft and clean water, so replacing the water filter in the refrigerator may not be necessary after six months. In such cases, you can use the filter for longer. By cleaning it.
Step 1
Locate the filter housing in your Whirlpool refrigerator. You may find it inside the refrigerator or in the bottom grille. How you remove the filter will also depend on the location and type. For some, you need to twist and pull them out; for others, there is a cap to turn before removing the filter. Consult the user manual for the exact method of removing the filter in your specific model.
Step 2
Carefully inspect the filter; if it is too dirty, cracked, and damaged, replace it. There is no point in cleaning a damaged water filter for reuse. But if it is still usable, remove visible dirt and debris from the head and other parts. You can hold it over a waste bag and tap it to dislodge the dirt.
Step 3
Mix mild dishwashing soap in warm water and soak the filter in it. Vinegar in warm water also works, or you can look for water filter cleaning agents to buy. Allow the filter to soak in the water for about twenty minutes. The length of soaking time depends on how dirty the filter is.
Afterward, remove it from the warm water and thoroughly rinse it under running water until the rinse water is clear. Leave the filter out to air-dry completely before putting it back into the refrigerator. Try the water from the dispenser to see how well the filter performs. If there are issues, you may have to replace the water filter.
How to Clean a Whirlpool Refrigerator Water and Ice Dispenser
There are two ways to clean the water and ice dispenser in a Whirlpool refrigerator. One way is to flush the system with vinegar and the other way is to take the dispenser apart before cleaning it. The second method works when there is too much dirt inside the dispenser and you have the skillset to take it apart.
Using Vinegar
If you want to clean it with vinegar and water, turn off the water to the unit. Use the shut-off valve and disconnect the water line. Get a small funnel and fix it to the open end of the water line.
Next, pour a few cups of vinegar down the line and into the dispenser through the funnel. You need to hold the line at such an angle that the water flows without restriction. The water line is narrow so it may take a long time to reach the dispenser.
Allow the vinegar to sit inside the dispenser for several minutes before dispensing it. Get a container and put it under the dispenser nozzle. Depress the lever or press the dispense button so that the vinegar flows out. Keep at it until all the vinegar is out. Now, get a small brush, dip it into the dispensed vinegar, and scrub the nozzle. Put the brush into the spout as far up as it can go and scrub.
Also, remove the drip tray and wash it in warm water and soap. After scrubbing the nozzle, clean the exterior parts of the dispenser. Use a small and soft washcloth dipped in vinegar to clean stains from the dispenser. Afterward, throw out the vinegar.
Next, connect the water line to the refrigerator and turn on the water. Allow the water to flow into the dispenser and flush the system. As the water flows, dispense it into the container until it cleans the vinegar from inside the dispenser. Keep dispensing until the water is clear and the odor disappears. Use the washcloth to clean the exterior parts to remove vinegar residue.
Taking the Dispenser Apart
However, if you want to take the dispenser apart for cleaning, it is a more complex process. Disconnect the refrigerator from electric power and remove the bulb in the dispenser. The next step is to remove the front panel; put one hand into the dispenser opening and press down the panel bottom. While doing so, pull one side of the panel away from the door, but do it gently.
When the panel comes off the dispenser, do not quickly yank it off. There is a wiring harness behind it you need to disconnect. So, reach into the back and disconnect the single harness. A small screwdriver helps to unlock the connector for easy removal. Then, lay the front panel aside for cleaning.
Next, unthread the screws holding the wire harness and dispenser switch panel in place. You do not need to remove the panel because completely removing the panel may mean destroying the tape holding the wires in place. So, find someone to hold the loosened panel up to allow access into the dispenser without destroying anything.
You also need to remove the water and ice dispenser levers by unthreading and removing two screws. Once done, pull the water lever out and down, turning it around the nozzle and out of the way. Next, remove the funnel from the ice lever and disconnect the ice flap damper’s rubber boot. Open the ice flap and turn the lever around it and the damper. Now, you can begin cleaning the dispenser.
Use a wet washcloth or sponge to clean the interior dispenser parts. Ensure you reach every area, including the ice flap and the area around its opening. Once everything is clean, wash the plastic parts you removed in warm water and vinegar. Rinse and thoroughly dry them before putting them back in place.
Reassemble the dispenser by retracing your steps, ensuring to align the top with the notches before screwing the panel. Inspect the wires to be sure none is kinked or pinched. Reconnect the refrigerator to electric power, turn on the water, and test the dispenser.
Note: These steps also apply if you want to clean a water dispenser or an ice dispenser in a Whirlpool refrigerator.
Check out these other articles…
How to Level a Whirlpool Refrigerator [Detailed Guide]
Whirlpool Refrigerator Flashing/Blinking [Solutions]
Whirlpool Refrigerator Door [Guide, Problems & Solutions]
Whirlpool Refrigerator Filter [Detailed Guide & Solutions]
Whirlpool Refrigerator Not Working [Proven Solutions]
How to Clean a Whirlpool Refrigerator Ice Maker
If you have the task of cleaning the ice maker in a Whirlpool refrigerator, turn off the water supply and disconnect the unit from electric power. Remove the ice bucket from under the ice maker and empty it of ice. Run warm water into it and allow it to soak.
Next, run warm water into a container and add a little dishwashing soap or vinegar. Use a washcloth or sponge and clean the ice maker inside the refrigerator. Reach inside it and clean the ice mold as well; if you can, unmount the ice maker before cleaning it. Afterward, rinse the washcloth in clean water and wipe the ice maker thoroughly to remove vinegar or soap residue.
The next step is to clean the ice bucket. Add some soap into the warm water and scrub the ice bucket to remove stains and dirt. Rinse it with running water to remove soap residue before putting it back in the refrigerator. Ensure you insert it fully; consult the user manual for instructions. Otherwise, the ice maker may not function properly.
Cleaning a Freestanding Ice Maker
If your Whirlpool ice maker is the freestanding type, there should be an indicator for cleaning status. The indicator lets you know when the ice maker is due for a cleaning, so if it is on, it is time to clean the machine. Typically, you should clean the ice maker after nine months of use without waiting for the status indicator.
Start with the ice maker’s exterior; turn the machine off before cleaning it. Pour hot water into a container and mix a little dishwashing soap into it. Using a clean and soft washcloth, clean the exterior, paying attention to stains. Ensure you reach all the stains and dirt before thoroughly drying the machine with another clean and dry cloth.
While cleaning the exterior, the ice inside the machine should be dumped into the ice bin. So, you do not have to wait to clean inside the ice maker; all the ice should be in the bin. Remove the ice cubes in the bin and open the machine’s drain to empty water from the tank. Dry any moisture inside the machine with paper towels, leaving it dry. Then, cover the drain.
There are cleaning solutions specifically for freestanding ice makers; you can browse online or check local stores. Follow the instructions on the cleaning agent label to measure out the right quantity for the ice maker. Pour it into the machine, add the recommended amount of water and press Clean on the control panel. Hold the button until the indicator starts blinking, indicating the machine has entered a cleaning cycle.
Whirlpool freestanding ice makers typically need to clean for about seventy minutes. So, allow the cycle to end before draining the cleaning mixture. Open the drain cap and allow the liquid to flow out. Check the interior of the ice maker for cleaning agent residue. If there is any, run water into the machine and start another cleaning cycle, this time using only water.
Cover the drain with the cap and turn on the ice maker. The cleaning solution should leave no taste in the ice, so the machine is ready for use.
How to Clean a Whirlpool Refrigerator Drip Pan
The drip pan is where the condensation flows from the refrigerator. The water evaporates when the condenser fan blows over it. Therefore, removing it to empty its contents is not always necessary. However, over time, the pan may begin to smell and becomes a cleaning necessity.
There are two types of refrigerator drip pans. One is removable and the other is not. If you want to clean the removable drip pan, pull it out from under the refrigerator. You may find it when you open the front toe grill or at the back, beside the compressor.
Mix one part household bleach and two parts water and clean the drip pan. Vinegar also works, especially if the drip pan is not white. Bleach can change its color while vinegar does not. Allow the solution to sit in the pan for a few minutes before thoroughly washing to remove stains and rinsing with clean water. Use paper towels to dry the pan or allow it to air-dry before putting it back in its place.
If the drain pan is not removable, it may be a little difficult to clean. But you can use a wipe or wet cloth placed in a claw-grabber to clean the pan while it is under the refrigerator. Navigating around the pan and cleaning it is crucial to avoid damaging nearby components. You will also need to check and replace the wipe or cloth as often as it gets dirty until the pan is clean.
How to Clean a Whirlpool Refrigerator
To clean a Whirlpool refrigerator, empty it of all food contents. Check each item to see those that are beyond salvaging and viable ones. Discard expired items and store others in a cooler while you clean the unit. Next, disconnect the refrigerator from electric power. Remove the shelves, racks, and bins, leave them out to warm, and soak them in warm water while you clean the refrigerator.
Use vinegar or baking soda to clean the interior parts of the unit. Never use an abrasive or harsh cleaning agent for the job. Wipe the refrigerator from top to bottom; it is best to start from the top to prevent dirty liquid from soiling already-clean areas. Gently but firmly scrub every crevice, especially stubborn stains.
Afterward, get another clean cloth, soak in clean water, and wipe the refrigerator again. This removes residue and leftover stains. When everything is clean, leave the doors open so the surfaces can air-dry while you wash the shelves, racks, and bins in water, dry them, and put them back into the refrigerator.
Clean the Exterior
After cleaning the interior parts of the refrigerator, it is time to clean the exterior parts. Start with the door gasket; it is one part of the refrigerator many forget to clean. So, get an old toothbrush or any small brush, dip it in warm soapy water, and scrub the gasket clean. Food crumbs usually stick to the gasket and over time, the gasket becomes too soiled. It may even stop the doors from properly sealing.
After cleaning the gasket, use a soft cloth to wipe the body of the unit. The finish of the cabinet will determine the cleaning agent and method. If it is stainless steel, for example, it is crucial to use a special stainless steel cleaner for the job.
Also, wipe the body in the direction of the grain so that dirt does not fuse into the lines. Otherwise, the exterior may become dirtier than before you cleaned it. Clean the top of the unit, too; dust and other debris may gather there over time. Never use an abrasive cleaner or brush on the stainless steel.
There are different types of finish on Whirlpool refrigerators: painted or colored, black stainless steel, fingerprint resistant stainless steel, and traditional stainless steel. You can use warm water, mild detergent or soap, and a microfiber cloth to clean all these types. Afterward, wipe them with a dry clean cloth. However, traditional stainless steel can be cleaned with a special stainless steel cleaning agent.
The next step is to clean under the refrigerator. You may have to unplug the unit and move it to have access to the back and underneath it. If the refrigerator is the built-in type, try cleaning under it from the front; remove the base grille and use a cloth attached to a stick and clean it.
But it is best if you can move it. Sweep the dirt under it and clean it using the correct cleaning agent. Soap and water will do but ensure you do a thorough job to remove mildew and odors. You should also clean the condenser coils to keep the refrigerator in optimal condition.
How to Clean Whirlpool Refrigerator Coils
Start by unplugging the refrigerator from the wall outlet or disconnecting it from electric power by turning off the circuit breaker. Next, open the refrigerator doors, place your hands on either side of the base grille, and push the top in while you pull the bottom up. This process loosens the base grille so that you can remove it.
Set the grille aside and get a vacuum cleaner with a small brush attachment. Use it to clean the coils, removing dirt ad debris. You can also clean the coils using a refrigerator condenser cleaning brush for the same job. Remember to clean the base grille to remove dust and dirt that may be sticking to it.
Afterward, put the grille back in place; line the support tabs to the metal clips and push it firmly until the grille snaps into position. Then, check the area around the bottom front of the unit and clean it if necessary.
How to Clean a Whirlpool Refrigerator Drawer
To clean the drawer in a Whirlpool refrigerator, pull it out of the unit and leave it out for some time. This gives it time to warm to room temperature. This step is crucial if the drawer is glass to prevent damaging the drawer. If you put it in hot or warm water while it is still cold, the sudden temperature change will cause the glass to crack or break.
When the drawer is warm enough, put it in warm water and add a little dishwashing soap. Do not use any harsh or chemical cleaning agent because the drawer usually contains food. Thoroughly wash the drawer, rinse it under running water until all the soap residue is gone, and dry it with a microfiber cloth.
If there is dirt in the refrigerator’s slide control for the drawer or shelves, soft cloth dipped in warm soapy water can clean it. Reach as far as possible to remove any dirt in the frame and slide control. Otherwise, it may cause the drawer or shelves to stick.
How to Clean Whirlpool Refrigerator Shelves
Cleaning the shelves in a Whirlpool refrigerator is straightforward. If you can remove them, lay them on a flat surface and allow them to warm. When their temperatures rise, use warm water and soap to wash the shelves. Rinse them under running water and dry them with a microfiber cloth. Leave them out to fully dry before putting them back into the refrigerator.
But if you cannot remove the shelves, ensure the refrigerator is off and clean them while inside the unit. Remove every food item on and around them before cleaning. Wipe the shelves to remove stains and dirt. When you have cleaned all the shelves and removed all stains, get another cloth to rinse and dry them. Leave them as dry as possible before putting items back on them and powering the refrigerator.
Note: You can wash glass shelves in a dishwasher, but hand washing is the best method. If the shelves have lighting under them, do not put them in a dishwasher. Ensure you allow the shelves to warm before putting them in the dishwasher. Consult the user manual for instructions on how to remove the shelves.
How to Clean a Whirlpool Refrigerator Drain
To clean the drain tube in a Whirlpool refrigerator, turn off the unit. Unplug it or disconnect the power. Locate the drain tube; the hole should be at the center of the rear wall in the freezer section. The water drains from that point into the tube and down into the drain pan.
So, remove items in the freezer and expose the drain hole. Check to see if there is ice over it; use a hairdryer to melt the ice. Then, check the drain line for debris; you can use a mixture of water and vinegar to clean the hole. Pour the mixture down the hole to flush out the dirt.
If that does not work, get a stiff wire and use it to push the dirt out of the hole. Flush the drain again with water and vinegar; keep pouring until the water runs free and clear. Check the drain pan and empty it. Clean and sanitize the pan with bleach or vinegar before replacing it.
Recap
Cleaning a refrigerator keeps it working as it should. This article is a detailed guide on how to clean a Whirlpool refrigerator. Learn how to clean the interior parts, exterior parts, gasket, and condenser coils. You will also find how to clean under the refrigerator, drain line, and drain pan.
Furthermore, this article explains how to clean a refrigerator ice maker and a freestanding ice maker. In addition, find out how to clean the shelves and drawers in the unit. Consult the refrigerator’s user manual if you need further assistance. You can also contact the Whirlpool Service Center if you need to get cleaning agents or have other inquiries.
Get Instant Help — Ask An Experienced Verified Appliance Technician
Need expert help? Click here to use the chat box on this page to speak with a verified appliance technician right away. No need for expensive in-home service calls. No appointments. No waiting.