If your refrigerator stops working, it can be frustrating. Learn what to do if you have a problem with a Whirlpool refrigerator not working in this article.
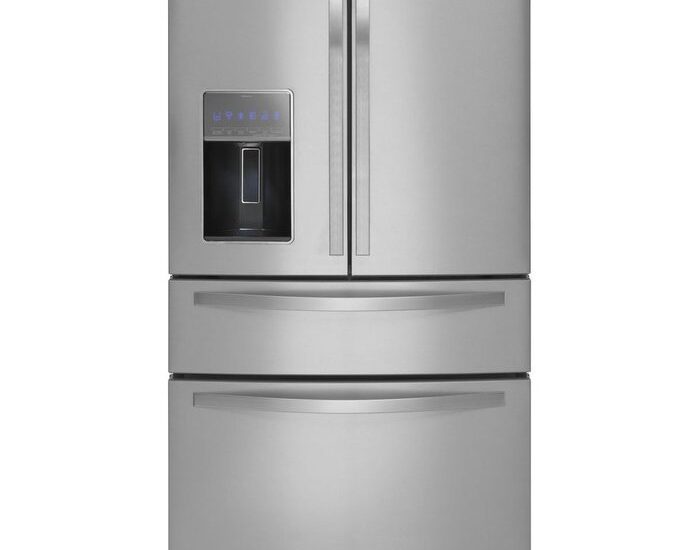
Table of Contents
Whirlpool Refrigerator Water Is Not Working – What to Do
The following are parts to check and fix if the water stops working in a Whirlpool refrigerator:
1. Water Filter
If you recently replaced the water filter, ensure you use the correct type and size. Whirlpool recommends using Everydrop or Whirlpool water filters; generic types may stop the water from working or may not fully filter the water. You can always use the old filter to measure and get a new filter.
The installation must be correctly done for the water to work. How you install it will depend on the type of filter and refrigerator model. So, follow the detailed instructions in the user manual to fix the new filter. After that, flush the system by dispensing water from the dispenser or water line for about one minute to remove trapped air from the system.
2. Control Lock
Whirlpool refrigerators have a lock on the control panel that allows you to lock the ice and water dispensers if there are children or you need to do some cleaning. The lock deactivates the dispenser buttons and functions, but you can unlock them when necessary.
There is usually a lock button on the control panel that you press and hold until the lock icon, which is lit at this point because the lock is active, becomes unlit. However, your user manual may have other instructions for unlocking the dispenser functions for the specific model, so check the directives and follow them.
3. Water Supply Line
The water supply line is the plastic line that connects to the refrigerator. Check to see if there is ice stuck in it. Pull the line out from the bottom of the left door and blow air into it. If it does not pass through, there is probably ice stuck in it. Use a hairdryer to thaw it and slightly increase the freezer temperature; if it is too low, the water supply line will freeze again.
If there are kinks or twists on the loop, it restricts the flow of water to the refrigerator. Also, the refrigerator or another object may be sitting on the line and cutting off the flow. Therefore, move the refrigerator and inspect the line. Straighten it if there are kinks and see if the connection points are intact; water should not drip from any point. If the water supply line is leaking from the plastic material, replace it.
4. Water Supply
You may also want to be sure the water pressure is sufficient. Check the main water supply valve, usually under the sink or on the wall behind the refrigerator, and ensure it is fully open. If the flow of water is too high, close the valve a bit to reduce the pressure. But if it is normal, open the valve fully.
If the water pressure exceeds 60 psi, the dispenser may not function as it should. The same is true if the pressure is lower than 20 psi. Let a qualified plumber check the water from the source if you are unsure of the correct pressure to function in the refrigerator.
5. Dispenser Lever
When trying to use the water dispenser, ensure you fully engage the lever. The lever is the paddle you press down to open the nozzle and release water. Sometimes, you may only partially activate it, and water does not dispense.
Press the water glass firmly against the dispenser lever to engage it fully. Do this after selecting the water option on the control panel. Your refrigerator model may have other instructions for water dispensing, so check the manual for the unit.
Other Possibilities
If none of the above fixes the water issue, the problem may stem from the dispenser or the door switch. The switch controls the interior lights and the dispenser, turning it off when you open the refrigerator door while turning on the lights.
Press the switch while the door is open and see if the interior lights respond. If they do, the switch is in good working condition. But if they do not respond, run a continuity test on the switch using a multimeter. Replace the door switch if there is no continuity.
In addition, check the dispenser switches and control board for the dispenser. The switches are responsible for directing voltage to the dispenser and working as a team. So, the dispenser stops getting voltage if even one switch stops working. Run a continuity test on each switch to see if any is defective. If you find defective switches, replace them.
Finally, check the dispenser control board. It has the job of governing the dispenser functions and may malfunction over time. And if it malfunctions, the entire dispenser system stops working. If you find no other faulty part in the dispenser or the entire system is not functional, you may want to replace the control board.
Note: Follow the same instructions to fix the ice dispenser on a Whirlpool refrigerator if it stops working. But ensure to select the ice option before using the dispenser; the ice won’t dispense if you do not select the right option.
Whirlpool Refrigerator Ice Maker Not Working – Fixed
The following are possible solutions to an ice maker not working in a Whirlpool refrigerator:
1. Turn On the Ice Maker
First, ensure the ice maker is not off. Many times, you may accidentally turn it off, especially while cleaning the freezer or the machine. If there is a power switch, press it to turn on the machine. But if there is no dedicated power button, use the metal arm or plastic paddle by the side. Lower the arm to turn on the ice maker.
2. Check the Water Connection
After that, check to see if the water tube is connected to water flowing into the ice maker. Make the necessary connections if necessary. If the water supply is disconnected with the ice maker still operating, there will be no ice from the machine. Also, it may cause food in the refrigerator and crisper drawer to freeze, and the machine will make a loud noise.
3. Change the Water Filter
The water filter may need a replacement. If your refrigerator has a filter status indicator, check to see if it is blinking. Replace the filter if it is, indicating it has been used for longer than six months. Do the same even if the status light is not blinking, but the filter is due for a replacement.
The water filter in any refrigerator must be replaced every six months; the air filter should be replaced after nine months of use. Ensure you use the correct type of filter for your refrigerator model. After installing the new filter, dispense water from it for about one minute to flush the system of possible trapped air. Doing this helps the ice maker and dispenser function better.
4. Remove Ice Jams
The ejector arm in the ice maker may have ice jammed in it. Turn the unit off and inspect the ice maker; if there is stuck to the ejector blades, use a plastic spatula to release the ejector and remove the ice. Ensure the blades are ice-free before turning on the ice maker and running another icemaking cycle.
5. Adjust the Temperature
Ideally, the temperature in the freezer should be 0 degrees Fahrenheit. If you must increase it, it should not exceed 5 degrees Fahrenheit. The ice maker works better when the temperature is at the recommended point, not lower or higher. If the freezer is too cold, the ice will frequently freeze. And if it is too warm, the ice maker won’t work.
Therefore, check the setting for the freezer temperature and adjust it accordingly. Give the refrigerator time to adjust to the new settings and see if the ice maker works. Fixing the temperature usually solves the ice maker problem as long as there is a water connection and the machine is in good operating condition.
6. Check the Ice Bucket
If you had to remove the ice bucket before the ice maker stopped working, you might have incorrectly inserted it. The bucket must be fully inserted under the ice maker, with the back touching the wall. An ice maker sensor must detect it before the ice maker can work. If the sensor does not detect the bucket or the ice maker senses it is full, it stops making ice. You may have to remove the bucket and correctly put it back in the freezer for the ice maker to resume operations.
7. Test the Water Inlet Valve
The water inlet valve opens to supply water from the main source to the refrigerator. The water dispenser and ice maker get water from the valve. So if it becomes defective, the dispenser may not work. Check to see if the inlet valve is fully open. Also, inspect the water line to see if water flows to the valve while the refrigerator runs.
If water flows in the water line but does not enter the inlet valve, even though it is open, the screen filter may be clogged, or the solenoid may be defective. Another possibility is that the valve is no longer working. You can always remove the filter and clean it, but if it does not get the inlet valve up and running again, you may have to replace it.
If none of these works, you may have to service the ice maker and refrigerator. Contact the Whirlpool Service Center to report the issue and request service. This is especially true if there is an active warranty. You can also hire a technician to troubleshoot and find the source of the problem.
Check out these other articles…
How to Level a Whirlpool Refrigerator [Detailed Guide]
How to Install a Whirlpool Refrigerator…[Detailed Guide]
Whirlpool Refrigerator Noise [Proven Solutions]
Whirlpool Refrigerator Light [Issues & Proven Solutions]
Whirlpool Refrigerator Flashing/Blinking [Solutions]
Whirlpool Refrigerator Not Working After Power Outage – Solved
If you find that a Whirlpool refrigerator is not working after a power outage, try resetting it. Locate the Filter and Lock buttons on the control panel and press them at the same time. The cooling function should begin operating if the reset is successful.
However, if there is no power to the refrigerator, you cannot reset it. Check the circuit breaker that powers the refrigerator. The outage may have caused it to trip off. Reset the breaker and turn it on before checking the unit. If that does not work, ensure all the fuses in the breaker are working; you may need an electrician to check the breaker box at this point.
After fixing the breaker, the unit should work. But if not, check the power cord and outlet. Ensure none is damaged during the outage. Connect another appliance, preferably a small one, to the outlet and see if it works. If it does not, the outlet may have a fault that needs fixing. If the appliance comes on, check the refrigerator’s power cord. It should not be kinked or twisted, and the terminals must be working well. Otherwise, replace the power cord.
Additionally, a damaged internal component may be keeping the refrigerator from working after the power outage. Hire a service technician to run tests on possibly faulty components and advice you on the next step.
Whirlpool Refrigerator Not Working After Moving – Solutions
You may have connected the refrigerator to electric power immediately after arriving at your destination. You must allow the refrigerator to stay unplugged for a few hours before plugging it into power. This is especially true if you laid the unit down during transportation. Otherwise, the refrigerator will not work.
If that does not work, it may be that the power outlet is not working. Ensure the refrigerator connects to a dedicated wall outlet. Never use one circuit for a refrigerator and other appliances, especially those that use a lot of voltage. Plug another appliance into the outlet to see if it works. That will tell you whether or not you need to move the unit to another point.
Another possible cause is that the breaker is off. If it is a house you are just moving into for the first time, ensure the breaker is working and is not off. It should be the first inspection before plugging any appliance into outlets. Fix the breaker and check the power outlet. If necessary, replace the outlet if it is defective.
However, if the outlet is working and you connect the refrigerator but it is not cooling, the compressor may be damaged. Contact a technician to troubleshoot different parts of the unit, especially the compressor, to find out why it is not cooling.
Why a Refrigerator Stops Working After Moving
Check the position of the refrigerator when moving it. When transporting a refrigerator from one destination to another, it is crucial to keep it upright as much as possible. This position is often not feasible, so you may have to position it in a partially upright position. Someone needs to stay close to it, so the refrigerator does not tumble while in transit.
If you are moving it yourself, follow this procedure to ensure the compressor oil does not flow into the cooling lines. Otherwise, the refrigerator may not cool, or the compressor will stop working. And if the compressor stops working, the refrigerator does not work, too.
When you get to your destination, move the refrigerator into the house and leave it standing unplugged and upright for more than four hours. If you had to lay it down during transportation, you might have to leave it unplugged for about 24 hours. It allows the oil to flow back to the compressor and the refrigerant to settle in the cooling lines.
But if it is a new installation, keep an eye out for the moving truck from the company. Ensure the refrigerator is upright when the installers arrive; have a pictorial record if the refrigerator is lying down so that you can make a legal complaint if the refrigerator does not work.
Whirlpool Refrigerator Lights Not Working – Quick Fix
If the lights in your Whirlpool refrigerator are not working, check the light bulb or LED lights. They may be old or damaged by moisture, which means you need to replace them. Also, check the light socket, light or door switch, light assembly, and the light board. Learn more about what to do from this article on Whirlpool refrigerator lights not working and follow the instructions to fix the problem.
Whirlpool Refrigerator Fan Not Working – What to Do
Dirt, debris, ice buildup, and a faulty motor can cause a Whirlpool refrigerator fan not to work. A typical Whirlpool refrigerator has two fans: an evaporator fan and a condenser fan. Each one has a separate location and specific duties. So, the causes for a failing fan depend on the fan.
Evaporator Fan
Ice can build up around the fan, which is in the same location as the evaporator coils. The coils get cold to release cool air for the refrigerator. If condensation builds and forms around the fan and coils, it can freeze and cause the fan to stop working. Thawing the ice with a hairdryer gets it up and running. Clean the moisture off the blade and motor before turning it on again.
Also, ensure the blade sits on the motor shaft and is secure. Turn it to see how well it works and if it is stiff, the motor is faulty. Get a multimeter and check the fan motor for continuity. If the motor has no continuity, replace it. The fan spreads cold air in the freezer, which flows into the refrigerator for single-cooling refrigerators. If the fan stops working, the refrigerator cannot cool.
Condenser Fan
The condenser fan functions like the evaporator fan but performs a different duty. The fan cools the condenser coils and compressor and runs whenever the cooling system runs. You will find it close to the condenser coils at the bottom back of the unit. Check to see if the blade is attached to the motor shaft and adjust it if necessary.
Next, check for dirt and debris around the fan. Its location on the refrigerator makes it easy to attract dirt and debris, affecting its functionality. Clean the fan and condenser coils before testing the blade. Turn it with your hand, and if it is stiff, it is crucial to check the motor. Run a continuity test using a multimeter, and if there is none, replace the motor.
Without the condenser fan, the compressor and condenser coil will overheat and cause cooling problems in the refrigerator. Over time, the compressor may stop working due to high temperatures and affect the refrigerator’s capacity to work.
Whirlpool Refrigerator Display Not Working – Fixed
If you find that the display on the control panel of your Whirlpool refrigerator shows nothing, try resetting the unit. Disconnect it from electric power by unplugging it from the wall outlet or turning off the circuit breaker. Wait about five or ten minutes and reconnect the unit to electric power. Turn on the cooling function and check the display.
You may need to reset the refrigerator if there is a recent power outage. The dispenser and control panel may not function after the power is restored. Otherwise, confirm your awareness of the power outage to enable the control panel functions.
The refrigerator may be in demo or showroom mode if it is still blank. The mode is the factory setting for new refrigerators, but you can also accidentally enter the mode. How you exit the mode depends on the specific model. So, check the user manual to find detailed instructions for exiting the showroom mode if it applies.
The refrigerator may also be in Sabbath mode. This mode is for religious observances where owners need to concentrate on different religious activities and may not use the unit often during that period. The lights on the dispenser and inside the refrigerator remain off, while the temperature settings do not change. You cannot use the dispenser or control panel in this mode. Check the user manual for specific steps to exit the Sabbath mode if it applies.
You can reset the control panel’s display if these fixes do not work. How you do it depends on the model, so follow the instructions in the user manual for specific instructions. Otherwise, you may have a loose wiring harness, a malfunctioning display board, or a bad main control board. Have a technician run some tests on these parts and find the faulty one if applicable.
Whirlpool Refrigerator Not Working At All – How to Fix
The first thing to check is the power connection. If the refrigerator has been working, there may be a power interruption. Inspect the power cord to see if it is fully connected to the outlet. You may want to check the outdoor circuit breaker only if the power cord connection is correct. The breaker controlling the refrigerator may be off, so reset and turn it on again. Then, check the unit.
If it is still not working, the wall outlet may not have sufficient power to carry a refrigerator. The circuit for the outlet may have other appliances connected to it, increasing the load and reducing the available voltage for the unit. You will need an electrician to inspect the connection and determine how to reroute different appliances, leaving the refrigerator on a dedicated circuit.
But if the wall outlet and the refrigerator’s power cord are in good working condition, the issue may stem from a faulty internal component. Several parts can cause the refrigerator to stop working or even cool. So check the following if the refrigerator is not working:
1. Temperature Setting
The freezer must be at 0 degrees Fahrenheit and the refrigerator at 37 degrees Fahrenheit. If the temperature is higher than this range, the refrigerator does not. It will stop cooling and eventually stop working if the trend continues. Set a thermometer inside the refrigerator to find out the current temperature.
If it is not the correct temperature, adjust it using the temperature buttons or turning the dial, depending on the type. Once done, leave the refrigerator to run for some time and adjust to the new temperature. If you need to adjust it again, you must wait until 24 hours after the first adjustment.
2. Condenser Coils
Disconnect the refrigerator from electric power and move it to access the bottom back. You will find the condenser coils there. If your refrigerator has the coils under the unit, you will have to remove the front bottom grille to access them. Inspect the coils to see if they are dirty.
If the coils are significantly dirty, use a vacuum cleaner to remove the dust and debris from them. Do a thorough job of cleaning the coils and the surrounding areas. If necessary, use a damp cloth to clean the fan and compressor area and wipe the dirt that sticks to the coils off. Afterward, clean the floor to remove any remaining dirt.
The refrigerator has a better chance of working well if the condenser coils are clean. Typically, the coils should not be cleaned more than twice a year. In some cases, you do not need to clean them more than once a year, especially if you do not live in a dusty area or have no pets. The coils remove heat from the refrigerator and transfer it out to prevent overheating. Otherwise, the compressor will overheat, and the refrigerator may stop working with time.
3. Temperature Control Thermostat
Locate the thermostat in your Whirlpool refrigerator and test it. The temperature control thermostat provides the voltage the cooling system needs to run when the sensor detects the refrigerator’s air temperature and the cooling needs. The thermostat’s location is usually in the control housing on the ceiling inside the refrigerator.
You may have to unmount the control housing to access the thermostat. Turn it from the lowest to the highest point and wait for a click. If you hear a click, the thermostat is not defective. But if you hear no click, test the thermostat using a multimeter. If there is no continuity at any temperature operating range, replace the thermostat.
The thermostat must be in good working condition for the refrigerator to run and cool. The cooling system does not receive the power necessary to run if the thermostat is defective. So, even if other parts of the unit are working well, but the thermostat is not, it is crucial to fix or replace it to get the unit up and running again.
4. Start Relay
The start relay is usually in the compressor compartment, attached to the compressor. The device ensures the compressor has the power to run when you turn on the refrigerator. Without the relay, the compressor may start but will eventually fail or not run at all. In some refrigerators, the start relay, capacitor, and overload protector are one device.
Therefore, connect the refrigerator to power and listen as it tries to run. If you hear a clicking sound or the compressor does not start, remove the relay and shake it. A rattle tells you the relay is damaged and you need a replacement. But if you do not hear a rattle, run a continuity test on it using a multimeter. Replace the start relay or overload device if you find no continuity. This is especially necessary if both the freezer and refrigerator stopped working.
5. Evaporator Coils
The evaporator coils produce cold air in the refrigerator. The refrigerant flows to the coils, absorbs the refrigerator’s heat, and leaves the air cold. However, if the coils become damaged, the refrigerator will stop working. And if they freeze, the refrigerator stops cooling.
Turn off the refrigerator and empty the freezer. Remove the rear panel inside the freezer to access the coils. While doing so, check the evaporator fan for faults. If there is an ice buildup around the fan and the coils, leave the refrigerator unplugged for some hours. Another option is to use a hairdryer to melt the ice but do it carefully to avoid damaging the plastic parts with heat or getting water in the backend of the hairdryer.
6. Refrigerant Leak
The evaporator coils may also be damaged to the point where they leak refrigerant. The same is true if the condenser coils are damaged or the cooling pipes leak. And if a refrigerator does not have enough refrigerant, it stops working. Typically, the unit shows signs of such damage by a reduction in cooling or other faults.
You may not detect a leak in the sealed system on time. So, if you suspect a refrigerator has a refrigerant leak, turn off the refrigerator entirely and create adequate ventilation. Then, contact Whirlpool or any qualified technician to inspect the refrigerator, find the leaks, and patch them. Otherwise, you may have to replace the refrigerator.
7. Condenser Fan
The fan is close to the condenser coils and prevents overheating, so it plays a vital role in how the refrigerator functions. Check the fan and ensure the blade is on the motor shaft. Adjust it if necessary and check for debris around it. Clean the fan and when it is clean, turn the blade to see how well it functions. A stiff fan indicates the motor may be faulty, but it may also be that the blade is bent or damaged. In such a case, replace the blade.
But if the blade is intact, but the motor seems faulty, the bearings may be worn. Worn motor bearings cannot be repaired, and you need to replace the motor. Otherwise, check the motor for continuity using a multimeter.
If the motor shows no continuity, replace the fan motor. A faulty condenser fan can stop the refrigerator from working or cooling if it can no longer remove the heat from the condenser coils and compressor. If the compressor does not run, the refrigerator stops working.
8. Thermistor
The thermistor is a sensor on the control board. It checks the temperature and transmits temperature readings to the control board. That way, the board can supply power to the cooling system to run and cool the unit. But if the thermistor is defective, it interrupts this process or provides false results to the board. So, locate the thermistor in your refrigerator; use the manual to find its location.
Get a multimeter and run a continuity test on the thermistor. Its resistance should change as the temperature of the air or the area around it changes. Since the refrigerator is not working at all, you can put the thermistor in a cup of water and slowly heat or cool it. Test the resistance as the temperature changes. If it remains the same and there is no continuity, replace the thermistor.
9. Compressor
The compressor is the heart of the refrigerator. So it should be one part to check if the refrigerator stops working. Check the compressor if the circuit breaker is on and working, the power cord is in good working condition, and the wall outlet is not faulty. If it malfunctions, many other parts will not work.
Testing the compressor is complex, so hire a technician to troubleshoot and determine whether or not the compressor has failed. Replace the compressor if it is no longer working, or replace the entire refrigerator if it is more cost-effective.
Note: If the refrigerator works intermittently, the compressor is malfunctioning. Check the relay following the instructions in this section and replace it if faulty. Otherwise, you may have to replace the compressor.
Whirlpool Refrigerator Water Not Working After Power Outage – Solved
The wire connection in the door may be faulty or loose. You may have to check the wire harness to ensure it is connected and the wires are not frayed. Rearrange the wiring or make a proper connection with the help of a professional if the dispenser problem comes from there.
The water inlet valve may also be faulty. Since it is controlled electrically, a power outage can affect it and stop the unit from working, as this article explains. The water pressure must also be correct, and the filter must be replaced every six months.
Whirlpool Refrigerator Water Dispenser Not Working After Replacing Filter – Quick Fix
After replacing the water filter in your Whirlpool refrigerator or any refrigerator, ensure you flush the system. Dispense water for a minute or two to release trapped air in the water lines. There may be a pressure buildup in the lines, causing the dispenser not to work. This process is typical for every filter replacement.
But if that does not work, ensure you have the correct type of filter for your refrigerator. Use the old filter you removed to buy a new one; it helps you know the correct size and type for your specific model. Stick to the recommended model from the manufacturer; a cheap replacement may stop the dispenser from working.
Before installing any new filter, ensure you remove every piece of the packaging. The packaging may block the connection point where the water flows from the refrigerator through the filter and into the dispenser. You may have to remove and inspect it to clear any blockage if applicable. Also, check the gasket that seals the filter to prevent leaks. Ensure it is in place for proper installation.
Check to be sure the O-rings are in place on the filter. Do not remove them, even if you suspect their absence may fix the filter issues. When fixing the filter back into the refrigerator, do not make it too loose or tight. Also, fix it, so the filter sits correctly in the filter housing. Improper installation can affect the functionality of the water dispenser and the ice maker.
The filter may have difficulty getting wet if none of the above works. The inside part of the filter needs to get wet before the filter can work. Typically, the water from the refrigerator quickly wets the filter before it can work. However, if the filter has a hard time soaking, remove it from the refrigerator and soak it in water for a few minutes. Then, reinstall it and see how the dispenser works.
One or more of these methods should fix the filter and get the water dispenser working again. But if the problem persists, report the issue to the Whirlpool Service Center or hire an independent technician for further assistance.
Whirlpool Refrigerator Ice Maker Not Working After Filter Change – Solved
Using the wrong filter size and type can keep the ice maker from working. Also, not flushing the system after a filter replacement keeps it from working. You must also check the water fill tube that feeds into the ice maker, water supply line, and the water inlet valve. This article on a Whirlpool refrigerator not making ice after filter change explains how to test each one and make the necessary replacements.
Whirlpool Refrigerator Ice Maker Not Working After Power Outage – What to Do
If the ice maker stops working in a Whirlpool refrigerator, check to be sure the ice maker is not turned off. If there is a power button, press it to turn on the ice maker if it is off. But in the absence of a dedicated button, use the wire shut-off arm by the side of the machine; lower it to turn on the ice maker.
Check the water line for ice fragments if the power issue does not get the ice maker working again. The power outage may have dislodged a piece of ice into the water line, preventing water from flowing into the ice maker. And if the ice maker does not have water, it cannot make ice. It may run when you turn it on, but there will be no ice production. Use a turkey baster to inject water into the water line until the ice melts.
Ice may also have jammed inside the ice maker. Unmount the machine and inspect the ice mold. The power outage may have caused already existing ice to melt and refreeze when the power was restored. Remove ice clumps in the machine if applicable and ensure the ejector blades move freely. Also, check the fill tube to be sure it is not frozen. Melt or remove the ice if necessary.
Another possibility is that the freezer temperature is too warm. The ice maker needs the temperature to be at 0 degrees Fahrenheit to work optimally. If it must be higher, it must not exceed 5 degrees Fahrenheit. Any temperature higher than this makes the ice maker too slow or non-functional. And if the temperature is too low, the ice maker may freeze.
The last possibility is that there is a damaged ice maker component. The power outage and restoration may have caused a surge that damaged the component. The same applies to the freezer, so you may have to run diagnostics on the freezer and ice maker components. Employ the services of a technician to check the parts and fix the faults.
Whirlpool Refrigerator Alarm Not Working – Quick Fix
Reset the refrigerator by disconnecting it from the wall outlet. Leave it unplugged for a minute or two and reconnect it to power. Try the alarm again, and if it does not work, the control board may be damaged. You can use the refrigerator without the alarm; the control board tends to be expensive. However, if necessary, hire professional assistance to replace the board.
Whirlpool Top Freezer Not Working – How to Fix
If you find that the top freezer of your Whirlpool refrigerator is not working, check the following:
1. New Installation
If the top-freezer refrigerator is a new installation, you must give it time to cool adequately. It may need nothing more than time to work. Leave the refrigerator as undisturbed as possible during the first 24 hours of installation and ensure it seals tightly. After one full day, the freezer may be cool enough. Remember to take it out of showroom mode and set the correct temperature if you have not already done so.
2. Leveling
Ensure the refrigerator is level. Use a level to check how balanced the unit is from side to side and from front to back. Correctly level the unit following the instruction in the user manual or follow this guide to make adjustments. The floor must also be level for the refrigerator to work, so use shims if the floor is uneven.
3. Contents
If you recently put too many room-temperature foods in the top freezer, it slows the cooling process. So, you may find the refrigerator section functioning normally, but the freezer is not working. You may have to give it time to cool or reduce the items in the freezer. It is usually better to leave the freezer only half or ¾ of the way full for proper air circulation.
Additionally, do not open the freezer door too often. Organize the contents to improve air circulation and take necessary items in one trip. The top freezer stops working as it should if you constantly open the door. It may even affect the door seal, compromising the cooling capacity. Moreover, the evaporator coils may freeze due to condensation from too much warm air if you open the door too often.
4. Vents
Food items may block the air vents, preventing cold air from coming into the freezer from the coils. It is made worse if the external temperature is high. Therefore, rearrange the freezer contents to make room for airflow and create a cooler atmosphere around the refrigerator. Ensure you store items in areas that maximize their usage. Do not place eggs and milk near the vents because they will freeze.
5. Location
Most refrigerators function better inside the house. If you keep a refrigerator in a garage, the existing temperature may stop it from working well. Refrigerators work best in temperature ranges from 55 degrees Fahrenheit to 110 degrees Fahrenheit. If the ambient temperature drops below this range or goes higher, the freezer may not work.
For example, keeping a Whirlpool refrigerator in a garage affects its cooling capacity. The same is true if any heat source is close to the unit. Relocate the refrigerator if possible or take steps to make the ambient temperature better for the unit’s functionality.
6. Temperature Setting
Check the temperature controls to be sure the settings fit the surrounding temperature. If the freezer is above 0 degrees Fahrenheit, adjust it to fit the environment. You can make it a little colder or warmer than this temperature, depending on the current temperature needs.
The refrigerator may use analog controls, so turn the dial to a high number; the higher the number, the colder the freezer. But if you want a warmer setting, adjust the dial to a lower number. Keep making adjustments until you have the right temperature. Remember to allow 24 hours between one temperature adjustment and another.
7. Cooling Function
Turn on the cooling function for the refrigerator, especially if there is a recent power outage. This may not apply to all Whirlpool refrigerator models, but some may require you to turn them on after an outage. Follow the instructions in the user manual to turn on the cooling if it applies to your specific model.
8. Evaporator Fan
The fan blows cold air into the freezer from the evaporator coils. If the fan stops working or becomes frozen, the freezer may not work as it should while the refrigerator works. Inspect the fan; you must empty the freezer and remove the inside rear panel to access it.
Ensure there is no ice buildup; use a hairdryer to melt the ice if there is. Otherwise, check the blade and replace it if damaged or bent. Run a continuity test on the fan’s motor and replace it if there is no continuity.
9. Condenser Coils
Check the condenser coils for dirt. If they are significantly dirty, clean them using a vacuum cleaner to remove all dust and debris from the coils. They have the job of transferring heat from the refrigerant into the atmosphere. Dirt acts as a blanket that restricts the heat transfer, and the freezer’s cooling capacity becomes compromised if the unit overheats. Ensure you clean the coils every six months; do the same with less frequency if there is no excessive foot or pet traffic and more often if necessary.
10. Refrigerant Leak
Finally, inspect the cooling lines for possible leaks in the sealed system. You may get the odd smell of refrigerant, or the freezer stops cooling. If the evaporator coils accumulate ice in one section or the top part of the top freezer stops cooling, there is a leak. Turn off the refrigerator and contact Whirlpool to report the issue and request service.
Whirlpool Refrigerator Auto Defrost Not Working – Solution
The problem stems from the defrost system, most likely the defrost timer. Also, check the defrost heater, thermostat, and control board. Locate the timer in your specific model and turn it to advance the system into a defrost cycle.
As you do so, the defrost heater should swing into action as the compressor and fan motors turn off. If the defrost cycle does not run or the timer does not automatically come out of the defrost cycle within 30 minutes, replace the timer. If the timer is not the cause, check the heater.
The heater is usually connected to the evaporator coils. Get a multimeter and run a continuity test on the heater. If you find no continuity, replace the defrost heater. The same applies to the defrost thermostat. It should close contacts and allow power to flow to the heater when the coils get too cold. But if the thermostat becomes faulty, the heater cannot work. If the thermostat has no continuity at the lowest temperature within its operating range, replace it.
Check the defrost control board if these components are in good working condition. The board governs the defrost cycle, so if it malfunctions, the entire defrost system malfunctions. However, replace the control board only if other components are working well. Otherwise, check other possible causes because control boards are easy to misdiagnose. The same applies to the main control board.
You may also want to check the defrost sensor with a fuse if you have such a model. The fuse acts as a backup if the sensor stops working. But the fuse may blow and keep the entire defrost system from functioning. Replace the sensor if there is no continuity in the fuse and sensor.
Recap
It is frustrating to have a Whirlpool refrigerator not working; the same applies to all refrigerators. This article is a detailed guide to locating different malfunctioning parts in a Whirlpool refrigerator, troubleshooting the issues, and fixing them. We have laid out possible solutions and instructions to follow for even the most complex issues.
Learn how to fix auto defrost, ice and water dispenser problems, alarm, ice maker, fan, and display issues. Also, you will find how to fix a Whirlpool refrigerator not working in this article. However, if the issues persist and the refrigerator is not fixed, contact the Whirlpool Center and request service. Alternatively, employ the services of a professional technician for further assistance.
Get Instant Help — Ask An Experienced Verified Appliance Technician
Need expert help? Click here to use the chat box on this page to speak with a verified appliance technician right away. No need for expensive in-home service calls. No appointments. No waiting.
