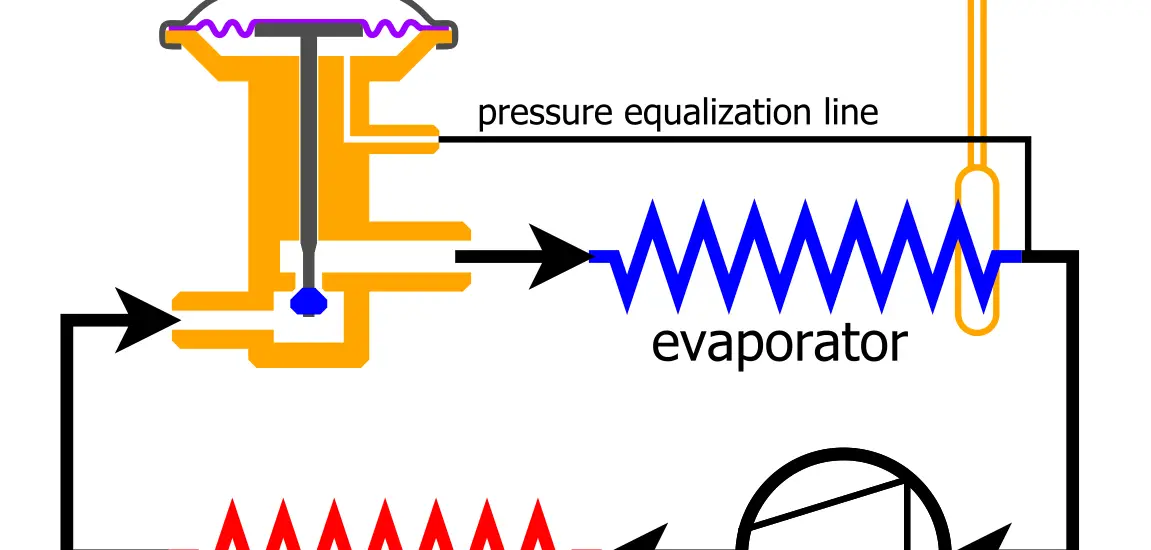
In this article, we delve into a step-by-step procedure of how to unstick a stuck valve that is so detailed even a novice can master the process.

Table of Contents
Understanding the Problem
First and foremost, it is essential to get to the root of the issue. An expansion valve might get stuck due to a variety of reasons such as rust formation, sediment accumulation, or the wearing out of its internal components.
Sometimes, it might be a result of long periods of disuse. Understanding the cause will help you approach the solution more strategically.
Gathering Necessary Tools
Before you dive in, assemble all the necessary tools to make the process hassle-free. Here is a list of tools you will need:
Wrench: A tool to help you get a good grip on the valve.
You can get this Crescent 4″ Adjustable Black Oxide Wrench from Amazon.
Plunger: In case you have to deal with a stubborn valve, a plunger can come in handy to apply the necessary force.
Penetrating oil: This is essential to loosen rust and other build-ups around the valve.
Clean rag: To clean the area and wipe off excess oil.
Safety Measures
Working with valves can sometimes be a risky business. Thus, adhere to the following safety protocols to ensure your well-being:
Turn off the main water supply: To prevent any water mishaps, always start by turning off the main water supply.
Protective gear: Equip yourself with gloves and safety glasses to protect from any accidental spills or splashes.
Well-ventilated space: Ensure that you are working in a well-ventilated space to avoid inhaling any harmful fumes from the penetrating oil.
Check out these other related articles…
TXV Hunting: Your Comprehensive Guide
Electronic Expansion Valve Types: The Full Breakdown
TXV Superheat or Subcooling: A Comprehensive 411 Comparison
Constant Pressure Expansion Valve: Comprehensive 411 Guide
TXV Valve Installation: In 5 Quick & Easy Steps
Steps on How to Unstick a Stuck Valve
The steps below will guide you on how to unstick a stuck valve.
Identification
Begin your task with the identification of the problematic valve. Depending on your household setup, it could be the main valve, an expansion valve, or another variant. Understanding the type of valve that is stuck is crucial because different valves have distinct mechanisms and hence require slightly varied approaches.
To identify it correctly, refer to your home’s plumbing blueprint or consult a professional if you are unsure. Once identified, label it to avoid confusion in the following steps.
Inspection
The next pivotal step is inspecting the stuck valve closely. Employ a flashlight to scrutinize every nook and cranny. Look for signs of rust, sediment buildup, and physical damage.
Sometimes, the valve might be stuck due to a foreign object lodged in it. Identify all problematic areas and make a mental note or mark these with a non-permanent marker.
This step ensures that you are well aware of the condition of the valve before you begin the actual unsticking process.
Application of Penetrating Oil
Now, grab your can of penetrating oil. This type of oil is specifically designed to loosen rust and free up stuck mechanical parts.
Spray or pour a generous amount of oil onto the affected areas that you identified in the previous step. Make sure to cover all the nooks and corners where rust and sediment are present.
Allow the oil to sit and penetrate deep into the crevices for a few hours; this waiting period is vital as it gives the oil adequate time to work its magic and loosen the rust and sediments.
Physical Manipulation
After allowing the penetrating oil to sit for a few hours, it’s time to physically manipulate the valve to unstick it. Utilize your wrench to gently grip the valve’s handle. Apply a steady and firm pressure to move the handle back and forth. It’s important to do this gently to prevent any breakage.
If you feel excessive resistance, stop and apply more penetrating oil, then wait for another few hours before attempting again. The idea is to gradually loosen the stuck particles without damaging the valve.
Testing
Once you’ve managed to move the valve, don’t rush to conclude. It’s time to test the valve to ensure it operates smoothly and correctly.
Slowly turn the valve to its open and closed positions several times to confirm its functionality. If it operates with difficulty, you might consider repeating the above steps or even seeking professional help. If it works well, then congratulations are in order – you have successfully managed to unstick a stuck valve!