Several issues can cause the problem of a KitchenAid refrigerator not making ice. Learn how to solve this problem from this article.
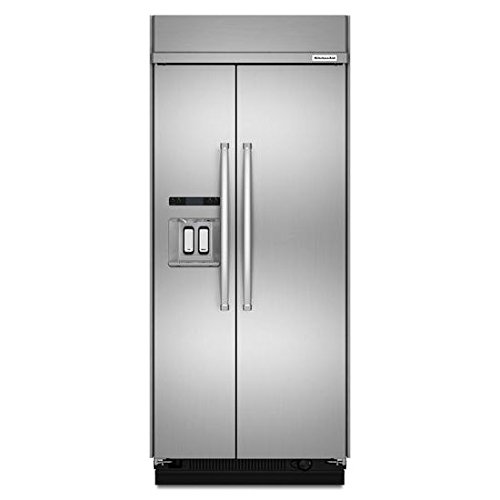
Table of Contents
KitchenAid Refrigerator Not Making Ice – Quick Solution
The ice maker in your KitchenAid refrigerator should always make ice if it is in good working condition. But if you find that the refrigerator has difficulty producing ice, the first thing to check is the temperature setting. While checking that, ensure the ice maker is on and operating. You may have inadvertently turned it off, or some items in the freezer may cause the arm to stick. Ensure the freezer is not overstocked; too many items can block the movements of the shut-off arm and keep the ice maker from working.
Check the water filter and replace it if it is older than six months. Some refrigerators have indicators that alert you when the filter is due for a replacement. Furthermore, the water line must be in good working condition for the refrigerator to produce ice. Also, the water pressure must be sufficient to push the water from the inlet valve to the ice maker. Finally, check the water inlet valve and ice maker if all other possible solutions fail. This article on a KitchenAid refrigerator ice maker not working explains more about how to troubleshoot and fix the problem.
KitchenAid Refrigerator Not Making Ice But Water Works – Solved
Check the following and fix faulty ones if the water from the KitchenAid refrigerator works but the unit does not produce ice:
1. Temperature Setting
Typically, the freezer, where the ice maker is located, must be set at 0 degrees Fahrenheit or -18 degrees Celsius. This is the ideal temperature for the ice maker to work optimally. Temperature settings lower than this point may cause excessive freezing, and higher temperatures may cause the ice maker to produce hollow, little, or no ice.
Keep it at a maximum of 5 degrees Fahrenheit or -15 degrees Celsius if you must adjust the setting to a higher point. Other issues can affect the temperature. So, use a thermometer to determine the correct internal temperature if the temperature display is correct yet, the ice maker is not working. Leave the thermometer in the freezer, between frozen foods, for about 24 hours and check it afterward.
Make the necessary adjustments if the reading is higher than the setting. Otherwise, check the condenser coils and door seals. These can significantly increase the internal temperature even when the setting is correct. Clean the coils if they are dirty and replace the door seals if they are weak. Additionally, ensure the cooling function is active; otherwise, the ice maker will not produce ice.
2. Water Inlet Valve
The ice maker must have enough water before it can make ice. The primary water source to the machine is the inlet valve; it opens for a few seconds per time to fill the ice mold. If the valve fails to work, the ice maker cannot work. Electricity controls the valve, so ensure there is power supplied to it. Also, ensure the solenoid is not damaged; you may have to replace it.
Also, the water line must fully supply water to the valve from the main source before it can work. So you may want to check the main supply line. Replace the water inlet valve if nothing else fixes the problem, and the ice maker is not receiving enough water.
3. Fill Tube
The fill tube feeds water directly into the ice maker from the inlet valve. You will find it connected to the ice maker from the back. If the tube is clogged with ice or dirt, it may restrict water flow and keep the ice maker from working. Checking the fill tube may require unmounting the ice maker, which is not a difficult task.
Use a hairdryer to thaw the fill tube and use medium heat to avoid damaging the plastic tube. Otherwise, turn off the refrigerator for a few hours until the ice melts. You can also try dislodging the ice obstruction with a small sharp object if you can see it at the mouth of the tube.
4. Ice Maker
The last part to check is the ice maker. It may have a defective component, preventing it from making ice. The same is true if the ice dispenser is faulty, as discussed in this ice dispenser parts article. However, there is also a possibility that the entire ice maker assembly is faulty or the control board has failed. You may want to consider replacing the machine or changing the control board.
KitchenAid Refrigerator Not Making Ice or Dispensing Water – Fixed
If a KitchenAid refrigerator is not making ice or dispensing water, it indicates the entire refrigerator has no water supply. Start troubleshooting from the main water supply. Ensure the house gets water at good pressure; insufficient water pressure can keep the refrigerator from getting water. Also, the main supply valve (some call it the saddle valve) may be only partially open, affecting the water flow.
If the water supply from the main source is good and there is no interference, check other parts:
1. Water Filter
You must replace the water filter in your refrigerator every six months. This is the maximum usage period if you must get pure water from the unit. A clogged water filter restricts water flow and can cause the unit to stop producing water or making ice. The status light should alert you to a need to replace the filter, but if your refrigerator model does not have this light to alert you, do a manual calculation.
Ensure you use the correct filter type for a KitchenAid refrigerator. The brand recommends using Everydrop or KitchenAid water filters for its refrigerators. Any other type or a cheaper alternative may not work well with the refrigerator. It may even keep from working as it should. After replacing the filter, run water from the dispenser or direct from the water line.
Doing this helps flush the trapped air system so that the dispenser can work. Otherwise, pressure builds in the system and keeps the dispenser from working. Follow the specific instructions in the refrigerator’s user manual to install the new water filter and correctly flush the system.
2. Control Lock
Some refrigerator models have a control lock that turns off the dispenser functions by locking the buttons. The function allows you to lock the dispenser when cleaning the refrigerator or if you have children to prevent accidental dispensing. Check to see if the lock icon is lit; it indicates that the function is active.
If that is the case, consult the user manual for specific instructions to deactivate the function. Your model may have a dedicated lock button; press it and hold it for a few seconds to turn the function on or off. Otherwise, find the button combinations that work for your specific model to control the Lock function.
3. Water Line
Inspect the water line to see if it is kinked or twisted. Pushing the refrigerator too close to the wall or surface behind it can cause the water line to kink and restrict the water flow. Straighten the line if applicable and ensure you leave a few inches of space around the refrigerator. You may also want to tape the excess part of the line to the back of the unit if it is too long. This helps to prevent a kinked water line in the future.
4. Filtration System
If your home has an in-house reverse osmosis water filtration system, it may interfere with the water. This type of filtration system tends to reduce the water pressure, causing the ice maker and dispenser not to function as they should. Consider using a different water line for the refrigerator to improve the dispenser and ice maker functions. Then, you can install a refrigerator water filter instead of using the house’s system.
The dispenser lever must be in full engagement for the refrigerator to dispense water or ice. First, choose the correct option, ice or water, and press the glass firmly against the lever. There is a possibility that you do not fully engage the lever, and if this is the case, the refrigerator cannot dispense water. However, your refrigerator may need service if the problem persists. Contact the KitchenAid Service Center, report the issue, and request service. Alternatively, employ the services of an appliance technician for further assistance.
Check out these other articles…
Whirlpool Refrigerator Starting [Issues, Solutions & Guide]
Whirlpool Refrigerator After a Power Outage [Problems Solved]
Whirlpool Refrigerator Overheating [Issues Solved]
Whirlpool Refrigerator Sounds Like…[Problems Solved]
Whirlpool Refrigerator Temperature [Detailed Guide]
KitchenAid Refrigerator Not Making Ice, Red Light Blinking – Solution
The optics board may need replacements, but the ice maker’s sensor may be obstructed. Reset the ice maker and see if it fixes the problem. If the red light continues blinking, the sensor may need cleaning or replacement. This article on the red light blinking on the ice maker of a Kitchenaid refrigerator sheds more light on the problem and possible solutions to it.
How to Make Ice on a KitchenAid Refrigerator
The ice maker must be on before you can make ice. If the refrigerator is a new installation, ensure it is correctly hooked inside the unit with the fill tube connected to the water line and inlet valve. Turn on the ice maker; use a power button if available or push the shut-off arm down or the On position. Do a test run to ensure the ice maker fills with water; check the main supply valve to see if it is fully on and producing water. The main water source supplies water that runs through the water line to the inlet valve.
Through the valve, it flows through the line into the fill tube and fills the ice mold inside the ice maker. The water inlet valve opens for about seven seconds and supplies water to the ice maker. Once the ice mold is full, the valve shuts off the supply, and the ice maker starts an ice-making cycle. The cycle may run for about 90 minutes before producing the first ice batch. Ensure you dispose of the first three ice batches if it is a new installation before using the ice.
The refrigerator’s user manual explains how to use the ice maker for new appliances. You may want to consult it to find out other specific instructions for your refrigerator model.
KitchenAid Refrigerator Slow to Make Ice – Fixed
There are several ways to fix the problem of a KitchenAid ice maker that is slow. First, check the temperature; it must be low enough to produce ice. If it is higher than 5 degrees Fahrenheit, it may slow ice production. Avoid opening the freezer door too often so that it does not lose all the cold air. The temperature setting may be correct, but frequent door opening can reduce the freezer’s cooling capacity.
The same applies to holding the freezer door open for too long. Warm air replaces the cold air and compromises the cooling capacity. As a result, the freezer cannot produce enough cold air for the ice maker to make ice fast. The best step is to take everything you need per time once you open the door and keep others from frequent refrigerator usage if you do not live alone.
If you recently stocked the freezer, ensure it is not too full. Keeping the freezer too full may interfere with the shut-off arm and stop the ice maker from working as it should. Also, an overstocked freezer has trouble circulating the cold air and may not cool as it should. This creates cold and warm air pockets and may affect the quality of the stored food. In the same vein, do not leave the freezer too empty, as there should be enough content to absorb the cold air for efficient functionality.
You may also want to replace the water filter. A clogged filter slows the flow of water, and the ice maker cannot produce ice fast if the inlet valve does not supply water as quickly as it should. Check the status light and replace the filter if it is red or orange. Use only KitchenAid or Everydrop water filter brands for your refrigerator for the best results. Otherwise, the slow ice problem may continue if you use a cheap alternative or the wrong type.
The water line must not have any obstructions to encourage water flow. Ice fragments can block the water line, especially if there is a power outage. The loss of power can dislodge ice pieces from the refrigerator and lodge them in the line, obstructing the water. Clear the line using warm water or turn off the refrigerator until all the ice melts. Correctly position the refrigerator to keep the water line from kinking and improve the water flow.
In addition, the water pressure must be sufficient to push the water to the ice maker. The higher the pressure is, the faster the ice maker fills with water. Typically, the ice maker should have a water pressure of at least 20 psi to work well. But it must not exceed 120 psi, or there may be issues with the water supply. You may need a plumber to check the pressure, especially if you do not have an in-house water filtration system. Schedule service for the ice maker if all else fails and the ice maker continues to make ice too slow.
KitchenAid Refrigerator Not Making Enough Ice – What to Do
There is a crucial factor to consider. Is the refrigerator a new installation? If it is, the unit needs to run for at least 24 hours to reach the correct temperature for the ice maker to work. When the ice maker begins making ice, you need to throw out the first three batches of ice because they may contain dirt and contaminants. Also, you may have to wait a few days to use ice from the refrigerator. If this is the case, the ice maker is working normally and is not making too little ice.
However, if the unit is not a new installation, check the water supply to the refrigerator. Inspect the main water supply valve and water line. The supply valve must be fully open to supply water through the water line. How you open it depends on the valve type, but most valves open when you turn them counterclockwise. Also, check the water line to ensure it is not twisted or kinked. Straighten it if kinked and check for possible damages. Replace the line if it is damaged.
If the water supply is not restricted in any way, check the water filter. The filter controls the water flow and purifies the water to make it clean enough for consumption. Due to the nature of its work, dirt clogs it within a few months. Therefore, manufacturers recommend replacing it every six months, although some users may not need to replace it often due to irregular usage.
You may find the filter indicator blinking or turning red. Replace the filter in your refrigerator if that is the case, following the instructions in the user manual. Ensure you use the correct type of filter for a KitchenAid refrigerator and properly install it. Dispense water for a few minutes to clear trapped air from the system before using the ice maker or dispenser. Otherwise, the ice maker may not get enough water to make ice.
If your home has a reverse osmosis water filtration system, it can interfere with the water pressure and supply. Your refrigerator does not need a filter if you have this filtration system in place, but it typically affects the water pressure, restricting how well water flows to the refrigerator. One solution is to disconnect the refrigerator from the system and connect it to a separate water supply line to the main cold water supply in your home.
Then, use a refrigerator filter to improve the water pressure. The ice maker may work better that way. But if nothing else seems to work, there may be an issue with the ice maker components, or the entire machine is defective. Consider replacing it or using the services of a qualified appliance technician if it is more cost-effective.
KitchenAid Refrigerator Ice Maker Won’t Stop Making Ice – How to Fix
The following are some reasons the ice maker in a KitchenAid refrigerator will not stop making ice:
1. Broken Shut-off Arm
The shut-off arm is the metal or wire arm by the side of the ice maker. The arm automatically moves up and down. When it is up, the ice maker is off and can dump ice into the storage bin. Afterward, the shut-off arm drop to the down position, and the ice maker can resume an ice-making cycle.
But if the metal arm is damaged in any way, the ice maker may continue making ice without stopping. Therefore, check it; wiggle it up and arm to check its movement and whether or not the ice maker responds to the movements. If there is no response or the arm moves loosely, you may have to replace it.
Another possibility is that the arm is stuck in the down position, which means the ice maker remains on and keeps making ice. Also, the freezer contents may cramp the arm and prevent it from moving when it should turn the machine off. Check these things and fix them to get the ice maker working as it should.
2. Obstructed Sensor
You will find the ice level sensor on the right side of the ice bucket. It checks how full the bucket is and alerts the ice maker to stop making ice when it is full without dispensing. If the sensor is dirty or obstructed, it may not detect the ice level. Consequently, the ice maker keeps making ice even when the ice bucket is full.
The ice storage usually has a scoop that you can use to collect ice. It sits in the ice bucket and you may position it in such a way that it blocks the sensor. This can cause the ice maker to keep producing ice. So, locate the sensor and check the position of the scoop; remove it from the path of the sensor if applicable and place it in the available holder.
Ensure you do not store anything in the ice bucket, even if you are not using it at any point; it should hold only ice. You may also want to check whether or not the sensor is dirty. Dirt can work as an obstruction, much like having an item physically blocking it. Over time, mineral buildup can cover the sensor and reduce its functional capacity. Therefore, clean the sensor with warm soapy water and a soft, clean, and lint-free cloth.
3. Accelerated Ice Feature Active
The feature allows you to make ice faster than usual, especially when you need a lot of ice within a short period. However, this also means the ice maker produces more ice than you may need if you accidentally activate the feature, although it automatically turns off after running for 24 hours. Not every model has this feature, but those that do may have it as Fast Ice, Max Ice, or Accelerated Ice.
4. Defective Water Inlet Valve
The water inlet valve is an electrically-controlled component that opens for about seven seconds per time to fill the ice maker. But if it fails, it may keep supplying water even when the ice maker does not need it, causing the machine to keep making ice. If there is a constant supply of water, it may an inlet valve issue and you need to check the solenoid. Replace the solenoid if it does not get power when tested with a multimeter. Otherwise, replace the entire inlet valve.
KitchenAid Refrigerator Not Making Ice or Keeping Foods Frozen – Quick Fix
The refrigerator likely has a temperature issue if it does not make ice or keep food frozen. While it may cool to some extent, it may not cool enough to freeze food or produce ice from the ice maker. As this article explains, several issues can affect the temperature in a refrigerator, even if you set it correctly. Clean the condenser coils, service the condenser fan, replace or clean the door gaskets, ensure proper air circulation around the refrigerator, and adjust the temperature setting if necessary.
KitchenAid Refrigerator Making Ice But Not Dispensing Water – Solved
Check the Control Lock feature on the control panel; it may be active. The lock feature keeps the dispenser from working and is primarily useful for cleaning or accidental dispensing purposes. The water filter may need a replacement or you may be using the wrong type for a Kitchenaid refrigerator. Ensure correct installation when replacing the filter; use the manual for instructions.
There must also be adequate water supply from the main source; open the supply valve to the full. Check the water line to ensure it is not kinked or twisted; you may have to replace the water line if it is the plastic type and is damaged. The in-door water line must also be in good working condition to supply water to the dispenser, so inspect it. Furthermore, check the water inlet valve to see that it is supplying water to the refrigerator.
In addition, the door switch must work well because it turns off the dispenser functions once you open the refrigerator door, and a faulty switch can stop the dispenser from working. Lastly, check the different dispenser parts such as the lever, dispenser switches, and the control board. Learn more from this article on a KitchenAid refrigerator water dispenser not working on how to fix this water dispenser problem.
KitchenAid Refrigerator Not Making Ice After Replacing Filter – Fixed
It takes several hours for the ice maker to resume its ice-making functions after replacing the filter. If you notice the ice maker in your KitchenAid refrigerator is not making ice after replacing the filter, it may be normal. Wait about six to twelve hours for the first ice batch; some models may take longer, but it is still normal.
Consider discarding the first one or two batches after the filter replacement because the old filter may have left some contaminants behind due to the inability to thoroughly filter. Therefore, the water may not be as clean as needed and the first ice cubes may not be fit for consumption. After the first 24 hours, your ice should be ready for consumption because the filter should be ready for use.
However, if there is still no ice after this time, you may be using the wrong filter type. KitchenAid refrigerators use Everydrop or KitchenAid water filters, so the refrigerator may not work well if you use another type. You can contact the KitchenAid Center for the correct filter or find an authorized retailer near you. A few alternatives may work, but it is not always the case.
Ensure correct installation when replacing the filter. Follow the specific instructions in the user manual to replace it and flush the system afterward. Otherwise, the refrigerator may not produce ice; trapped air in the system may restrict water flow to the ice maker. Another possibility is that the filter is dirty or damaged. Check the filter head for signs of damage or dirt; clean it if dirty or replace it if damaged. The O-rings must be in place and the filter housing seal must not be displaced for the filter to work.
How Long Does It Take for a KitchenAid Refrigerator to Make Ice?
The ice maker typically takes about 90 minutes to make one batch of ice. A refrigerator running optimally and cool enough makes it easier for the ice maker to produce ice. In other words, the colder the freezer, the better the ice-making process. A new installation needs about three hours to make one batch of ice and three days or 72 hours to make ice enough to fill the ice bucket.
KitchenAid Refrigerator Leaking Water and Not Making Ice – Fixed
If you find that the refrigerator is leaking water and not making ice, it may indicate that the defrost system is not working well. As a result, the refrigerator does not cool enough for the ice maker to work. That also means the defrost function keeps the ice melting and leaking from the unit, especially if the defrost drain is clogged.
Clear the drain of debris and ice if applicable using warm water. If the dirt is stubborn, use a stiff wire to push it out and pour more water into the drain until it runs clear and free. Also, clean the drain pan to remove the dirt you removed from the drain hole. Otherwise, the defrost water may remain in the pan, leak, and cause a pungent smell from under the refrigerator.
Furthermore, troubleshoot the defrost system to find the faulty components. The defrost timer may be faulty, failing to advance the system in and out of a cycle. The heater may also have failed, keeping the refrigerator in a defrost cycle and preventing the cooling function from working. The thermostat can stop the heater from working if it becomes defective, so you may have to replace it. Finally, check the defrost control board because it controls the entire system.
Consider the ice maker itself; it may have faulty components. The entire ice maker assembly may also be defective. If the defrost function is not the problem, or you fix the drain and defrost components but the problem persists, you may have to replace the ice maker. Service the refrigerator from time to time to prevent these issues.
Important Notes
Reset the refrigerator first before performing any repair task if you find that the ice maker is not producing ice. The control board may fail and affect how well the machine works. Turn off the refrigerator by unplugging it from the wall outlet. If that is not possible, use the breaker for the unit. Wait about five minutes and reconnect the refrigerator to electric power and ensure the cooling function is working. Check the ice maker to see if it is working and making ice.
Note that the troubleshooting and repair steps in this article apply to all KitchenAid refrigerator models. So, they apply to side-by-side, 3-door French door, 4-door French door, and 5-door French door models. However, always use the refrigerator manual for specific instructions that apply to that particular model if you need to repair any part or find the model number for replacement parts.
Get Instant Help — Ask An Experienced Verified Appliance Technician
Need expert help? Click here to use the chat box on this page to speak with a verified appliance technician right away. No need for expensive in-home service calls. No appointments. No waiting.