As with many other refrigerator compressors, a Maytag refrigerator compressor can develop issues. In this article, we list some of them along with their solutions.
Table of Contents
How to Test a Maytag Refrigerator Compressor
To test the compressor of a Maytag refrigerator, pull out the start relay from its side. And if there is an overload, pull that out, too. When you do this, you will see 3 pins or terminals on which the relay rests or is plugged.
Next, use a digital multimeter to test the resistance between the pins or terminals. It does not matter the type of compressor you have – old or new. Once the relay comes off, they all look the same. So this procedure works for all compressors.
The multimeter has 2 probes. Place each probe on two pins at the same time and read the number or resistance registered on the meter.
When checking the resistance, record which of the 2 pins shows the highest number. It helps to make a diagram of the 3 pins, draw lines to connect the pins and write the numbers as you test them.
The two pins between which you get the highest number or resistance are the start and run or main pins. The remaining pin is the common one and the other two connect to it.
On some compressors, you will find that the common pin is the one that forms the top of the triangle of pins. But on others, this is not so. So it is important to run this test and not assume the top pin is the common one.
Finding the Resistance…
After taking the resistance between the 2 pins, run a test to find the resistance between the common pin and each of the others.
The readings you get between the common pin and each of the start and run pins must be exactly the total of the reading you get between the start and run pins.
In other words, the resistance between the start and run pins is the highest number you will find. Then, the sum of the resistance between the common and run pins and the resistance between the common and start pins must be equal to the resistance between the start and run pins.
However, if the readings you get between the common and run pins and the common and start pins are not within a half Ohm of each other, then one of them is shorted to the ground. The only fix here is to replace the compressor.
In the event of the pins being in good working condition yet the compressor has issues, find a certified technician to further troubleshoot it and find a solution.
A visual demonstration always goes a long way in helping with such procedures. So this video shows you how to test a refrigerator compressor accurately…
How to Replace the Compressor on a Maytag Refrigerator
To replace the compressor on a Maytag refrigerator, do the following:
Step 1
The first thing to do here is to disconnect the refrigerator from electric power. You don’t want to work on any electric appliance while it is connected to electricity actively. If the work needs electric power, work cautiously.
Next, remove every content in the refrigerator. Since this repair may take some time, depending on how fast you work, the frozen food may thaw. You need to do this, especially for perishable food items.
Step 2
Pull the refrigerator out and away from the wall or surface behind it. This is to give you access to the compressor and room to work.
Now, take a look at the bottom back of the unit. If there is a cover over the compressor compartment, pull it out. Some may be secured with screws. If that is the case, use a suitable tool to unthread the screws before removing the cover.
Be sure to place the cover and screws out of the way and in a safe place. Do this so that you don’t lose the screws.
Step 3
Allow some time to pass after removing the cover before touching the compressor. Because you just unplugged the refrigerator, the compressor may be too hot. That is if it has been running. The same is true about every other metal there.
After about 20 to 25 minutes, it is time to remove the old compressor. But before disconnecting any wire or tubing, take pictures of connections. Be sure to capture how and where everything goes.
And as you remove wires step by step, continue taking pictures. Some of those wires need to be cut and joined later by brazing. Others simply need to be unclipped.
Step 4
Remove the old compressor and place it aside. Be sure you don’t confuse it with the new one. Get the wires and brazing equipment ready.
Then, take the new compressor and start connecting wires and other connectors. Connect the joints that you cut earlier and secure them by brazing. This is when those pictures come in handy.
Step 5
Put some refrigerant in the new compressor. Compressors don’t come replete with refrigerant; you have to manually add it.
The steps to do this are laid out in the manual that comes from the refrigerant manufacturer. Do well to follow them closely. You can also find instructions on adding refrigerants to a compressor online.
Step 6
Test the new compressor. Reconnect the refrigerator to electric power and listen to the sound of the compressor. A low and steady hum means it is running well. So give the refrigerator about 4 hours before checking to see whether or not it is cooling properly.
Maytag Refrigerator Compressor Not Coming On – How to Fix
Do the following to fix a Maytag refrigerator compressor that is not coming on:
1. Check the Start Relay
Remove it from where you see it attached to the compressor’s side. Now, shake it and listen for an audible rattle. Even if the rattle is small, the relay is bad; it should not rattle at all. So, replace it.
Also, if the relay gives off a burnt smell, no matter how faint, replace it.
However, even if none of these applies, test it to check for continuity using a multimeter. If there is no continuity, replace the relay.
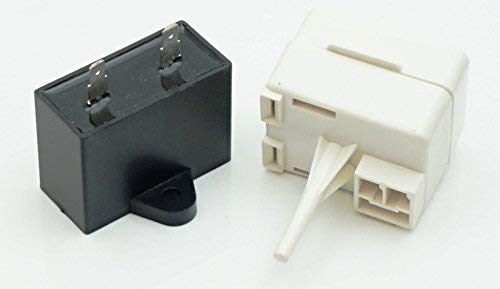
[amalinkspro type=”cta-btn-css” ctabtn-id=”” asin=”” apilink=”https://www.amazon.com/dp/B07NQM8L1P?tag=refrigeratorsreviewed-20&linkCode=osi&th=1&psc=1″ addtocart=”false” new-window=”true” nofollow=”true” alignment=”alignright”]Buy this start relay on Amazon[/amalinkspro]
2. Check the Power Cord
If the power cord of the refrigerator is frayed or damaged in any way, replace it. Not only does this help the refrigerator run smoothly but it also reduces the risk of a fire outbreak.
A damaged power cord cannot deliver the required amount of power or voltage to the compressor. As a result, you may find that the compressor does not run at all.
The problem may also stem from the outlet into which you plug the refrigerator. Therefore, whether or not the cord is in good working condition, check the wall outlet.
Connect another electrical appliance to it and see if it powers. If it does, the outlet is good. But if not, you will have to replace the outlet or relocate the refrigerator.
3. Check the Condenser Coils
Clean condenser coils help the compressor run smoother and better. If they are dirty, however, they tend to overload the compressor. Eventually, it may stop working completely.
So check the coils to see if they are dirty. The amount of dirt on them will let you know if they have affected the compressor. Clean them thoroughly with a vacuum cleaner with a hose attachment or a condenser cleaning brush.
4. Check the Condenser Fan
First, check the blades. They should be free of dirt and any obstruction. But just to be certain, clean the blades to remove dust and debris.
Then, turn them with your hand. See if they turn well. If they do, then the fan is likely working fine. However, if they don’t turn well, the motor may be bad.
This test is not conclusive so go a step further and test the motor to check for continuity. Use a digital multimeter to perform this test. If there is no continuity, replace the motor.
If the fan, which is supposed to cool the compressor and the condenser coils, has a faulty motor, the compressor would overheat. And overheating can cause the compressor to not come on.
5. Check the Thermistor
Test the continuity of the thermistor using a multimeter. You should find its resistance changing as the temperature in the refrigerator is changing.
If this is not possible, remove it and use a cup of water to run the test. Place it in the water and check its resistance. Then, slowly heat the water and see if the resistance changes.
If it does not change and there is no continuity showing on the multimeter, replace the thermistor.
This component monitors the temperature in the refrigerator and sends its findings to the control board. The board directs or sends voltage to the cooling system to kick it into action as needed.
If the thermistor is bad and sends false results to the board, the board won’t be able to send the right amount of voltage to the cooling system, to which the compressor belongs. Consequently, the compressor may not come on at all.
6. Check the Compressor
This is the last thing to check. Be sure that all the other components pass the test before going for the compressor.
Follow the steps on checking or testing the compressor. And if there is any pin or terminal that is shorted, replace the compressor.
Check out these other articles…
GE Refrigerator Evaporator [Issues and Solutions]
Frigidaire Refrigerator Compressor [Issues and Solutions]
How to Adjust a GE Refrigerator Door [Quick Guide]
GE Refrigerator Compressor [Problems and Solutions]
GE Freezer Is Frosting Up [Solved]
GE Refrigerator Fan [Issues & Solutions]
Whirlpool Refrigerator Compressor [Issues Solved]
Kenmore Refrigerator Compressor [Problems Solved]
KitchenAid Refrigerator Compressor [Issues Solved]
Maytag Refrigerator Compressor Clicking – Quick Fix
A bad start relay is the most probable cause of a refrigerator compressor clicking. The clicking sound you hear is the compressor trying hard to run but failing and shutting down.
Detach the relay and shake it lightly. Any rattle from it means it is damaged and needs a replacement.
You can also test it with a multimeter between the start and run terminals to check for continuity. If you don’t find continuity, replace the relay.
Another possible cause of the clicking sound is the condenser coil. It is close to the compressor and when it is dirty, the compressor gets overloaded and shuts down.
Due to its location, it is easy for it to gather dirt. So clean it and make it a duty to inspect and clean it every year.
Maytag Refrigerator Not Cooling and Compressor Is Hot – Solutions
The following are parts to check if a Maytag refrigerator is not cooling while the compressor is hot:
1. Evaporator Coils
If the coils, which are located behind the rear wall inside the freezer section, are frozen, they cannot cool any air for the refrigerator.
So, remove that wall or panel and check the coils. They should be cold or have a light coating of frost. But if there is a huge accumulation of frost on them, thaw them using a hair dryer or by manually defrosting the unit.
You will find the compressor running almost constantly because it automatically tries to keep the refrigerator cold. Since the coils can’t do this, the compressor steps up. However, it becomes hot due to the extra effort.
To prevent this from happening again, troubleshoot the defrost system. A failure in the system is the reason for the frost accumulation on the coils. Replace the defective component so the unit can operate smoothly.
2. Evaporator Fan
Spin the blades manually. They should tell you if the motor is working fine. If they spin well, there is no need to check the motor. Otherwise, run a continuity test on the motor using a multimeter.
If there is no continuity, replace the motor. The same applies if the motor is too loud or does not run at all.
The refrigerator won’t cool and the compressor will run hot if this fan fails. This is because it has the job of circulating or spreading the cold air from the coils. This is especially true if the unit has a single cooling system.
So, both the coils and the fan need to be in good working condition for the refrigerator to cool and the compressor not to be hot.
3. Condenser Coils
It is recommended that every refrigerator owner checks and cleans the condenser coils once or twice a year. Doing this keeps them working optimally.
If yours are dirty, do a thorough job of cleaning them. Dirty coils will cause an overload on the compressor. As a result, it will become hot while running and the refrigerator won’t cool due to the heat.
4. Refrigerant
Low refrigerant in the refrigerator will cause it to stop cooling. Even if it manages to cool, it won’t do so properly. Consequently, the compressor may work harder to maintain a cool temperature in the unit. It will become too hot with the constant running.
Unfortunately, there is no easy way to check the refrigerant in the unit. Only a professional can do this so contact Maytag and report your suspicions.
In the meantime, remove the food from the refrigerator and preserve them. If you have access to another refrigerator, store the food there. Then, unplug the unit or power down the circuit breaker.
5. Temperature Control Thermostat
Rotate the thermostat to the highest temperature setting and wait for an audible clicking sound. If you don’t hear it, the thermostat is likely defective.
To be sure, check for continuity with a multimeter. If you change the temperature setting to different points and there is no continuity, replace the component.
[amalinkspro type=”showcase” asin=”B083M8TQ7Q” apilink=”https://www.amazon.com/dp/B083M8TQ7Q?tag=refrigeratorsreviewed-20&linkCode=osi&th=1&psc=1″ new-window=”true” addtocart=”true” nofollow=”true” sc-id=”6″ img-sizes=”500:438″ imgs=”LargeImage” link-imgs=”false” specs=”” btn-color=”#ff9900″ btn-text=”Buy on Amazon” alignment=”aligncenter” hide-prime=”0″ hide-image=”0″ hide-price=”0″ hide-button=”0″ width=”600″]Refrigerator Freezer Temperature Control Thermostat for Whirlpool, Kenmore, Roper, Estate, Crosley, Inglis, KitchenAid, Maytag, Amana Refrigerators[/amalinkspro]
6. Compressor
A bad compressor can run without cooling the refrigerator. And while it is doing so, it becomes hot.
Take a multimeter and perform a continuity test on the compressor. Do so between 3 pins on the side of the compressor. If there is a circuit that shows as open or you don’t get the right resistance reading, replace the compressor.
Maytag Fridge Compressor Keeps Running – What to Do
Here are things to do if you find that the compressor on your Maytag fridge keeps running:
1. Close the Doors
The doors may be slightly ajar. In an effort to keep the fridge running cool, the compressor never stops running.
Check the doors to make sure they are closed and sealed tightly. You will find that the compressor runs less often when you do this.
However, if this does not help, check the seal for dirt, looseness or weakness. If it is dirty, clean it with warm soapy water. And if it is loose, push it into place with a small screwdriver without puncturing it.
But if it is weak, you need to replace it. Wondering how to do that? This video will guide you to replace the seal accurately…
2. Check the Ambient Temperature
You may have to relocate the fridge to save the compressor if the ambient temperature is wrong. But if you cannot relocate it, turn down the fridge’s internal temperature.
The best room temperature for any refrigerator is between 55 degrees and 110 degrees Fahrenheit. So check the temperature in the room where the fridge is located. If it is too hot or cold, the unit may keep running in a bid to maintain the right temperature.
Additionally, if it is too close to a heat source such as a radiator or an oven, the compressor runs constantly. The same is true if sunlight hits it directly.
3. Adjust the Temperature
Make sure the fridge’s setting is at mid-point or set to 37 degrees Fahrenheit if you have a digital display. For the freezer, set it between 0 degrees and 5 degrees Fahrenheit.
If the setting goes higher than these settings, the compressor senses this and begins to work harder. This is why you find it keeps running.
4. Clear the Vents
Blocking the air vents may keep cold air from entering and warm air from expelling. As a result, the internal temperature begins to rise. And the compressor begins to work harder to keep the temperature cool.
In addition, check the user manual of the fridge to know the space to make all around the unit.
5. Clean the Coils
The above are easy and quick fixes. But if they don’t fix the issue, try cleaning the condenser coils.
They may need cleaning by a professional. But check the user manual to determine the type of cleaning that is needed.
The bottom line is to keep the coils as clean as possible. If you can reach them easily, try cleaning them with a condenser brush or a hose attached to a vacuum cleaner.
A coating of dust and dirt on the coils means they cannot remove heat from the refrigerant. Because of the heat, the compressor keeps running in order to stop the temperature from rising.
Recap
If you find that a Maytag refrigerator compressor has issues, find solutions as quickly as possible. This is because a compressor is like the heart of the refrigerator. And if the heart is weak, the whole system fails.
However, if you cannot find the right solution, contact Maytag, report the issue and request service.
You can also opt to use one of our appliance technicians. Chat with them; no expensive in-house call and no appointment needed.
Get Instant Help — Ask An Experienced Verified Appliance Technician
Need expert help? Click here to use the chat box on this page to speak with a verified appliance technician right away. No need for expensive in-home service calls. No appointments. No waiting.