When a refrigerator compressor error appears, it’s often a sign that something is amiss with your appliance’s cooling system. Fortunately, this guide will walk you through diagnosing and fixing the issue, ensuring your refrigerator operates optimally again.

Table of Contents
Signs of a Refrigerator Compressor Error
Recognizing the signs of a refrigerator compressor error can save you a lot of trouble. Here are some common indicators:
Noisy Operation: Unusual noises like humming or buzzing may signify compressor issues.
Temperature Fluctuations: If both the fridge and freezer sections aren’t maintaining their temperatures, this is often a sign of a compressor error.
Excessive Heat: A faulty compressor often generates more heat than usual, usually noticeable at the back of the appliance.
Tools Required to Diagnose and Fix a Refrigerator Compressor Error
To diagnose and possibly fix a compressor error, you’ll need some basic tools:
Screwdriver: For removing the back panel to access the compressor.
Multimeter: To test the electrical continuity of the compressor. A good example is the AstroAI Multimeter Tester from Amazon.
Pliers: For disconnecting and reconnecting electrical connections.
Diagnosing a Refrigerator Compressor Error
Proper diagnosis is the first and most crucial step toward resolving a refrigerator compressor error. Inadequate diagnosis can lead to further issues and even increase repair costs. Below is an in-depth step-by-step guide to help you accurately diagnose the problem.
Unplug the Refrigerator: Safety should always come first. Unplug your refrigerator from the electrical outlet to eliminate any risk of electric shock during the diagnosis process.
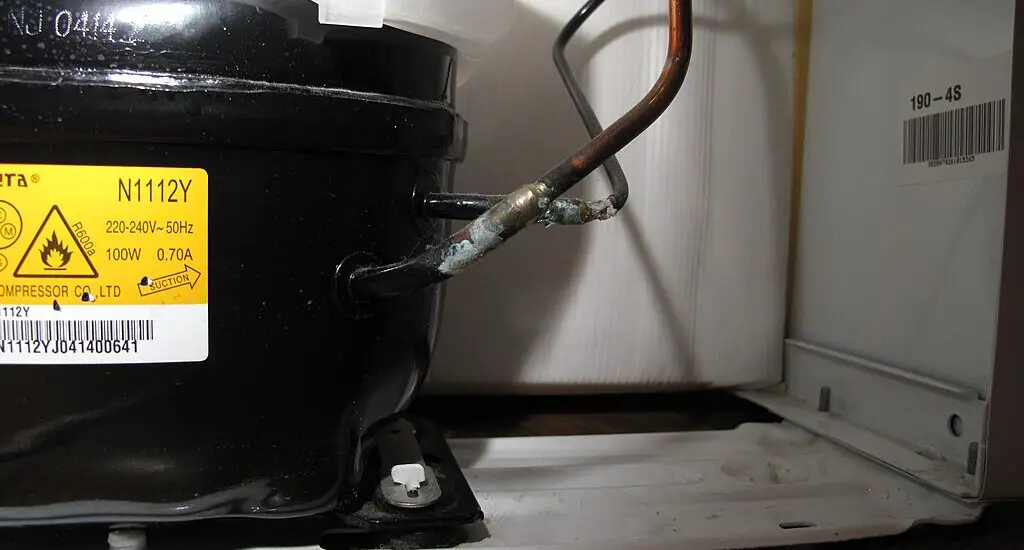
Locate the Compressor: The compressor is generally at the back of the fridge, often covered by a metal or plastic panel. You’ll need a screwdriver to remove the screws securing this panel. After removal, you’ll see a black, pot-shaped component—that’s the compressor.
Inspect for Physical Damage: Check for signs of physical damage such as dents, rust, or oil leaks. Physical damage often correlates with functional issues.
Test Electrical Continuity: Using a multimeter set to the continuity setting, place the probes on the electrical terminals of the compressor. A reading other than zero means there is electrical continuity, and the compressor might be functioning correctly. A zero reading indicates no continuity, signifying that the compressor is likely faulty and needs to be replaced.
Check for Overheating: Carefully touch the compressor to gauge its temperature. Excessive heat may indicate a malfunction. Normally, the compressor should be warm but not excessively hot.
Listen for Noise: Plug the refrigerator back in temporarily and listen for unusual noises like humming or buzzing coming from the compressor area. Such noises can indicate mechanical issues within the compressor.
How to Fix a Refrigerator Compressor Error
If the diagnostic steps confirm a compressor error, you’ll want to take immediate action. Not doing so can lead to inefficient cooling and potential food spoilage. Below are your options for fixing a refrigerator compressor error.
Repair the Existing Compressor
This may involve replacing individual components like relays or capacitors. This can sometimes be a cost-effective solution but requires some level of expertise.
Replace the Capacitor: A faulty capacitor can make it difficult for the compressor to start. Replacing the capacitor is a relatively simple task. Locate it, usually next to the compressor, and swap it out with a new one.
Change the Relay: The relay acts as a switch that controls the compressor. A faulty relay can cause the compressor not to run. To replace, locate the relay (often a plastic box connected to the compressor), disconnect it, and replace it with a new one.
Replace the Compressor
If repair isn’t feasible or the compressor is too damaged, replacement is the only option. This is a complex procedure that involves several steps:
Remove the Old Compressor: After unplugging the fridge, use pliers and a screwdriver to disconnect all electrical and refrigerant connections to the old compressor.
Install the New Compressor: Place the new compressor in the same location as the old one. Reconnect all electrical and refrigerant lines.
Test: After installation, it’s crucial to test the new compressor for functionality. Plug the refrigerator back in and monitor its cooling performance for a few hours.
Check out these other articles…
Refrigerator Compressor Clicks But Won’t Turn On: Solved
Refrigerator Compressor Disposal: A Step-by-Step Guide
Refrigerator Compressor Discharge Line: Complete 411 Guide
Refrigerator Compressor Duty Cycle: What You Need to Know
Refrigerator Compressor Does Not Turn Off: 4 Causes & Fixes
Refrigerator Compressor Does Not Turn On: Proven Fixes
Refrigerator Compressor Explanation: Comprehensive 411 Guide
When to Seek Professional Help
Compressor issues can be complex and risky to fix on your own. If you’re uncertain at any point, it’s advisable to consult a qualified technician. Incorrect repairs can lead to warranty voidance and additional long-term issues. A professional can provide a more accurate diagnosis and, if needed, safely perform the repair or replacement to resolve the refrigerator compressor error.