Ever have your quiet evening disturbed by the whirring of your refrigerator compressor? That’s where the magic of a refrigerator compressor sound blanket comes in. This simple tool can drastically reduce that unsettling noise, bringing tranquility back into your kitchen. Let’s have a look at what this game changer is, how it works, and how it can help transform your refrigerator into a more peaceful appliance.
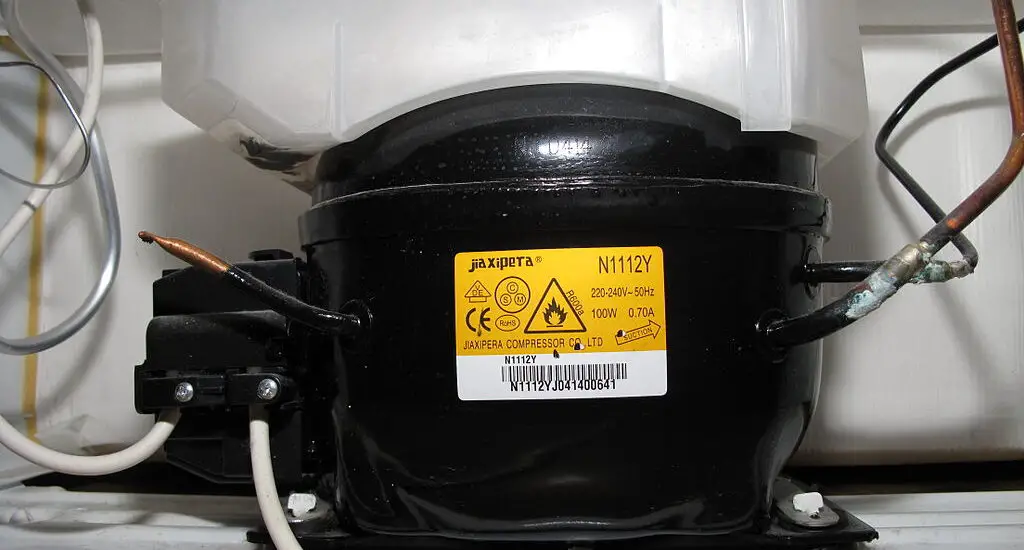
Table of Contents
What is a Refrigerator Compressor Sound Blanket?
Let’s begin with the basics, shall we?
Defining Refrigerator Compressor
At the heart of every refrigerator is a compressor. It’s the engine, if you will, that drives the cooling process. Picture this, the compressor sucks in the refrigerant, compresses it, and circulates it throughout the fridge, keeping your food fresh and drinks cool. But, with this vital job comes a downside – noise. The constant running of the compressor can create an annoying hum that can invade your peaceful kitchen.
Role of Sound Blankets
Enter the sound blanket. Imagine wrapping your loud refrigerator compressor in a warm, sound-absorbing cocoon. That’s essentially what a sound blanket does. It’s a specially designed wrap that goes around the compressor, absorbing most of the sound vibrations it produces. Quite clever, isn’t it?
Benefits of Using a Refrigerator Compressor Sound Blanket
So, why would you want to use a sound blanket on your refrigerator compressor? For starters, it significantly cuts down the noise, providing a quieter, more peaceful kitchen environment. Plus, it can also extend the life of your compressor by reducing vibration-related wear and tear. Pretty nifty, huh?
Choosing the Right Refrigerator Compressor Sound Blanket
If you’re sold on this amazing blanket, you might be wondering how to get the perfect fit for your compressor. As usual, we’re here to help you.
Material and Thickness
Not all sound blankets are created equal. Some are made of thin, lightweight materials, while others are thicker and denser. It’s like comparing a summer blanket to a heavy-duty winter comforter. The thicker the blanket, the more sound it can absorb. So, keep an eye out for the blanket’s material and thickness. You’ll want something robust enough to trap the noise but breathable enough to allow heat from the compressor to escape.
Size and Fit
One size doesn’t fit all when it comes to sound blankets. It’s like trying to wear a cap that’s either too tight or too loose – neither is comfortable. The same applies to your sound blanket. Measure your refrigerator compressor accurately, and ensure the blanket you choose is a good fit.
Installation Considerations
It’s not just about slapping the blanket on and calling it a day. You’ve got to think about safety measures during installation and make sure you aren’t obstructing the airflow around the compressor. It’s a balancing act, but don’t worry, we’ll guide you through it later.
Check out these other related articles…
Refrigerator Compressor Overload Relay: Your Ultimate Guide
Fridge Compressor Max PSI: Everything You Need to Know
Refrigerator Compressor Hard Start Kit: Comprehensive Guide
Portable Ice Maker Compressor Not Working: How to Fix
Ice Machine Compressor Troubleshooting: Your Ultimate Guide
How to Install a Refrigerator Compressor Sound Blanket
So you’ve gotten your refrigerator compressor sound blanket, and you need to install it. Do you call the pros or install it yourself like a boss? The great thing is that you can do it yourself, and we’ll show you how.
Tools Needed
Alright, let’s get down to the business of installation. You’ll need a few tools like a tape measure, scissors, and some cable ties. Simple, right?
Step-by-step Installation Process
Don’t fret if you’re not a DIY pro, we’ve got you covered. We’ll walk you through the process. Start by unplugging your fridge (safety first, folks!), then measure and cut your sound blanket to fit the compressor. Finally, wrap it around the compressor and secure it with cable ties. Voila! You’ve just installed your sound blanket.
Tips for Effective Installation
Now a few words of wisdom before you embark on this mission. Make sure the blanket is snug, but not too tight – you don’t want to strangle your compressor. And remember, the compressor needs some breathing space, so don’t cover the top. Just like us, it doesn’t like being smothered!
Getting the Best Out of Your Refrigerator Compressor Sound Blanket
Installing a sound blanket is just the beginning. There’s a bit more to it if you want to get the most noise reduction out of this nifty little tool. Let’s run through some of the key strategies.
Correct Placement
Just like hanging a picture, it’s all about placement. The sound blanket should wrap around the sides of the compressor but remember to leave the top uncovered. This allows heat to escape and keeps your compressor cool.
Regular Maintenance
Just like you’d service your car, the sound blanket needs a little TLC too. Regular checks will ensure it stays in place and continues to do its job of dampening the sound. A quick peek every few months should do the trick. Isn’t maintenance a breeze?
Life isn’t always smooth sailing, and neither is using a sound blanket. You may face a few hiccups along the way – like the blanket slipping or deteriorating over time. But no worries! These challenges are quite manageable. Secure the blanket firmly during installation to prevent it from slipping, and check it periodically for wear and tear.
Potential Challenges and Their Solutions
Life isn’t always smooth sailing, and neither is using a sound blanket. You may face a few hiccups along the way – like the blanket slipping or deteriorating over time. But no worries! These challenges are quite manageable. Secure the blanket firmly during installation to prevent it from slipping, and check it periodically for wear and tear.
