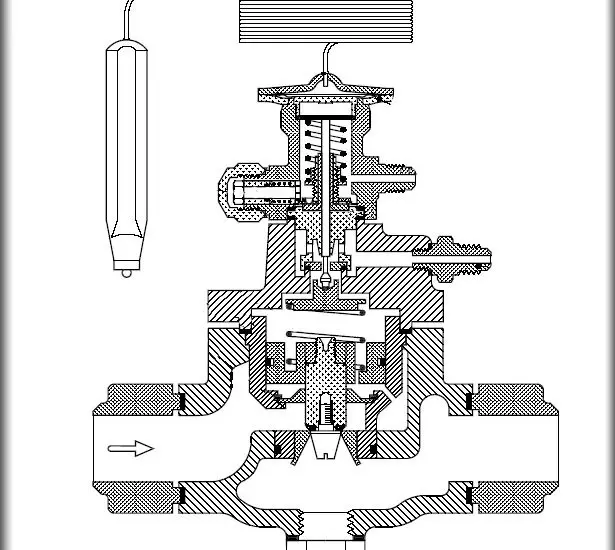
Expansion valve troubleshooting is a crucial skill for anyone dealing with HVAC systems. This guide provides step-by-step instructions to help you navigate this process, even if you’re new to the task.

Table of Contents
Step 1: Identify the Problem
Proper diagnosis is key in troubleshooting the expansion valve. The following steps will guide you through the process:
Listen for Unusual Noises: Place your ear near the valve and listen for hissing or gurgling sounds, which may indicate a leak or blockage.
Check the Temperature: Use a thermometer to measure the temperature near the evaporator coil. If the temperature is significantly different from the expected range, it might point to a valve issue.
You can use this Amazon-listed Etekcity Infrared Thermometer 1080 for this task.
Inspect for Visible Signs: Look closely for physical deformities, corrosion, or signs of wear and tear. Any such visible signs could indicate a malfunctioning valve.
Step 2: Turn Off the Power
Turning off the power is a vital step for your safety. Please follow these instructions carefully:
Find the Main Power Switch or Circuit Breaker: Locate the switch near the HVAC unit or the circuit breaker within the main electrical panel. Flip it to the “off” position.
Confirm that the Power is Off: Use a non-contact voltage tester to ensure there’s no electricity in the wires near the valve. If the tester lights up or beeps, the power is not off. Double-check the circuit breaker or switch.
Step 3: Access the Expansion Valve
Accessing the valve may require some disassembly. Follow these detailed steps:
Locate the Expansion Valve: It’s usually near the evaporator coil within the HVAC unit. Your unit’s manual will have a diagram to guide you.
Remove Covers or Panels: Using a screwdriver, remove any screws that hold covers or panels in place, keeping them in a safe place for reassembly.
Mind Other Components: Carefully move wires or other components aside, being mindful not to damage anything. Take pictures if needed, to help with reassembly.
Check out these other related articles…
How to Unclog Expansion Valve in 6 Easy Steps
5 Expansion Valve Stuck Closed Symptoms: Easy Guide
Bad Expansion Valve Pressures: A Complete Guide
5 Expansion Valve Stuck Open Symptoms: A Comprehensive Guide
4 Stuck Expansion Valve Symptoms: A Complete Guide
Step 4: Inspect and Repair
With access to the valve, you can now inspect and perform necessary repairs. Follow these detailed instructions:
Look for Physical Damage: Examine the valve for any cracks, corrosion, or other visible damage. Use a magnifying glass if needed to see small details.
Check Responsiveness: Utilize a temperature change test to see how the thermostatic element responds. If it’s sluggish or unresponsive, replacement might be needed.
Match Specifications if Replacing: Should a new valve be required, make sure it matches the original valve’s specifications, including type, size, and brand.
Follow Manufacturer’s Instructions: Carefully read and adhere to the manufacturer’s guidelines for repairing or replacing the valve. This ensures that the repair aligns with the design and functionality of your specific HVAC system.
Always keep your system’s manual handy and consult with a professional if you encounter something unfamiliar. Expansion valve troubleshooting can be a successful DIY project when done with care and attention to detail.