One home appliance problem you don’t want to have is a freezer not cooling. If you tend to store a lot of food, it can be nightmarish, but not without a solution.
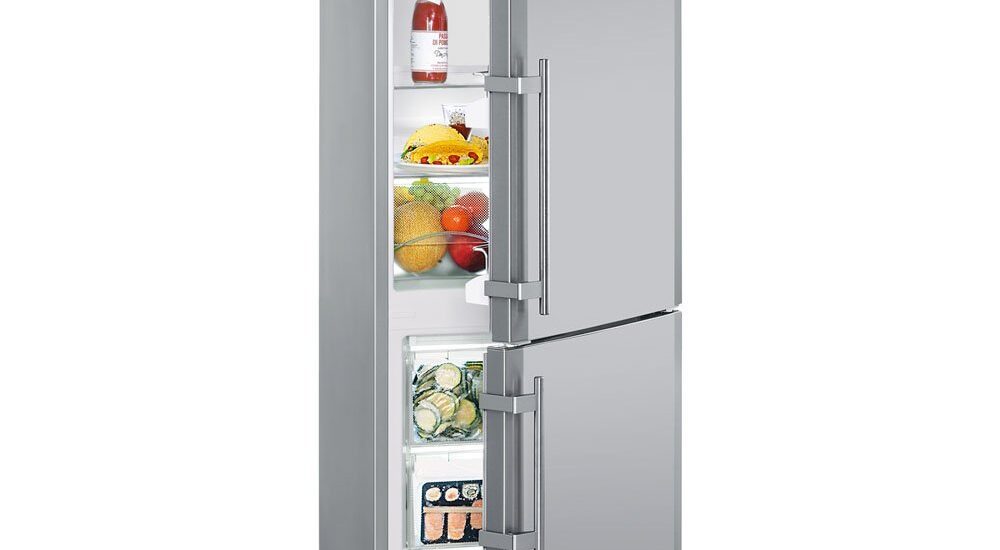
Table of Contents
Freezer Not Cooling But Light is On – How to Fix
If you find that your freezer is not cooling even though the light is on, check the following parts:
1. Start Relay
Check the start relay attached to the compressor’s side. It may be faulty. How you check the relay will depend on the type, but as a general rule, you have to know whether or not it is a mechanical or electrical type of relay.
If it is the mechanical type, you can remove it and give it a shake. A rattle from the relay tells you that something is broken inside it, so the relay should be replaced. You cannot repair a broken start relay. Also, a burnt smell indicates permanent damage.
For an electrical start relay, run a continuity test to check its functionality. Take a multimeter and place the test leads on the start and run terminals of the relay. If the multimeter registers no continuity, replace the start relay.
You can test both the mechanical and electrical types of start relay using a multimeter in most cases. So, if the shake and rattle test is not satisfactory, consider testing the mechanical relay with a multimeter.
The start relay is a small device fixed to the side of a compressor to boost power when the motor needs to start and run. It does not shut off until the compressor is up and running smoothly. Without it, the compressor cannot start any time it shuts down for defrost or other reasons.
2. Evaporator Coils
You will find the evaporator coils in the freezer compartment. Remove the contents along with the shelves and racks. Unmount the screws holding the inside back panel in place and remove it out of the way. Do it carefully because the evaporator fan is attached to the panel.
If it is a standalone freezer, the location of the coils is different. Consult your user manual for instructions on how to find the coils.
Take a look at the coils. If they have a light, even coating of frost on them, the coils are not frozen. But if the frost on them is heavy, it means the coils are unable to cool the air in the freezer. The solution is to thaw the coils, so use a heat source or manually defrost the freezer.
If you will manually defrost the freezer, simply leave it unplugged for some hours, with the door open. Let the warm air naturally melt the ice. But you have to prepare to catch dripping water during the defrost, so it does not ruin your kitchen floor.
Troubleshooting the Defrost System
Next, troubleshoot the defrost system. A malfunctioning defrost system is one primary reason why the coils accumulate heavy frost. Start with the defrost timer. You will find it behind the bottom grille, at the back of the refrigerator, or in the control housing inside the refrigerator.
Turn the timer using a flat-head screwdriver. As you do, you will hear a sound as the compressor turns off and the defrost heater turns on for the cycle. Wait for the timer to advance out of the cycle after about 30 to 35 minutes. If it moves automatically, it means it was likely only stuck. Otherwise, it is broken and should be replaced.
If you are not sure, you can test the timer for continuity. If you find no continuity, replace the defrost timer. It is crucial to find a replacement because the defrost cycle won’t run without the timer.
Next, test the defrost heater. If the defrost timer is in good working condition, take a multimeter and run a continuity test on the heater. Replace it if you don’t find continuity. The heater is the element that heats the evaporator coils during the defrost cycle. If it stops working, the coils will get too cold and freeze over time. In that state, they cannot cool the air in the freezer.
However, if the heater is working well, then test the defrost thermostat. The component closes contacts for power to flow to the heater when it senses that the coils are too cold. Therefore, it is important to test it for continuity because if it fails, the heater may not turn on even if the timer is working. But if the thermostat shows no continuity, replace it.
Check the Door
Another critical factor that affects the evaporator coils is the door seal. If it is broken or cracked, it will easily let warm air into the freezer. The moisture in the air will condense on the coils and other parts of the unit. And if the frequency of this occurrence is high, the defrost system won’t be able to keep up. Consequently, the coils freeze.
Also, check the hinges, especially if the door was recently removed. The improper installation lets warm air into the unit the same way a weak seal does. Therefore, check the hinges and fix them if they are not correctly done. Replace them if they are weak.
It helps to load the door bins lightly. Storing too many items, especially heavy glass jars, in the door weighs it down and affects the hinges in the long run. It may also keep the door from fully closing. If you have too many things in the door, reduce them.
3. Condenser Coils
Find the coils at the bottom back of the freezer unless you have a unit with coils within the walls. If the coils are visible and you have never cleaned them, use a vacuum cleaner to remove the dust and other debris clinging to them.
Also, clean the condenser fan and compressor. The location of the coils, fan, and compressor makes them susceptible to dirt. And the coils fail to work efficiently if they are significantly dirty. Therefore, it is crucial to clean them every six months, especially if you live in a dusty area or have pets.
The condenser coils have the job of holding the hot refrigerant as it flows from the evaporator coils after absorbing the heat from the freezer. It is in the coils that the heat in the refrigerant releases into the atmosphere through the coils. But if the coils are dirty, they become choked and cannot work as they should.
It helps to create some room around the freezer, just a few inches on all sides, so that air can flow. Poor airflow around the refrigerator affects the unit because the heat from the coils and compressor becomes trapped. As a result, heat builds in the freezer and affects its cooling capacity.
4. Condenser Fan
While checking the condenser coils, check the condenser fan. The fan is next to the coils and should be spinning as the refrigerator is running. So, if it is not working, test the blades and motor.
First, clean the blades to remove accumulated dust and other debris. Then, turn them to check their functionality. If they turn well, the fan may be in good working condition. But if they don’t turn well, the problem may be low lubrication or a faulty motor. Use a little penetrating oil on the motor shaft to lubricate it. Wait a few minutes before trying the blades again.
If they are still don’t turn well, it indicates the motor bearings are worn, and the motor needs a replacement. Before replacing the motor, test it for continuity using a multimeter. If the motor has no continuity, replace it. And if you cannot find individual replacement parts, replace the entire fan assembly.
The condenser fan cools the condenser coils as they expel heat from the refrigerant. The fan also keeps the compressor from overheating and evaporates the water in the drip pan. But f the fan becomes faulty, the freezer will overheat and stop cooling.
5. Evaporator Fan
You will find the fan attached to the inside back cover of the freezer. Many call the cover the evaporator fan cover for this reason. Unmount the screws holding the cover to the freezer and carefully remove it. Disconnect the wire harness connecting the fan and remove the fan from the freezer.
Ensure the fan blades are clean and there is no obstruction. After that, turn them with your hand. If they turn well, the problem may stem from loose wiring. You can easily fix that by ensuring the wire harness connection is secure. But if the blades don’t turn well, the motor may be faulty.
To confirm it, take a multimeter and test the continuity of the fan motor. If there is no continuity from the motor, replace it. It is crucial to find a correct replacement for the evaporator fan motor or the entire assembly because the fan circulates cold air from the evaporator coils inside the freezer. Without it, the freezer won’t be cold. And if it is a fridge freezer, the refrigerator will also be warm.
6. Temperature Control Thermostat
First, ensure the thermostat is set to the correct point. Typically, the setting should be at the mid-point for the best results. Then, wait to see if the freezer’s temperature changes. If it remains the same, turn the thermostat to the highest temperature setting. Wait for an audible click that lets you know the thermostat is in good working condition.
If you hear the click, there is no need to replace the thermostat. But if the thermostat makes no sound, run a continuity test on it using a multimeter. And if the thermostat shows no continuity, replace it.
The thermostat provides power to the cooling system when the temperature rises to a specific level. If the thermostat fails, the cooling system may not work, and the freezer will stop cooling.
It is crucial to disconnect the freezer from electric power before performing any troubleshooting tasks.
Note: These troubleshooting steps apply to all types of freezers, including chest and upright freezers. If you are unsure how to troubleshoot or repair any part, contact the manufacturer or hire a qualified service agent.
Freezer Not Cooling Enough – What to Do
Sometimes, your freezer stops cooling as it should, even though you can still feel some coolness. If you find that your freezer is not cooling enough or adequately, check the following:
1. Temperature Setting
Incorrect temperature setting is one of the commonest reasons a freezer does not cool enough or at all, as innocuous as it sounds. Check to see if the temperature is too high. For a freezer, the correct setting is 0 degrees Fahrenheit, no matter the brand. If you have an ice maker in your freezer, you may want to set it a few degrees lower for faster ice-making.
Adjust the setting if necessary and wait for the freezer to start cooling. It may take up to 24 hours before you see a considerable temperature change. However, if the freezer’s temperature setting is already low enough, check the next factor.
2. Door Gasket
The door gasket may be leaky, letting cold air escape. As a result, there won’t be enough cold air in the freezer to keep the freezer cold enough. Therefore, check the gasket and replace it if you notice it is broken or cracked. But if it is simply loose, you can push it back into place with a small screwdriver. And if it is dirty, clean it until there is no dirt left.
In the same vein, ensure the door hinges are solidly in place. If they are even slightly loose, cold air will escape in the same way as when the gasket is leaky. So, tighten the hinges or replace them if they are no longer functional.
3. Evaporator Coils
Inspect the evaporator coils behind the interior freezer wall. The coils should not be frozen if they are to perform optimally. So, if they have a thick frost coating on them, defrost the freezer by unplugging it and leaving the door open for a few hours.
Lay towels on the floor to soak up any excess water. Allow the manual defrost to run until the frost on the coils has melted. Then, clean the freezer and plug it back into electric power. But that also means you have to find out why the coils became frozen.
The most probable cause is a faulty defrost system. The timer should advance the system into a defrost cycle. When the thermostat senses the coils have reached a preset temperature, it shuts down its contacts for power to get to the heater. Then, the heater turns on to warm the coils.
If this cycle fails to run, the frost or ice will accumulate on the coils. Over time, they will freeze and stop producing cold air for the freezer.
However, openings can let in warm, moisture-filled air into the refrigerator. The moisture in the air will settle on the coils and freeze, forming frost. The frost will heavily accumulate if the warm air keeps entering, and the defrost system may not keep up.
Therefore, check the defrost system and the door gasket, door hinges, and other openings through which warm air can enter. In addition, reduce the frequency of door opening and the length of time the door is held open each time.
4. Condenser Coils
Keep an eye on the condenser coils because the freezer will stop cooling properly or at all when they get dirty. If you discover they are dirty, unplug the freezer and clean the coils with a vacuum cleaner. If you have a condenser cleaning brush, all the better because it will reach crevices that a vacuum cannot clean. And while at it, clean the compressor and condenser fan with a rag so they can function optimally.
5. Evaporator Fan
A strange noise from the motor lets you know it is faulty even before checking it for continuity. But to see what is causing the noise, open the interior back panel of the freezer. Clean the blades of the fan and ensure there is no ice or debris around them. If they are clean, turn them with your hand. If they feel stiff, it could be because the motor is faulty. Ensure the motor shaft is turning and functioning well before checking the motor.
Then, take a multimeter and check the motor for continuity. If the motor shows no continuity, replace it. It is crucial to have a functional evaporator fan because the freezer won’t have cold air circulating inside without one.
6. Condenser Fan
Make sure the condenser fan blades are clean and no object is keeping them from spinning. Also, clean the area around the fan to remove any potential obstruction. Then, turn the blades; if they don’ turn well, it is an indication the motor is not working. To be sure, run a continuity test using a multimeter. If the motor shows no continuity, replace it.
The condenser fan cools the refrigerant in the condenser coils so that the freezer can keep cooling. If the fan becomes faulty, the coils will overheat and cause cooling problems in the freezer.
7. Start Relay
Pull the relay from the compressor and shake it. If you hear a rattle, the relay is damaged and needs a replacement. The same applies if the relay smells burnt. You can opt to test the relay with a multimeter, especially if it is the electrical type. Place the meter’s probes on the relay’s start and run terminals. If there is no continuity, replace the start relay.
The compressor cannot run smoothly if the start relay is defective. That is because the relay is responsible for supplying power for the compressor to start and run. It keeps giving the power until the compressor fully stabilizes. Without it, the compressor is likely not to run. Even if you find a way to bypass the relay and start the compressor, it won’t run for long.
8. Cold Control Thermostat
Turn the thermostat to the lowest temperature setting. Give the freezer some time to see if it begins cooling. If the temperature does not change, turn it from lowest to highest and listen for a click. If you hear no click, the thermostat may be faulty. Test it for continuity with a multimeter and if there isn’t any continuity, replace the thermostat.
Note: You can fix any type of freezer that is not cooling enough by following the steps above.
Check out these other articles…
Refrigerator Compressor Shuts Off [How to Fix]
Refrigerator Handle [How to/Problems & Solutions]
Refrigerator Light [How to/Questions/Problems & Solutions]
Refrigerator Humidity [Detailed Guide]
RV Refrigerator Leaking [Problems Solved]
Freezer Not Cooling and Compressor is Hot – Solved
If you find that the compressor of your freezer is hot and the freezer is not cooling, here are possible causes and fixes:
1. Faulty Automatic Defrost System
If the defrost system begins to malfunction, it may cause the freezer to stop cooling as it remains in the defrost mode. As a result, the compressor will constantly run to maintain a cool temperature in the freezer and will become hot.
Check each component of the defrost system to find the faulty one, if any. You will find the defrost timer, defrost thermostat, and defrost heater. In rare cases where none of the components is defective, check the defrost control board. Replacing it may fix the compressor and cooling problems.
It is important to note that a faulty door seal will affect how well the defrost system works. The leakage will cause a buildup of excessive frost, which the system cannot keep up with to defrost. So, before checking the defrost system, check the door seal and hinges.
2. Dusty Condenser Coils
When the condenser coils get too dirty, they will become unable to dissipate the heat in the refrigerant. And if the heat remains, the freezer loses its capacity to cool. As a result, the compressor picks up and runs more than it should in order to cool the freezer. In the process, it becomes too hot.
Disconnect the freezer from electric power and find the coils behind the freezer. This applies to freezers with visible condenser coils. Next, clean the coils until they are thoroughly clean. Then, sweep up the dirt on the floor and make a note to clean them in the next six months.
3. Defective Condenser Fan
Check the condenser fan blades for obstruction and ensure the motor is working. Turn the blades to check their functionality. Also, run a continuity test on the motor using a multimeter. Replace the motor if it is not working, or replace the blades if bent out of shape. If you cannot find individual parts, replace the entire fan assembly.
A failed condenser fan causes the compressor to run hot and the freezer to stop cooling. If the fan stops working, it is crucial to replace it. It may help the compressor to stop overheating and reduce the heat in the freezer.
4. Compressor
The compressor may be failing. One of the signs that a compressor is faulty is overheating and constant running. If you find that the compressor is too hot and does not stop running, it may have an internal failure or an open circuit. Test the compressor and if it is faulty, consider replacing it or the freezer. Replacing a freezer or refrigerator compressor tends to be expensive.
Freezer Not Cooling After Power Outage – How to Fix
There are a few things to check if your freezer is not cooling after a power outage:
1. Circuit Breaker
Check the breaker outside the house. It may have tripped off during the outage. If it is off, turn it back on, or reset it if necessary.
2. Power Cord
If the circuit breaker is not the problem, then check the freezer’s power cord. It may not be fully plugged into the wall outlet. Disconnect and reconnect it. Then, check the freezer. If it does not start cooling, check the cord for frays or damage. You may have to replace the power cord if it is damaged.
3. Wall Outlet
The power cord may not be the problem. If the wall outlet is damaged during the outage, it cannot power the freezer. Therefore, plug another appliance into the outlet, and if it comes on, the power cord is the problem. Otherwise, the wall outlet has a fault.
If it is a GFCI outlet, it may need resetting. Find the reset button and press it. Then, test the outlet again. If the freezer does not come on and start cooling, you may need to replace the outlet.
Troubleshoot different parts of the freezer. If all these fixes fail, then the freezer may have a failed component. But also consider that a freezer needs about forty-eight hours to cool to a food-safe level if it is full. If it is only half-full, it may need only twenty-four hours to cool.
Freezer Not Cooling But Refrigerator Is Fine – Quick Fix
The most probable cause of this problem is a freon leak. The freezer stops cooling when the sealed system springs a leak, even if the refrigerator section continues cooling. This is especially true if the unit has a dual cooling system.
Check to see if the evaporator coils are evenly frosted over. If just one section of the coils has frost on them, the sealed system is leaking. It is a serious problem that needs immediate attention; you may have to replace the freezer.
One other cause of this problem is a compressor that does not constantly run. If the compressor only runs intermittently, it may be enough to cool the refrigerator but not enough for the freezer. Therefore, check the start relay and replace it if it is damaged or has no continuity. Also, the compressor may be overheating due to a failed condenser fan. And there may be some internal damage. Test the compressor and replace it if necessary.
Finally, check the ice maker. If the freezer has an ice maker in it but is not constantly in use, turn the ice maker off. If you leave it on, it will go through the usual ice-making cycles without water and produce heat through the heating element under it. The heat will reduce the cooling capacity of the freezer, even when the refrigerator keeps cooling.
Freezer Not Cooling After Moving – Solved
Ensure the power cord is fully plugged into the wall outlet. Check to see if the cord is damaged; a heavy object may have rested on it and damaged it. You may have to replace the power cord if that is the case.
Also, make sure the outlet provides the correct voltage to power the freezer. Do not use an extension cord to plug it. Next, consider the way you positioned the freezer during transportation. If you laid it down on its side, the oil in the compressor might flow into the freezer’s cooling lines. The oil should not enter the lines; otherwise, the freezer won’t cool.
If you had the freezer on its side when moving, allow it to stand unplugged for a minimum of four hours. And if the freezer is laid on its side for up to 24 hours, allow it to stand unplugged for a minimum of 24 hours. Afterward, plug it into the wall outlet.
It may take a few days for the freezer to cool or freeze considerably. If you leave it empty or only partially filled, it may take longer to cool to the usual temperature.
Freezer Not Cooling After Door Left Open – Quick Fix
The evaporator coils may have frosted up from all the humid air that entered the freezer when the door was open. Check the coils to see if they have an accumulation of frost on them. If they do, thaw the coils using a dryer or steamer.
You can also manually defrost the freezer by disconnecting it from electric power. Leave the door open for some hours. It may take longer than using a dryer, but it is a safer method. Remember to store the frozen food in a cooler or another freezer.
Afterward, clean the freezer and reconnect it to electric power. Allow it to run for about four hours before putting food back into it.
Freezer Not Freezing After Defrosting – Solved
It is best to troubleshoot the defrost system to determine why the freezer stopped freezing after a cycle. One or more components may have failed, causing the freezer to remain in the defrost cycle. But also note that it takes a few hours for the freezer to cool adequately after a defrost cycle. So, you may need to wait to see if you need to replace a component.
Freezer Not Freezing at Top – Quick Fix
Check the temperature setting of the freezer. If it is set to a high point, turn it to a lower point. Cold air takes some time to reach the top of the freezer. So setting the temperature too high will increase the time it takes to cool.
Inadequate supply of power can also affect the cooling capacity of the freezer. And the top part will be most affected. Therefore, check the power cord and plug it fully into the wall outlet. If it is, be sure there is no damage to it.
Another thing to check is the door. If it has been open for an extended period or the gasket is no longer working, the top part of the freezer will not cool as it should. Ensure the gasket is sealing and no item inside is keeping the door open. Additionally, keep the door closed most of the time to encourage appropriate cooling.
Finally, the sealed system may be leaking. One of the signs of this problem is when the top part stops cooling. Therefore, it is crucial to check the closed system. You may need the services of a qualified service technician so that if there is a leak, the technician will know what to do.
Freezer Not Freezing and Making Clicking Noise – What to Do
The compressor is trying to start and failing. That is the noise you hear, and that is the reason the freezer is not freezing. A power overload can cause it to happen, and the most probable cause of this problem is a defective start relay. So, remove the relay from the compressor and shake it. It shouldn’t rattle, but if it does, it has likely failed.
To be sure, check it for continuity using a multimeter—test between the two terminals on the relay. If you find no continuity, replace the start relay. When the relay fails, the compressor will have a hard time starting. From time to time, it will try to start and make the clicking noise. But it will fail because the relay is not working.
Another part to check is the condenser coils. If they are dirty, they will overload the compressor with heat and cause it to shut down. The compressor will try to start but will fail because there is still an overload of heat.
Therefore, clean the coils if they are dirty. If you have never cleaned them, now is an excellent time to do it. Use a small brush to wipe the dust off the coils; a condenser cleaning brush is perfect for the job. Ensure you clean the fan and compressor while at it, and clean the floor around and under the freezer.
You can also check the setting of the thermostat. If you set it wrongly, the compressor won’t run smoothly. It may even try to start and fail. And the freezer won’t cool or freeze. So, move the dial of the thermostat to a mid-point and give the freezer time to cool. Wait a few hours and if the problem continues, turn the dial to the highest point. Then wait for a click.
If the freezer makes a clicking sound as you turn the thermostat, you know the component is in good working condition. But if there is no click, test the thermostat for continuity. Replace it if you find no continuity.
Freezer Not Freezing in Hot Weather – What to Do
Lower the temperature in the freezer if it is not freezing in hot weather. If it is already at the recommended point, take it one or two degrees lower. Remember that you have to wait 24 hours between each temperature adjustment so that the freezer can adjust to the new setting.
And find a way to cool the room where the freezer is. Hot weather reduces the capacity of the freezer to cool and brings high humidity with it. As a result, the freezer has a hard time cooling; you may even find it constantly running as it tries to maintain a cool temperature. Therefore, use an air conditioner to cool the room or a dehumidifier to reduce humidity.
If the freezer is located in a garage, be aware that the ambient temperature is unstable. If the garage tends to be too cold or too hot, it will affect the freezer. It helps to balance the temperature in the garage so that the freezer can work optimally.
Additionally, reduce the number of times you open the freezer. Keep it shut for most of the day during hot months. Apart from the effect of the weather, opening the freezer too often will compromise the internal cold temperature.
Freezer Not Working in Garage – Solved
If the weather is freezing, the thermostat in the freezer may interpret it as the freezer is cold enough. Then, it will shut off the cooling system. Consequently, the freezer stops cooling. The thing is, the garage is hardly ever heated during the winter months. And this affects the freezer.
To fix it, find a way to warm the air around the freezer and thermostat. That way, the thermostat will stop shutting off the compressor and other components of the cooling system.
The garage will be stiflingly hot in the summer months if there is no provision for cooling. As a result, the freezer’s capacity to cool drops, which may affect the compressor in the long run.
The voltage supply to the garage may not be sufficient to power the freezer. If you are sure the freezer is in good working condition but is not working in the garage, check the wall receptacle into which you plug the freezer’s power cord. Also, check the breaker that powers the garage.
The breaker may have a bad fuse, affecting the power in the garage. If that is not applicable, then check the outlet. Ensure you use a dedicated outlet for the freezer, and avoid using an extension cord. Test the outlet by plugging a smaller appliance into it. If the appliance comes on, the problem may be voltage output. You may need the services of an electrician to determine if the problem is from the garage or freezer.
Freezer Not Freezing and Leaking Water – Quick Fix
There is a defrost problem if a freezer is not freezing and is leaking water. The timer may be stuck in the defrost cycle, unable to advance the system out. As a result, the freezer stops freezing as the leftover ice continues to melt.
Disconnect the refrigerator from electric power for about a minute. Then, reconnect it and wait for the compressor to run. The hard reset should fix the defrost system, but check the defrost system components if the compressor does not start.
Start with the timer and heater. These two have likely failed and kept the freezer in defrost mode. If you find any faulty components, replace them.
The problem may also stem from a blocked defrost drain. If the drain is clogged with debris, condensate water cannot flow out. Over time, it will overflow and leak out of the freezer. The drain pan may be leaking through cracks.
Inspect the drain and drain pan under the freezer. If the drain is clogged with debris, unclog it with a stiff wire and hot water. Then, empty the drain pan and check for cracks. If it is cracked, replace it.
Recap
It is not a daily occurrence to see a freezer fail. But if you have a problem with your freezer not cooling, it is crucial to find a solution as quickly as possible. Thankfully, some of the fixes are easy, and you can do them yourself. Remember to disconnect the refrigerator from electric power before performing any repairs.
However, if any repairs are too difficult or complex, contact the manufacturing brand or hire a qualified technician for immediate assistance.
Get Instant Help — Ask An Experienced Verified Appliance Technician
Need expert help? Click here to use the chat box on this page to speak with a verified appliance technician right away. No need for expensive in-home service calls. No appointments. No waiting.