Fridge compressor fitting; seems a bit daunting, doesn’t it? Don’t worry! This article demystifies the process and gives you a comprehensive step-by-step guide to getting it done.
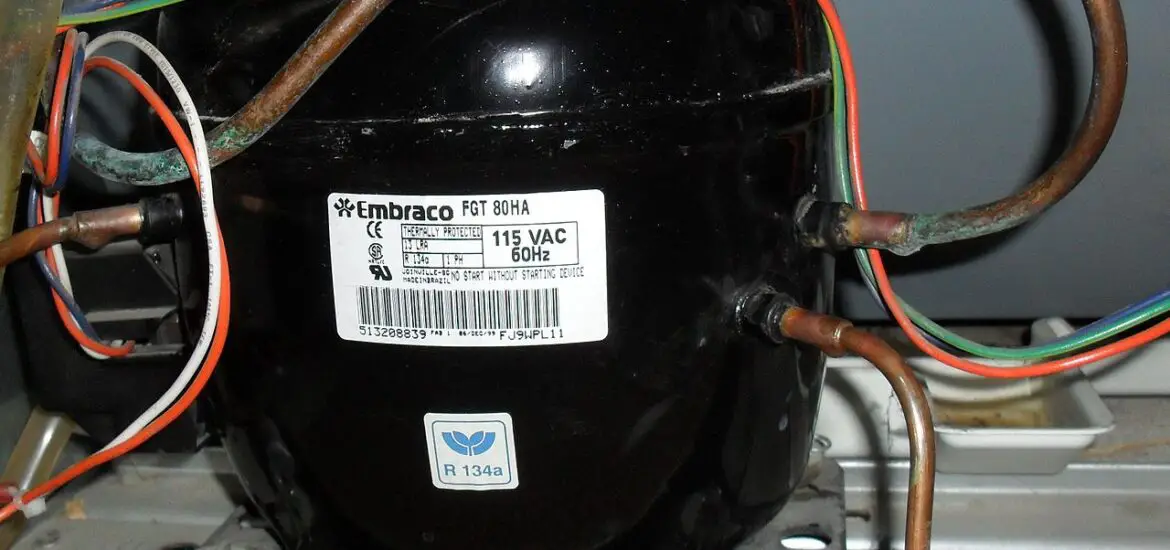
Table of Contents
Understanding the Role of a Fridge Compressor
The fridge compressor is the unsung workhorse in your kitchen appliance, playing a central role in the refrigeration cycle. It pumps refrigerant through the system and helps maintain the cool temperature inside your fridge.
What a Fridge Compressor Does
A fridge compressor isn’t just any old component; it’s the heart of your refrigerator. It’s this little box that works tirelessly to keep your food cold. Think about it. Who else is working while you’re sleeping to make sure your leftovers are safe for tomorrow’s lunch?
When to Replace Your Fridge Compressor
But how do you know when it’s time for a new fridge compressor? Well, if your fridge is warm but the light’s on or there’s a clicking noise coming from the back, it might be time for a compressor check-up. A little research online can lead you to other signs like excessive frost buildup or your fridge running non-stop. Don’t ignore these red flags, okay?
Safety Precautions Before Starting the Fridge Compressor Fitting Process
Just like any repair job, safety is paramount when fitting a fridge compressor. You’re dealing with electrical components and potential hazards, so taking precautions is non-negotiable.
Disconnecting the Refrigerator
Before you even think about starting the fridge compressor fitting, you’ve got to disconnect the refrigerator. Why? Simple. Electricity and DIY don’t mix! Turn off the fridge, unplug it, and wait for a bit before starting. Safety first, folks!
Gathering the Right Tools
Every good handyman knows that having the right tools is half the battle. For this task, you’ll need a variety of screwdrivers, pliers, a multimeter, and of course, your new compressor. Have these at the ready to streamline the process.
Check out these other related articles…
How to Replace Fridge Compressor: 3 Proven Replacement Steps
Chest Freezer Compressor Hot: 3 Causes & Tested Solutions
Fridge Compressor Wiring With Capacitor: In 5 Easy Steps
Fridge Compressor Pressure Test: Your Ultimate DIY Guide
Fridge Compressor Oil Change: In 5 Easy Steps
Fridge Compressor Open: 2 Common Causes & Guaranteed Fixes
Fridge Compressor Leaking Water: 3 Causes & Guaranteed Fixes
Steps for Fridge Compressor Fitting
Roll up your sleeves, it’s time to get into the meat of the process. From removing the old compressor to installing a new one, each step is critical for a successful fridge compressor fitting.
Removing the Old Compressor
The first step is to remove the old compressor. This process requires care to avoid damage to the fridge or harming yourself in the process.
Identifying the Compressor
First things first. Where’s the compressor? It’s usually at the back of your fridge, at the bottom. It looks like a black box and has a bunch of wires and tubes attached. That’s your target.
Disconnecting and Removing the Old Compressor
Ready to go? Start by disconnecting the wires and tubes. Be gentle, remember these parts aren’t made of steel. Once everything is disconnected, you can start removing the old compressor. It’s usually held in place by a few bolts. Easy peasy!
Installing the New Compressor
With the old one out, it’s time to fit in the new compressor. This part of the process requires accuracy and patience, ensuring everything is correctly set up.
Preparing the New Compressor
So, you’ve got your new compressor. Great! But don’t rush into installing it. Make sure it’s clean and primed if needed. It’s like prepping for a first date, you want to make a good impression, right?
Fitting the New Compressor
Now comes the key part, fitting the new compressor. To start off, slide your shiny new compressor into its designated spot in the fridge. Align the tubes and wires, just like they were in the old one. It’s important to connect them correctly, just like a guitarist tuning his instrument, every note matters. After that, follow the manufacturer’s instructions to connect the wires and tubes properly. There’s no harm in checking twice, right?
Securing the New Compressor
Now that everything is connected, you’ll want to secure the new compressor. Bolt it in place, but not too tight! You don’t want to damage your new equipment. It’s like tucking in a child, snug but not too tight.
Post-Installation Checks
Done with the installation? Not so fast! Post-installation checks are crucial to ensure everything’s fitted right and the fridge is working as it should.
Checking Connections
After everything’s done, double-check your work. Are all the wires and tubes properly connected? No loose ends? Good job! It’s like proofreading an essay, you want it to be perfect, don’t you?
Powering On and Testing the Fridge
Here comes the moment of truth. Plug the fridge back in, switch it on, and let it run for a while. Keep an ear out for any strange noises. If everything seems normal, you’re all set! Give yourself a pat on the back, you’ve done a good job.
Tips for Fridge Compressor Fitting
Fitting a fridge compressor isn’t a cakewalk, but some tips can make the process smoother. Here’s one: Take pictures before you start disconnecting anything. It’s like a map that will guide you when you’re reconnecting everything. And remember, if you ever feel unsure about anything, don’t hesitate to consult with a professional!
When to Consult a Professional for Fridge Compressor Fitting
Despite your best efforts, sometimes it’s best to leave it to the professionals. If you’re unsure about any part of the process, don’t be a hero. A professional can ensure the job gets done right the first time. It’s not admitting defeat; it’s being smart!