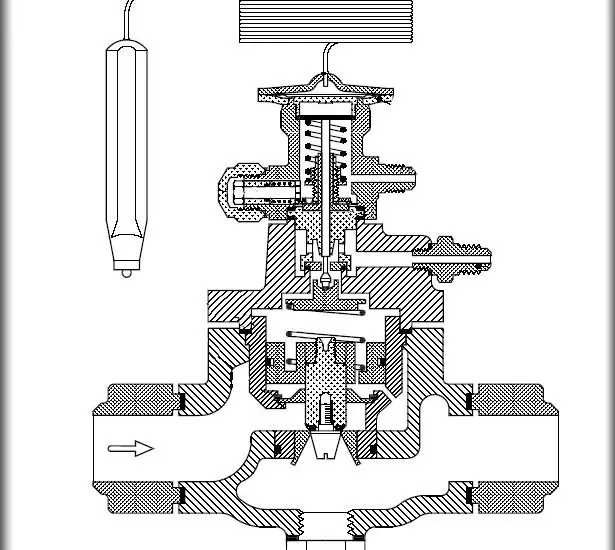
Understanding TXV adjustment is essential for maintaining an efficient air conditioning or refrigeration system. In this comprehensive guide, you’ll learn every step involved in the process.

Table of Contents
Gathering the Right Tools for TXV Adjustment
Before diving into the TXV adjustment process, it is crucial to assemble all the necessary tools. Having the right tools at your disposal will make the task smoother and ensure safety and efficiency.
Thermometer: Accurate temperature readings are vital. A good quality thermometer will help you measure the superheat values correctly. It is advisable to use a digital thermometer for precise readings.
Check out this Kamtop Dual Channel Thermometer listed on Amazon.
Adjustable Wrench: An adjustable wrench is needed to make the adjustments on the TXV. Ensure it fits nicely on the valve’s stem to avoid damaging it.
This WORKPRO 2-piece Adjustable Wrench Set from Amazon is an ideal wrench to help you get the job done.
Manual or Guide: Having the system’s manual or guide will be beneficial. It contains the specifications and guidelines from the manufacturer, aiding you to understand the exact parameters needed for adjustments.
Notebook and Pen: Keep a notebook and a pen handy to jot down the initial and final readings after the adjustment. Documenting the readings will help in maintaining a record for future reference.
Personal Protective Equipment (PPE): Ensure you have gloves and safety glasses to protect yourself from potential hazards during the adjustment process.
Safety Measures and Preparations Before Starting the TXV Adjustment
Once you have gathered all the necessary tools, the next step is to take safety measures and make proper preparations before commencing the TXV adjustment.
Here we break down the vital safety precautions and preparatory steps to ensure a secure and successful TXV adjustment:
System Shutdown: Ensure to shut down the entire system before beginning. It will prevent any accidents and allow you to work safely. Disconnect the power supply to avoid electrical hazards.
Workspace Clearance: Clear the workspace of any clutter. Ensure there is sufficient lighting and ventilation in the area you are working to prevent accidents and facilitate ease of work.
Refrigerant Handling: Handling refrigerants requires caution. Always use gloves and safety glasses to protect yourself from any refrigerant that might escape during the adjustment process.
Consulting the Manufacturer’s Guidelines: Before making any adjustments, always consult the manufacturer’s guidelines to understand the ideal parameters for your system. This will help in avoiding mistakes and achieving the correct settings.
Emergency Contacts: Keep a list of emergency contacts handy, including a professional technician whom you can call in case of any mishaps or if you find yourself unable to complete the process safely.
TXV Adjustment: Step-by-Step Process
In this section, we will cover the precise steps needed to undertake a successful TXV adjustment, ensuring your air conditioning or refrigeration system operates efficiently:
Step 1: Locating the TXV
Begin your TXV adjustment by locating the thermal expansion valve in your system. It is usually found near the evaporator in air conditioning or refrigeration systems.
You might need to consult your system’s manual or do a quick online search specifying your system’s make and model to find its exact location.
Step 2: Consulting the Manufacturer’s Guidelines
Before making any adjustments, refer to the manufacturer’s guidelines to know your specific system’s ideal parameters and settings. This information is vital to prevent any missteps during the adjustment process.
If you have lost the manual, try to find a digital copy on the manufacturer’s official website.
Step 3: Measuring the Current Superheat Value
This step involves measuring the existing superheat value to understand the adjustments needed. Use a reliable thermometer to obtain accurate readings.
Place the thermometer on the outlet of the evaporator to get the exact value. Remember to note down the initial value before making any adjustments.
Step 4: Adjusting the TXV Valve
Now comes the critical part of adjusting the TXV valve. Use a wrench to turn the adjustment stem available on the valve. Usually, turning it clockwise increases the superheat while anticlockwise decreases it.
Make adjustments gradually and allow the system to stabilize before noting down the new readings. Always approach this step with patience to achieve the desired settings accurately.
Step 5: Re-evaluation
After making the initial adjustments, it’s time for a re-evaluation. Run the system for a while to observe the changes.
Note any variations in the temperature and verify if the superheat values are within the recommended range as per the manufacturer’s guidelines. Don’t hesitate to redo the adjustments if necessary, aiming for optimal performance.
Check out these other related articles…
TXV Valve vs Piston: A Comprehensive Comparison
When to Replace Expansion Valve: 3 Telltale Signs
Pressure Control and Expansion Valve: A Complete Guide
TXV vs Expansion Valve: A Comprehensive Comparison
Adjusting Superheat on TXV: In 6 Simple Steps
Troubleshooting Common Issues During TXV Adjustment
Even with the most meticulous preparations, you might encounter some challenges during the TXV adjustment process. Here, we address the common issues and how to troubleshoot them:
Issue 1: Fluctuating Superheat Values
It is not uncommon to notice fluctuating superheat values during the adjustment process. This could be due to air or moisture in the system. In this case, you might need to evacuate and recharge the refrigerant to stabilize the values.
Issue 2: Potential Leaks
While adjusting the TXV, you might notice signs of refrigerant leaks, which can lead to inefficient system performance. Ensure to check all connections and seals thoroughly.
If a leak is identified, it must be fixed immediately before proceeding with the adjustment. You might need to call a professional technician if you are unsure of how to fix it yourself.
Issue 3: Non-Responsive TXV
If the TXV does not respond to adjustments, it might be faulty or stuck. Try tapping it gently with a tool to see if it becomes responsive.
If this doesn’t work, the TXV might be damaged and needs replacement. In such a scenario, seeking the help of a professional technician is advisable.