We have prepared this comprehensive article to help you troubleshoot and fix your GE refrigerator dispenser problems. In addition, we will answer your most frequently asked questions about GE refrigerator dispensers.
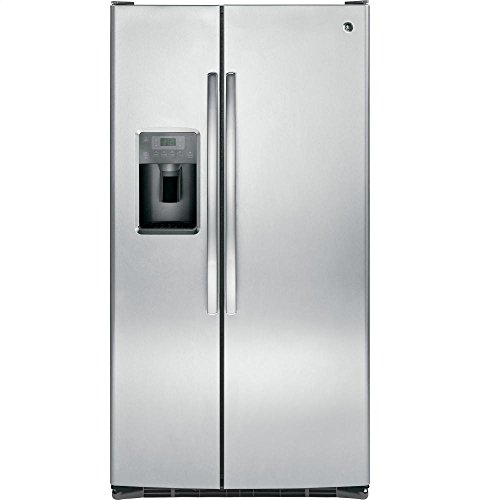
Table of Contents
GE Refrigerator Water Dispenser Not Working – What to Do
If your GE refrigerator water dispenser is not working, do the following:
1. Check the Water Tube
The first component of your refrigerator to troubleshoot when it is not working is the water tube. First, check if the water in the tube is frozen. To do this, detach the tube from the dispenser and try to circulate air throughout every corner of the tube. If any does not circulate, then the water is frozen and needs to be thawed.
A frozen water tube does not support the circulation of water, so it may seem like the dispenser is damaged when it refuses to dispense water. To ensure the water tube does not get frozen, the freezer temperature should be between 0 and 10 degrees Fahrenheit. If the freezer temperature is set below this range, the freezer may become too cold and freeze the water tube again. On the other hand, if the freezer temperature is above that range, the freezer may become too warm.
2. Inspect the Water Inlet Valve
Water is supplied to the dispenser via the water inlet valve. If the water in the water inlet valve is not much, or if the valve is twisted, water will not be supplied to the dispenser. According to refrigerator manufacturers and repair experts, the pressure in the water inlet valve needs to be about 20psi before it can supply water to the dispenser.
Test the water inlet valve for continuity using a multimeter. If the multimeter reading indicates that there is no continuity in the water inlet valve, replace it.
3. Diagnose the Dispenser Control Board
The control board is the heart of a refrigerator dispenser. If it is defective, other components will be affected. If a part of the dispenser control board is working, you can repair the other defective parts. However, if the entire control board is not working, go for a replacement.
4. Check the Dispenser Switch
Voltage gets to the dispenser via the dispenser switches. If a single switch is burnt or bent, your GE refrigerator will not function. Apart from visual inspection, the other way to know if the dispenser switch is defective is by running a continuity test. If the test reading shows that there is no continuity in the dispenser switch, replace it.
5. Check the Water Filter
The most common problem with a dispenser water filter is clogging. When the water filter is clogged, the dispenser may work slowly, or may not work at all, in a worst-case scenario. Refrigerator manufacturers and repair experts recommend that you change your dispenser water filter at least once in six months to prevent clogging and to ensure your water is free from impurities.
GE Refrigerator Ice Dispenser Not Working – Quick Fix
If the ice dispenser of your GE refrigerator is not working, here are the different parts to troubleshoot to fix it:
1. Dispenser Control Board
This component of your dispenser facilitates the operation of all other components. The good thing about the dispenser control board is that it rarely goes bad, but if it does, you have to replace it instead of repairing it.
It is recommended that only refrigerator repair experts troubleshoot and replace the dispenser control board because of its complex setup. If you are not an expert, you may end up worsening the condition of your ice dispenser.
2. Dispenser Switch
The dispenser switch allows voltage to go to the dispenser. If the dispenser switch is burnt or broken, your ice dispenser will not be able to function. Apart from physically inspecting the dispenser switch, you can also conduct a continuity test to know whether or not the dispenser switch is defective and needs to be replaced.
3. Auger Motor
Ice is pushed down the chute of the dispenser with the help of the auger motor. Depending on how often you use the ice dispenser, the auger motor may get burnt or the blades may be broken. Whichever the case is, you won’t get ice when you need it.
To know if the auger motor is defective, test for continuity using a multimeter. If the test results indicate that there is no continuity in the auger motor, replace it.
4. Dispenser Actuator
The dispenser switch works with the dispenser actuator to power the auger motor. The dispenser switch cannot be activated if you have a defective dispenser actuator. Check every corner of the dispenser actuator and if you see any cracks, replace it.
5. Dispenser Solenoid
The door flap of the ice dispenser opens and closes with the help of the dispenser solenoid. So, having a broken dispenser solenoid means that you won’t be able to get ice. The only way to know if the dispenser solenoid of your refrigerator is defective is by conducting a continuity test.
If the result shows that the dispenser solenoid is not working, replace it.
6. Ice Bucket Auger
When you press the ice dispenser lever, the auger is rotated with the help of the auger motor. As this rotation is ongoing, ice is forced to the dispenser door and through the chute.
This mode of operation will not take place if you have a broken ice bucket auger is broken or disconnected from the auger motor. Run a continuity test and replace the auger if the test shows it lacks continuity.
[amalinkspro type=”showcase” asin=”B00LGUBHJG” apilink=”https://www.amazon.com/dp/B00LGUBHJG?tag=refrigeratorsreviewed-20&linkCode=osi&th=1&psc=1″ new-window=”true” addtocart=”true” nofollow=”true” sc-id=”6″ imgs=”LargeImage” link-imgs=”false” specs=”The GE Appliances WR17X11939 Ice Bucket Auger Assembly is a genuine OEM (Original Equipment Manufacturer) part designed and engineered to exact specifications” btn-color=”#ff9900″ btn-text=”Buy on Amazon” alignment=”aligncenter” hide-prime=”0″ hide-image=”0″ hide-price=”0″ hide-button=”0″ width=”600″]GE WR17X11939 Genuine OEM Ice Bucket Auger Assembly for GE Refrigerators[/amalinkspro]
GE Refrigerator Ice Dispenser Freezing Up – Quick Fix
If your ice dispenser is freezing up too soon, you can solve the problem by doing the following:
1. Check the Freezer Temperature
According to the Food and Drug Administration (FDA), the freezer of your refrigerator should be at a temperature threshold of about 0 – 10 degrees Fahrenheit. If your refrigerator is below this temperature range, the freezer will get to form ice very quickly.
In light of the above, ensure that your freezer temperature is in the recommended temperature bracket and you won’t have to worry about your dispenser freezing up rather quickly.
2. Inspect the Water Filter
The water filter gets clogged by dirt over time and that can cause the water pressure to drop. When that happens, the ice dispenser may freeze up. To prevent the ice dispenser from freezing up, change the water filter once you notice it is clogged.
3. Examine the Water Pressure
If the aforementioned components all check out, then the next thing to check is the water pressure of the refrigerator. Freezing issues will arise if the water pressure is too low or too high. According to refrigerator manufacturers and maintenance experts, the water pressure of the refrigerator should be 2opsi. Anything above that mark can cause freezing.
4. Ensure the Water Line is Properly Aligned
If the water line of your GE refrigerator is not properly aligned in the valve, it causes a splashback, which leads to freezing. To prevent a splashback, ensure that the water line is properly positioned.
5. Check if the Circuit Board is Defective
The circuit board may be responsible for the incessant freezing up of your refrigerator ice maker. The circuit board needs to be troubleshot and replaced if it is discovered to be the source of the freezing problem.
6. Check if the Ice Dispenser Chute is Frozen
The dispenser chute is not the same as the water line. You can access the chute by sliding out the ice tray. Check if it is frozen or not. If it is frozen, use a bowl of hot water to defrost it and the dispenser freezing problem will be resolved.
7. Examine the Water Inlet Valve
The last component of your GE refrigerator that may be responsible for the freezing issue is the water inlet valve. With this component, water can get to the ice dispenser.
However, in the event of a fault on the water inlet valve, it may freeze up once it is overfilled. Run a continuity test on the water inlet valve to know if it is working properly. If it is not, get a new one.
GE Refrigerator Ice Dispenser Flap Not Opening – What to Do
If the flap or chute door of your GE refrigerator is not opening or closing, start the repair process by unplugging the refrigerator from its power source.
After that, detach the drip tray and the façade by inserting a putty knife at its bottom. Before removing the dispenser switches, take note of their original position because you will have to reconnect them.
Once that is done, take out the screws holding the switch and light housing in place. Next, press the tabs so that the housing can be released and secure it with a tape. At this point, remove the old flap using a flathead screwdriver and install a new one. You will know if the new flap is properly aligned if it snaps into place.
After that, reinstall the tabs and remove the tape. Ensure that the switch and light housing screws you removed are properly fitted back in. Rewire the switch and ensure that the dispenser façade top is aligned with the edge of the dispenser housing.
After that, reattach the drip tray, plug the refrigerator power cord into a power source and check if the new flap is working properly.
[amalinkspro type=”showcase” asin=”B00A8O05M6″ apilink=”https://www.amazon.com/dp/B00A8O05M6?tag=refrigeratorsreviewed-20&linkCode=osi&th=1&psc=1″ new-window=”true” addtocart=”true” nofollow=”true” sc-id=”6″ imgs=”LargeImage” link-imgs=”false” specs=”This is a genuine GE Original Equipment Manufacturer (OEM) part” btn-color=”#ff9900″ btn-text=”Buy on Amazon” alignment=”aligncenter” hide-prime=”0″ hide-image=”0″ hide-price=”0″ hide-button=”0″ width=”600″]GE WR17X11653 Genuine OEM Ice Dispenser Damper Door for GE Refrigerator[/amalinkspro]
GE Refrigerator Water Dispenser Drip Tray Removal – What You Need to Know
To begin with, if your GE refrigerator model was made after 1987, the drip tray cannot be detached. However, drip trays designed prior to 1987 can be removed by opening the front grille. If the drip tray is filled with water, pull it out from the refrigerator, empty it, and reattach it.
GE does not make detachable drip trays anymore because overflowing is not expected, except on rare occasions. The location of the GE refrigerator drip tray is usually beneath the compressor. The reason for this position is for it to be close enough to the heat produced by the compressor motor. With the heat, the drip tray is not get frozen regardless of the temperature level of the refrigerator.
Perhaps you notice that your GE refrigerator drip tray is overflowing and since you are not able to access the drip tray, the big question is, what can you do? Well, the best thing to do is to clear the drain line, which may be clogged.
If the drip tray is clogged, water will run through the back of your refrigerator instead of filling the drip tray. So, there is no point removing the drip tray even if you see water on your floor.
GE Refrigerator Water Dispenser Dripping – How To Solve It
If your GE refrigerator water dispenser is leaking or dripping, troubleshoot the following components and replace the defective one:
1. Water Filter Head
Check if the water filter head is cracked or if the seal missing if any defects are discovered in the water filter head, replace it.
2. Water Inlet Valve
Water gets to the water dispenser via the water inlet valve. If the valve is broken or is loosely fitted, your dispenser will start leaking. Check the valves once you notice any leaks and if the valve is broken, replace it.
3. Water Tank Assembly
Beside the aforementioned components, check the water tank assembly to see if it is responsible for the dripping problem of your GE refrigerator. If you discover a crack on the water tank assembly, replace it, instead of trying to repair it. This is because gluing a water tank assembly made of plastic will be holding the sole of your shoe with tape.
4. Water Filter
The water filter of your GE refrigerator is installed to ensure you always drink pure water. However, if the water filter is clogged or if it is not well connected to the water filter housing, your refrigerator will start leaking. Whichever the case, replace the water filter and the leaking problem will be a thing of the past.
[amalinkspro type=”showcase” asin=”B08KXYKBL2″ apilink=”https://www.amazon.com/dp/B08KXYKBL2?tag=refrigeratorsreviewed-20&linkCode=osi&th=1&psc=1″ new-window=”true” addtocart=”true” nofollow=”true” sc-id=”6″ imgs=”LargeImage” link-imgs=”false” specs=”PREMIUM MATERIAL:After a large number of experiments, we select natural active coconuts carbon sourced from Sri Lanka as the critical material of the refrigerator water filter .This material has rich micropores and can absorb harmful substances most effectively.” btn-color=”#ff9900″ btn-text=”Buy on Amazon” alignment=”aligncenter” hide-prime=”0″ hide-image=”0″ hide-price=”0″ hide-button=”0″ width=”600″]Refrigerator Water Filter Cartridge SMART WATER Replacement for GE MWF, MWFP, GWF,HWF,HWFA,GWF01,GWF06, FMG-1, FMG, WFC1201, PC75009, RWF1060 2 pack[/amalinkspro]
GE Refrigerator Water Dispenser Error Codes – What You Need to Know
To begin with, most refrigerator dispenser controls have error codes or fault codes programmed into them. With these codes, technicians can quickly identify the problem your GE refrigerator is facing.
A beep, flashing green error sign is displayed with the error code on your refrigerator control panel to indicate that an error has been detected. Below is a list of error codes and their meaning:
1. FF
This error code means that the temperature of your refrigerator is rising, so check if the dispenser components are getting frozen up.
2. PF
This means that there is a power interruption on your GE refrigerator.
3. Cl
Cl indicates that you should check if every component of the ice dispenser is working properly.
4. dE
When you send the control panel of your GE refrigerator displaying a dE error, it means you have not used the defrost system for more than 24 hours.
5. CC
If your GE refrigerator displays a “CC” error, it is an indication that the temperature of your refrigerator is not correct.
Meanwhile, if your GE refrigerator displays tC and tF, do not mistake them for error codes. They are the symbol for Turbo Cool setting and Turbo Freeze setting, respectively.
GE Refrigerator Water Dispenser Making a Loud Noise – What to Do
If your GE refrigerator water dispenser is making a loud noise when running, the first component to check is the water filter. Perhaps the new water filter you installed is causing the loud noise.
Ensure that the water filter and its housing are properly connected and that nothing is blocking the seal. If there are traces of air in the water line, pour at least 15 glasses of water to get rid of the air in the water line.
If the water filter is working properly then troubleshoot the water inlet valve and replace it if it is found to be defective. The water inlet valve tends to make a squeaky noise if it is broken.
GE Refrigerator Water Dispenser Keeps Running – Solutions
If your GE refrigerator water dispenser keeps running it is because the button of the dispenser is stuck. To resolve this problem, first, unplug the refrigerator and turn off the water supply valve of your kitchen.
Check for the water line connected with a 1/4-inch copper pipe. In the middle of the pipe, you should see a saddle valve threaded with a wire. To close the saddle valve, turn it in a counterclockwise direction. After that, the water dispenser should stop running.
[amalinkspro type=”showcase” asin=”B004W6IL04″ apilink=”https://www.amazon.com/dp/B004W6IL04?tag=refrigeratorsreviewed-20&linkCode=osi&th=1&psc=1″ new-window=”true” addtocart=”true” nofollow=”true” sc-id=”6″ imgs=”LargeImage” link-imgs=”false” specs=”The GE Appliances WR55X10956 Main Control Board Assembly is a genuine OEM (Original Equipment Manufacturer) part designed and engineered to exact specifications” btn-color=”#ff9900″ btn-text=”Buy on Amazon” alignment=”aligncenter” hide-prime=”0″ hide-image=”0″ hide-price=”0″ hide-button=”0″ width=”600″]GE WR55X10956 Genuine OEM Main Control Board Assembly for GE Refrigerators[/amalinkspro]
GE Refrigerator Water Dispenser Light Not Working – What to Do
If your GE refrigerator water dispenser light is not functioning, press and hold down the light button. This simple action will reset the unit and the light will start working properly this time.
Similarly, if your GE refrigerator water dispenser light stays on even when the dispenser is not dispensing, it means the light button is stuck. You have to check if the light button is in its ON position- the same level as the refrigerator wall.
After that, go to the light switch and pull it out carefully to release the stuck button. Refrigerator manufacturers and repair experts recommend that you manually operate the light switch by pressing and releasing it, several times. This will help to prevent the light button from getting stuck again.
What is the Meaning of GE Refrigerator Dispenser Off Message?
If your GE refrigerator dispenser is showing an “OFF” message, it means that you need to adjust or replace the water filter, depending on its working condition. After the water filter is adjusted correctly or a new one is installed, the message displayed should be “FRONT”. If the water filter shows you a “BACK” message, reverse or reinstall it.
GE Refrigerator Water Dispenser Slow or No Flow – Quick Fix
Having a GE refrigerator water dispenser that dispenses slowly can be quite frustrating. If you have been battling with this problem, check if the water filter is clogged. If it is, get a new water filter.
That said, to know if the water filter is clogged, detach it and put a bypass plug in its position. Turn on the water dispenser and if you notice an improvement in water flow rate, then the water filter is responsible for the slow dispensing.
What’s more, sediments from construction sites can clog your water filter when they find their way into your water system. In light of this, refrigerator repair experts recommend that you change your water filter every six months. Check out the video below to learn more about fixing a refrigerator dispenser that is slow or not flowing at all…
Check out these other articles…
- Samsung Refrigerator Dispenser Problems [Solved]
- Whirlpool Refrigerator Error [Solved]
- KitchenAid Freezer Not Freezing [How to Fix]
- LG Freezer Not Freezing [Solutions]
- Frigidaire Freezer Not Freezing [How to Fix]
- Samsung Freezer Not Freezing – How to Fix
GE Refrigerator Water Dispenser Turns On by Itself – Fast Fix
One of the reasons why your GE refrigerator water dispenser is randomly turning on is because the motor relay on the motherboard is bad. To make matters worse, activating the Control Lock mode will not solve the problem.
Perhaps the dispenser switch is failing and transmitting the wrong signal to the dispenser thinking you are pressing the lever. If you discover that the relay motor or dispenser lever is defective, replace it, and the automatic turning on problem will be over.
GE Refrigerator Water Dispenser Sticks – How to Solve It
If your GE refrigerator water dispenser sticks, do the following:
1. Check the Reset Button
The first part to check if your refrigerator water dispenser becomes sticky is the reset button. It may be that the reset button was pressed too hard or jammed. Press the reset button to release it and if that does not work, then unplug the unit from its power source.
After unplugging, wait for 10 to 15 minutes and then plug back in the refrigerator. The reason for this action is because refrigerator dispenser buttons tend to be sticky in the event of a temporary power outage.
2. Inspect the Refrigerator Door
If your refrigerator door is open, the dispenser button will appear to be stuck because it cannot release water. So, ensure that the door of your GE refrigerator is closed before attempting to dispense water.
3. Ensure that the Lock Mode is Deactivated
If your model of GE refrigerator is equipped with a lock mode, the dispenser button will appear to be stuck if the locking mechanism is activated. The lock mode can be found on the front of the dispenser. Also, ensure that the lock mode is deactivated by pressing the “Unlock” icon.
4. Inspect the Dispenser Wires for Defects
Several wires are run through the water dispenser button to transmit signals to the different components of your refrigerator to perform their respective functions.
These wires can become loose or get burnt over time. When that happens, the dispenser button will become sticky. Since the refrigerator wiring can be quite tricky and dangerous to inspect, it is best to hire a technician to help you troubleshoot and fix it.
[amalinkspro type=”showcase” asin=”B004H3XX00″ apilink=”https://www.amazon.com/dp/B004H3XX00?tag=refrigeratorsreviewed-20&linkCode=osi&th=1&psc=1″ new-window=”true” addtocart=”true” nofollow=”true” sc-id=”6″ imgs=”LargeImage” link-imgs=”false” specs=”The GE Appliances WR60X10258 Dispenser Ice Crusher Motor is a genuine OEM (Original Equipment Manufacturer) part designed and engineered to exact specifications” btn-color=”#ff9900″ btn-text=”Buy on Amazon” alignment=”aligncenter” hide-prime=”0″ hide-image=”0″ hide-price=”0″ hide-button=”0″ width=”600″]GE WR60X10258 Genuine OEM Dispenser Ice Crusher Motor for GE Refrigerators[/amalinkspro]
GE Refrigerator Dispenser Problems – Related FAQs
How Does GE Refrigerator Water Dispenser Work?
When the paddle of your GE refrigerator water dispenser is pressed, the door switch that operates the water valve is activated. Water flows from the reservoir at the back of the refrigerator through the valve and then to the tubes. From there the water goes to the chute and into your glass.
The operational mechanism of the water dispenser is such that water is always supplied to the reservoir, and into your glass when you press the lever. If you press the lever and water does not enter your glass or the dispensing rate is low, then something might be wrong with some of the refrigerator dispenser components and require repair or replacement.
How to Clean a GE Refrigerator Water Dispenser
To clean up deposits on your GE refrigerator water dispenser, soak the affected area with undiluted vinegar and a teaspoon of citric acid powder. Also, note that the soaking should be for about 30 minutes to make the deposit become loose or completely disappear.
Since the exterior of most GE appliances is made of aluminum, do not clean them with water. Instead, use a dry cloth to wipe them. That said, ensure that you unplug your refrigerator before you start cleaning it.
How to Remove Ice Dispenser Cover on a GE Refrigerator
You need to remove the cover of your GE refrigerator ice dispenser to gain access to the internal components if you want to do some repairs. To remove the cover, use a flat blade screwdriver to run through the edges of the face panel.
Once the face panel snaps free, place your finger under the wiring connector. After that, take out the electrical harness connector to allow you to pull out the cover.
How to Replace GE Refrigerator Dispenser Control Board
To replace the control board of a GE refrigerator dispenser, unplug the appliance from the wall socket. Next, pull out the bottom of the control panel from the dispenser. After that, pull out the top of the control panel and detach the wire connectors attached to the panel.
You can now set the control panel aside and have access to the part needed for your repairs.
How Do I Keep the Water Dispenser from Freezing in My GE Refrigerator?
To prevent your GE refrigerator water dispenser from freezing up, install a water line heater, which is designed to hold the control panel wiring together and prevents them from freezing. While it is quite expensive, the only other option you have is to thaw the dispenser water line. However, your refrigerator dispenser will freeze again after some time.
How to Unclog a GE Refrigerator Water Dispenser
Before attempting to unclog your refrigerator water dispenser, ensure that the refrigerator is turned off and unplugged from the wall outlet. Once that is done, move the refrigerator from the wall, if it was positioned there initially. A piece of towel should be placed under the refrigerator in case of any leaks.
The next thing is to unscrew the water line and press the lever to see if the dispenser releases water. If water does not come out of the chute, it is an indication that the water line is clogged. Thaw the water line to resolve the problem.
How Do I Unlock My GE Refrigerator Water Dispenser?
To begin with, the lock feature disables the water dispenser and ice maker of your GE refrigerator. But then, other components of the control panel will still be enabled. For most GE refrigerator models, you can disable the lock feature by going to the “Settings” and then tapping the “Lock“ feature if it shows a lock icon.
Get Instant Help — Ask An Experienced Verified Appliance Technician
Need expert help? Click here to use the chat box on this page to speak with a verified appliance technician right away. No need for expensive in-home service calls. No appointments. No waiting.