We know, it’s wintertime, and fiddling with a home cooling unit is probably the last thing on your mind. If anything, you need to worry about heating, not cooling. However, to save you from stress, later on, you must know how to winterize your swamp cooler in preparation for the hot season when you would be needing it.
Hold up, what does it mean to winterize?
To winterize simply means to adapt your swamp cooler to the winter season. As you won’t be needing it then, it involves a series of process that reflects the current season (winter) and prepares it ahead for hot summer months.
Table of Contents
Why You Need to Winterize Your Swamp Cooler
Yes, this is the best time to winterize a swamp cooler, but why exactly?
- It ensures efficiency
For one, winterizing helps to keep the years on your unit. When you carry out this important maintenance, you are investing in efficient, reliable and long-lasting action.
- It prevents the growth of microbes
Winterizing protects your swamp cooler from mildew, mold and bacterial growth. Being a unit that requires water for its operation, it provides an optimal environment for microorganisms to thrive in a moist environment. Periodic cleaning and maintenance help to prevent this.
- It eliminates swampy odor
Swamp coolers work by evaporative cooling. So, over time, a swamp cooler tends to give off a swampy, damp smell.
- Protects pipes
Furthermore, it saves your pipes from leaks and bursts due to water freezing up in them.
- Prevents rust and corrosion
Winterizing also prevents rust and corrosion. Many parts are in constant contact with water which leads to rusting. Drying and covering them during winter gives them a break and prevents rust.
- Warranty assurance and saves costs
Your unit can break down due to any of the above reasons, leading to unnecessary stress as it won’t work when you need it to. More so, the warranty doesn’t cover the breakdown caused by these. Thus, winterizing would save you avoidable costs of repair or replacement.
Fancy a portable swamp cooler? Check out this product below:
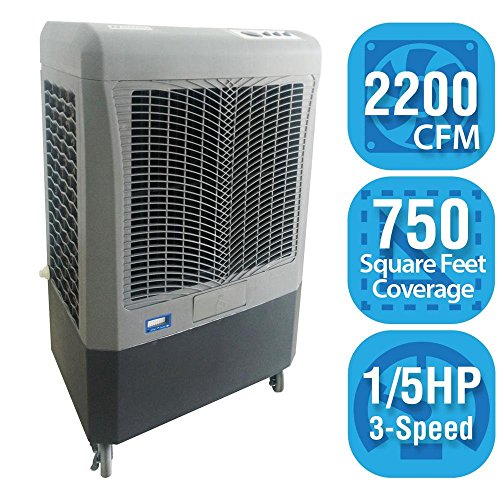
[amalinkspro type=”cta-btn-css” ctabtn-id=”” asin=”B00MYWQL96″ apilink=”https://www.amazon.com/dp/B00MYWQL96?tag=refrigeratorsreviewed-20&linkCode=osi&th=1&psc=1″ addtocart=”false” new-window=”true” nofollow=”true” alignment=”alignright”]Click here to check out this portable swamp cooler on Amazon[/amalinkspro]
How To Winterize A Swamp Cooler
- Disconnect the swamp Cooler
Before you do anything else, the first thing is to disconnect your unit from the power supply. This is part of general safety when working on an electrical appliance.
Also, remember that you won’t be using it for a while, hence you have to unplug anyway. More so, if you just switch the unit off but leave it plugged in, a switch could accidentally get turned on and the unit kicks into action. So, it’s better to completely unplug from the start.
- Turn the water supply off
Swamp coolers work based on evaporative cooling, and water is used to keep the pads wet. You need to stop the water supply by turning off the supply valve.
- Drain the water pipe.
Disconnect the water pipe linking the air-conditioner and valve and drain out the water in the pipe
If not, the water within would get frozen in the winter and stress the pipe, leading to cracking or total bursting of the pipe.
If all the water won’t come out, blow through the hose at one end to push out the water. Dry the hose and store in a cool and dry place
- Remove residual water
Removing the standing water that has collected in the cooler over time will prevent rust and mineral build-up. Open the drain at the base of the unit to let the water out with a wrench or pair of pliers. If you don’t have these, no worries.
You can simply use a small bowl or bailer to scoop out a bulk of the water and then use a sponge, foam or absorbent cloth to soak up the rest.
- Clean out the swamp cooler.
Cleaning helps to remove dirt and mineral build-up. You can use an appropriate cleaning liquid like a vinegar and water mix to clean. Use a water hose to flush out the stubborn mineral build-up.
The floats and pumps can also be soaked in vinegar overnight to remove buildup completely.
- Replace or clean pads
If you use disposable pads, this is the time to replace them with new ones. If you use high-efficiency ones which last longer, then clean them now.
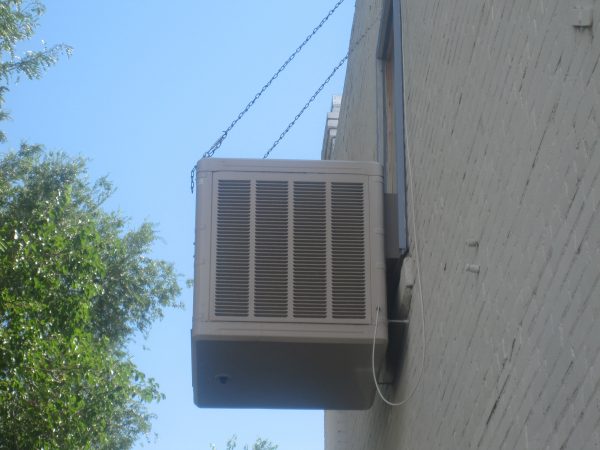
- Cover the swamp cooler
To protect it, use a swamp cooler cover to cover your appliance after it dries. We recommend that you measure the dimensions of your swamp cooler first to get the right size for it. Also, make sure to tie the ends so that the cover doesn’t come off when the wind blows or during a storm.
If you are in the market for a swamp cooler cover, then we recommend the Brian’s Canvas Products Down Draft Heavy Duty Canvas Cover for Evaporative Swamp Cooler.
It has one-size-fits-all dimensions of 34 inches width by 34 inches depth by 36 inches height. So, it fits most swamp coolers and even has a draw rope to help you achieve a secure and custom fit. It is also moisture-proof and durable.
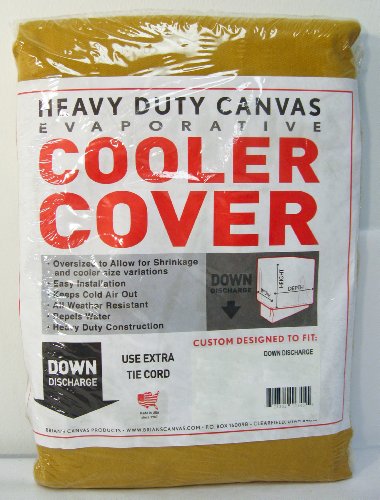
[amalinkspro type=”cta-btn-css” ctabtn-id=”” asin=”B008X6P760″ apilink=”https://www.amazon.com/dp/B008X6P760?tag=refrigeratorsreviewed-20&linkCode=osi&th=1&psc=1″ addtocart=”false” new-window=”true” nofollow=”true” alignment=”alignright”]Click here to buy this heavy-duty canvas cover for an evaporative/swamp cooler on Amazon[/amalinkspro]
- Cover the vent
It’s the cold winter months and the last thing you want is to lose heat out of the house. The vents of the swamp cooler should be covered to prevent this. A damper should also be placed between the ducts and the vents.
Check out these other in-depth articles/reviews…
Garage Refrigerators: How to Buy the Best
Nutrichef 8-Bottle Wine Cooler — In-depth Review
How Much Propane Does an RV Refrigerator Use
ARB 12V Weatherproof Fridge/Freezer with Electronic Lock — Detailed Review
Kalamera 18-Bottle Wine Cooler — Detailed Review
How to Transport a Refrigerator [Detailed Guide]
How To Winterize a Swamp Cooler — Quick Summary
Swamp coolers are very useful units for the hot period. It is important to winterize them to keep more years on the product and save you from stress later on. If not, the tubes will be frozen and the swamp cooler won’t start when you need it to. Also, rust and corrosion could set in, as well as the growth of microbes.
To winterize, unplug from the power source, disconnect and drain the tubes. Also, drain standing water that has collected over time and dry the pads.
Clean the swamp cooler, replace pads if necessary and cover with swamp cooler cover after it’s dry. Whatever you do, remember to cover vents to prevent heat loss from the house through the ductwork.
This whole process typically takes roughly 1 hour and as we always recommend that the user’s manual is your best friend.
The video below also provides an easy DIY tutorial on how to winterize your swamp cooler. Check it out!
You can also check out our post on How to Start a Swamp Cooler so that when the heat sets in you’re ready.
Get Instant Help — Ask An Experienced Verified Appliance Technician
Need expert help? Click here to use the chat box on this page to speak with a verified appliance technician right away. No need for expensive in-home service calls. No appointments. No waiting.
Pingback: How To Make Air Conditioner Cooler - In-depth Refrigerators Reviews