If you are looking for how to change an ice maker on a Samsung refrigerator, look no further. You have come to the right place.
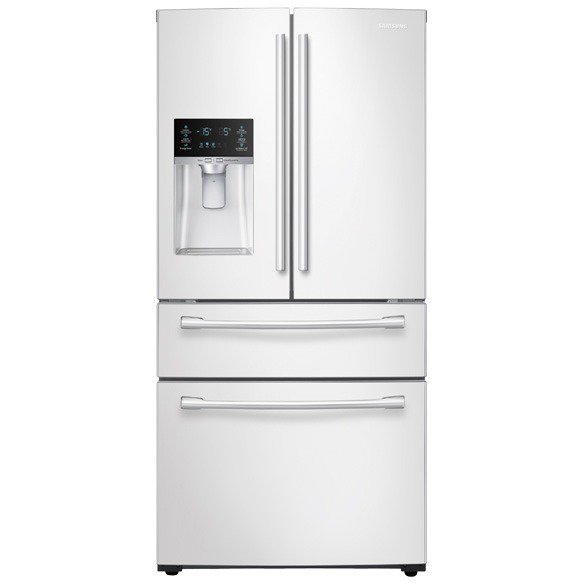
Table of Contents
How to Change an Ice Maker on a Samsung Refrigerator
To change an ice maker on a Samsung refrigerator, take the following steps:
Step 1
Check to see if the ice maker needs to be defrosted, that is, if it has some ice around it. If it does, put the refrigerator in the forced defrost mode.
To put it in the forced defrost mode, press the Energy Saver and the Fridge buttons at the same time for about 8 seconds.
After 8 seconds, the display will go blank. Press the Fridge button 4 more times to get to the Fd option, which is the forced defrost mode. Next, allow the refrigerator to defrost for about 5 minutes.
To take the unit out of the forced defrost mode, press the same buttons again, at the same time, for about 8 seconds. Next, press the Fridge button once to return the display to normal.
Do note that the combination of buttons to press depends on the Samsung refrigerator model you have. Therefore, consult the user manual for instructions.
Step 2
Unplug the refrigerator from the wall socket or trip the circuit breaker if you cannot reach the socket. Be sure to do this for every repair you want to do in any refrigerator.
Step 3
Remove the ice bucket by grabbing it at the bottom, lifting it a little and pulling it out gently. Some older Samsung refrigerator models have levers or buttons to push in order to remove the bucket.
When you remove the ice bucket, you will be able to see if there is excess ice around the ice maker. If there is, thaw it by leaving the door of the refrigerator open for some time. Do not use any heat source to defrost the ice so as not to melt the plastic parts inside the refrigerator.
Step 4
Remove the cover of the wire housing by unscrewing the Philips screw holding it in place. Next, push the cover a little towards you and remove it.
Now, pull the wiring of the ice maker out of the side of the compartment, press the locking clip and remove the wire harness.
Step 5
With the Philips screwdriver, remove the Philips screw on the ice duct tray. Once the screw is removed, move the tray to one side using the screwdriver and pull it down to reveal the underside of the ice maker.
With the underside of the ice maker revealed, check to see if there is a coil there. Some models have this special cooling coil so if it is there, make sure there is no ice on it. If there is, allow it to thaw before touching it.
Be careful when shifting it out of the way so that you don’t puncture it. This is because if it is punctured, the refrigerator is damaged and cannot be repaired.
Using a flat blade screwdriver, push the coil down just enough to be able to slide the ice maker out from the top of it.
Step 6
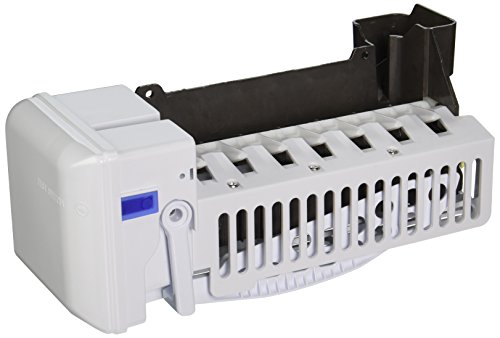
Remove the ice maker by depressing the top locking clip, pulling the ice maker forward a little and down. This dislodges it from the housing.
Before you install the new ice maker, make sure that the two slots on top of the ice maker align with the two tabs on the roof of the compartment for the ice maker.
Step 7
Ensure you lower the duct tray on the ice maker bottom. Now, insert the cooling coil through the back of the ice maker. After this, push the ice maker in until the locking tab on top snaps and locks in place.
When it locks in place, push up the duct tray so that it locks in place. Now, mount the screw you removed earlier.
Step 8
Reconnect the wire harness and push the wires back into the side of the compartment for the ice maker. Replace the cover of the wire housing by pushing it in and gently sliding it back in.
Next, mount back the Philips screw you removed earlier. Replace the ice bucket. Push it in until it locks in place.
Step 9
Plug the refrigerator back into the wall socket or turn on the circuit breaker if you tripped it earlier. Next, give the ice maker time to cool appropriately and make ice. This could take up to 12 hours. Then, test it to see if it is working as it should.
Watch this video for a visual representation of how to change the ice maker in a Samsung refrigerator…
Samsung Ice Maker Bucket Replacement [How To]
To replace the ice bucket of a Samsung ice maker, do the following:
Step 1
Remove the ice bucket. For older Samsung refrigerator models, there is a button at the top to press in order to release the bucket before pulling it out. For newer models, there is no button; just grab the bucket at the bottom, lift it a little and gently pull it out.
Step 2
If there is any ice left in the ice bucket, dump it out so that you can properly inspect the bucket for any damage. Usually, when there is a lot of ice in the bucket and you don’t use it regularly, it can cause the bucket to crack.
There is also a chance that the auger motor in the middle of the bucket is broken. Inspect it, too to see if it is broken.
Whichever part is damaged, you will need to replace the entire ice bucket assembly. This is because Samsung does not sell individual parts of the assembly.
Step 3
Check to see if the new ice bucket has a latch plate. If it does, remove the two screws at the top, holding the old latch in place, with a Philips screwdriver. Take the new latch and insert it into the slot. Next, mount the two screws you removed earlier.
Now, push the new ice bucket into its space until it clicks and locks in place.
Here is a video showing how to replace the ice bucket in a Samsung ice maker…
Check out these other articles…
Panasonic Refrigerator Leaking [How to Fix]
Hitachi Refrigerator Leaking [Quick Fix]
Daewoo Refrigerator Dispenser Problems [Solutions]
How to Remove a Samsung Ice Maker [Quick Guide]
How to Turn a Samsung Ice Maker On and Off [Quick Guide]
How Do Samsung Ice Makers Work? [Quick Guide]
How to Make Fast Ice in a Samsung Refrigerator [Quick Guide]
Samsung Ice Maker Water Valve Replacement
To replace the water inlet valve of a Samsung refrigerator, do the following:
1. Disconnect the Refrigerator from Power
Make sure you disconnect the refrigerator from the wall outlet to cut off the supply of electric power to it. This is an important step whenever you have to work on any electrical appliance.
After disconnecting it from the power source, turn off the supply of water to the refrigerator. Doing this prevents water from flooding the floor of the house when you disconnect hoses from the valve.
2. Inspect the Valve
Move the refrigerator away from the wall to inspect the valve at the back of the refrigerator. Remove the access panel at the back of the unit by unmounting the screws holding it in place. Keep them in a place where they won’t go missing.
3. Uninstall the Old Valve
At the bottom of the refrigerator, on the right, you will see the valve. Remove the screw that holds the blue water line in place and push the tube aside.
Now, unscrew the bracket of the water inlet valve from the right of the unit. Tilt it as far as it can go so that you can put your hand into the unit. When you reach the unit, press the sides of the cover of the box which contains the wire harness and pull it down out of the way.
Depress the clips on the sides of the wire harness. On the left side of the valve, remove the two white hoses from the clips and detach the bracket holding the bottom hoses in place.
After removing the bracket, remove the hoses from the valve. This frees the valve completely. Remove and keep it.
4. Install the New Valve
To install the new valve, retrace your steps above. It is recommended that you take a picture of how the connections are before disconnecting anything. This makes it easier to make connections.
5. Test the Valve
Reconnect the water supply, plug the unit back into the wall socket and move the refrigerator back into place. Check to see if there is any leak. If there is none, you know you did a good job.
Here is a video that shows how to do this easily…
Important Note
If you are looking for how to change an ice maker on a Samsung refrigerator, be sure you have the right part handy. Buy the replacement part using the model of your refrigerator.
Contact Samsung to request service if changing the ice maker proves too difficult. You can also chat with us to get the best services with any of our refrigerator technicians.
Remember to unplug the refrigerator before performing any diagnostic or repair work. Doing this prevents electric shocks and keeps the unit from damage.