If your GE refrigerator is beeping, there are a number of reasons why this is happening. This article lists the possible causes and how to fix them.
Table of Contents
GE Refrigerator Beeping – What to Do
Here’s what to do if your GE refrigerator is beeping:
1. Check the Door Seal
To check the door seal of your GE refrigerator, unplug the refrigerator, open the door, and carefully check the seal. This can be done with your hand or flat screwdriver. If there is any worn out part, it means there is a need for a repair or replacement.
If you are going to repair the door seal, unplug it first, then turn it aside. Now, open the refrigerator and get a flat screwdriver. Carefully use the screwdriver to tuck in or tuck out the seal as the case may be.
However, if you are going to replace it, get a door seal that suits your GE refrigerator model. Disconnect the refrigerator from power and remove the items in it.
Now, turn the unit, open it and loosen the hinges with a screwdriver. Detach the door from the refrigerator and place it on a flat surface.
Next, undo the screws on the door and remove the frame. Carefully remove the old seal from the door line, fix the new one from beneath, and align it properly.
Finally, put the door frame back on the door and tighten the screws. Reattach the door back to the refrigerator and reassemble the other components.
When the door of the refrigerator is open for too long or doesn’t close properly, the temperature of the refrigerator becomes high. As a result, the refrigerator beeps at intervals. Thus, the beeping sound alerts you that the door has been open for more than three minutes.
2. Rearrange the Items in the Refrigerator
Bring out all the items inside the unit and put them in portable containers. Now, place your soups and solids at the bottom of the refrigerator. Then, put vegetables and fruits in the middle compartment. Finally, put drinks and beverages in the top compartment.
However, when arranging items into the refrigerator, ensure that the refrigerator is not overfilled. Whenever it is overfilled, it will be difficult for the door to close firmly, thereby, causing it to beep. So, it is advisable to fill your refrigerator moderately.
This video shows you how to properly arrange items in your refrigerator if you are not sure how to do it…
3. Level the Refrigerator
To check whether or not your refrigerator is balanced, unplug it from the wall outlet first. After that, get a spirit level-a tool used for checking balance.
Next, remove the grill beneath the refrigerator, and place the spirit level from where you removed the grill. Then, check if the left and right sides are balanced. If the sides are not, you will need to adjust and level them.
To balance the refrigerator, lift the left or right side of the refrigerator with a small jack. Locate the refrigerator stand and loosen or tighten it, depending on the desired level of balance.
However, if your refrigerator does not have an adjustable stand, you can place a strong pad underneath it. After doing this, use a spirit level to check if it is properly aligned. If it is not, adjust it again.
Additionally, it is important to note that the front should be higher than the back of the refrigerator. This implies that it should slant backwards a little. This position allows the firm closure of the door and the free flow of defrost water out of the refrigerator.
4. Check the Temperature Sensor
To inspect the sensor of your GE refrigerator, get a multimeter and unplug the refrigerator. Undo the screws on the back panel, remove the frame and locate the J1 plug.
Next, count five ports from the beginning of the J1 plug, then place the black probe of the multimeter on the port. Then, place the red probe on the yellow wire.
Now, check the result displayed on the multimeter. Finally, repeat this process for the black and white wires. The temperatures of the compartments should vary. If they do not, it means that the sensor is defective.
However, you should understand the colors of the wires. The yellow wire represents the refrigerator, the white wire represents the freezer, and the black wire represents the evaporator temperature.
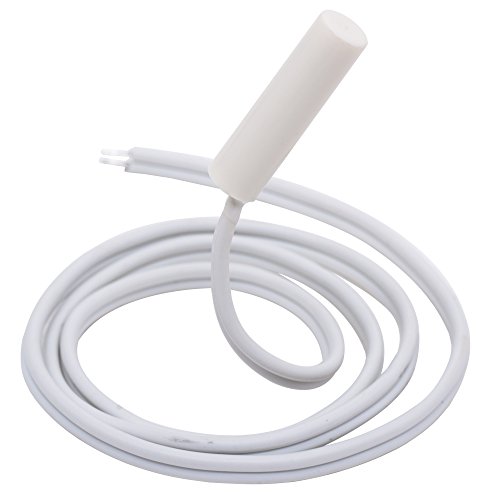
[amalinkspro type=”cta-btn-css” ctabtn-id=”” asin=”” apilink=”https://www.amazon.com/dp/B075M2Q4B2?tag=refrigeratorsreviewed-20&linkCode=osi&th=1&psc=1″ addtocart=”false” new-window=”true” nofollow=”true” alignment=”alignright”]Buy this sensor on Amazon[/amalinkspro]
Check for Continuity
Alternatively, you can check the functionality of the thermistor by checking for continuity. To do this, detach the thermistor from the wire connector.
Then, place it in a cup of ice water and set the multimeter to the lowest range. Fix the probes of the multimeter to the wires of the thermistor. Lastly, check the result.
After that, get the tech sheet of your GE refrigerator and compare the resistance range value with the results displayed on the multimeter. If the difference exceeds 1%, it implies that the thermistor is not working properly. This test is called a continuity test.
To replace the sensor, first, get a new sensor that suits your refrigerator model. Second, unplug the refrigerator, and locate the thermistor.
Next, undo the screws, remove the frame and detach the old one from the wire connector. Plug the new one in, position it rightly, put back the frame, and redo screws. Then, plug the refrigerator in and test run it for about 6 hours.
You should note that sensors can be found in different parts of a refrigerator. If any of them is defective, it can affect the proper functioning of the refrigerator. As a result, beeping sounds can occur when the right signal is not sent to the control board.
You can check out this video for more information on how to inspect and replace a sensor…
Check out these other articles…
GE Refrigerator Control Panel Not Working [How to Fix]
GE Refrigerator Autofill Overfilling [How to Fix]
GE Refrigerator Making Noise [How to Fix]
How to Replace Auger in GE Ice Maker [Quick Guide]
How To Remove Doors From a GE Fridge [Quick Guide]
5. Check the Water Filter
To check the water filter, disconnect the refrigerator from power. Next, locate the water filter inside the refrigerator. Then, hold it firmly with your hands and turn it anti-clockwise to remove it from the filter holder.
Finally, bring it out and check for damages or dirt. If there is any damage, a replacement will be needed.
To replace it, get a water filter type that suits your refrigerator model. Remove the old one and fix the new one to the filter holder, taking into consideration the tip of the filter. Then, push it in and turn it clockwise to tighten it.
Your GE refrigerator may be beeping to draw your attention to the need to change the water filter. So, if you have not done that in the last 6 months, it could be the reason why your refrigerator is beeping continuously.
Important to Note
GE refrigerator may be beeping because the alarm has not been set correctly. Therefore, if you have checked the water filter, door seal, and thermistor, check the alarm setting.
To reset the alarm, find the control panel on the door of your refrigerator. Next, locate the alarm button and press it down once to turn it off. Then, press it down for the second time to switch it on. This simple process of switching the alarm off and on restores it to its default setting.
However, if you still have a working warranty with GE, you can contact them to report the issue and request service. Otherwise, chat with any of our repair technicians who are readily available to assist you.
Do not forget to always stick to the user manual’s instructions on what to do about any refrigerator problem.
Get Instant Help — Ask An Experienced Verified Appliance Technician
Need expert help? Click here to use the chat box on this page to speak with a verified appliance technician right away. No need for expensive in-home service calls. No appointments. No waiting.