If you are looking for how to remove doors from a GE fridge, this article will show you what to do. The steps below work for most models.
Table of Contents
How to Remove Doors from a GE Fridge
Here are the steps to follow if you want to remove your GE fridge doors:
1. Gather Your Work Tools
You need a Phillips screwdriver, an adjustable wrench, and a socket driver/ratchet for this job. You may also need masking tape if you do not have a helping hand. The masking tape will be used to hold the door in place.
2. Prepare the Fridge
Before you commence dismantling your fridge door, ensure you have emptied every shelf in the unit. Then, shut the door and secure it with masking tape. Unplug the power cord from the wall socket, and turn off the water supply if applicable.
3. Disconnect the Wiring Harness and Water Line
Next, pull out the front grille from the lower part of the fridge. This will enable you to disconnect the water hose and the wiring harness.
The wiring harness and water line are usually behind this grille and next to each other. Disconnect the water hose by detaching it from its connector. Then, do the same thing for the wiring harness.
4. Take Out the Hinge Cover/Bracket and the Hinges
You may need to use a Phillips screwdriver to unscrew the hinge bracket if it is screwed with a Phillips head screw. Otherwise, hold the hinge cover by the sides close to the back and push back on it. Lift it from the back, and do the same at the front.
For a hinge bracket that does not have screws, avoid using a screwdriver to take it out. But be careful so you don’t damage its rear retaining tab.
Once you have removed the hinge cover, unbolt the screws that secure the upper hinge to the cabinet. Use a socket driver/ratchet to do this.
Note: The hinge bracket/cover does what its name implies – it covers the hinge. So, before you can access the hinges, you will need to remove its cover first.
5. Remove the Door
Take off the masking tape, and carefully turn the door to a 90-degree angle. Lift the door to an upright position, guiding it off the base hinge. While doing this, move the door off of the disconnected wiring harness and water line.
While lifting the door, ensure the plastic hinge pin cap does not fall off. It should remain either inside the hinge pinhole on the door, or the hinge pin on the cabinet.
Lay the door on any protected surface. The protection could be any material such as a carton, towel or carpet. The door should be laid with the inside facing up.
Repeat the above steps for the second door.
Important Note
- If you do not lift the door straight, it may damage the base hinge.
- Be cautious not to tightly press the wiring harness or the water hose.
- The connector may be damaged if it has hard contact with any hard surface.
- Place all screws next to their unscrewed positions to avoid mix-up or loss.
Check out these other articles…
GE Refrigerator Control Panel Not Working [How to Fix]
GE Refrigerator Autofill Overfilling [How to Fix]
GE Refrigerator Making Noise [How to Fix]
How to Replace Auger in GE Ice Maker [Quick Guide]
How To Remove Doors From a GE Fridge [Quick Guide]
How to Remount the Door
To remount the door, take the following steps:
Step 1
Carefully let down the door onto the base hinge. While doing this, the door should be at a 90-degree angle. Then, ensure the plastic hinge pin cap is still in position.
Step 2
Carefully shut the door and secure it with masking tape, or have a helping hand hold the door in position. Ensure the door is properly aligned with the cabinet, and that the door gasket laps well.
Step 3
Reinstall the upper hinge and replace its cover.
Step 4
Reinsert the water hose into the coupling, then reconnect the wiring harness. Ensure the water hose is pushed well into the coupling. You will know this if the marking on the hose is no longer visible.
Step 5
Turn the water supply back on, after which you plug the power cord back to the electric outlet.
Repeat steps one to four for the second door before you proceed to step five.
How Do You Remove a GE Freezer Bottom Door?
Removing the bottom freezer door is a bit easier, and does not require much work. Find below how to do it seamlessly:
Pull out the freezer door all the way through. You will find a socket with two little screws on each side of the door, close to the slides. Unscrew these screws and lift the door for it to come off.
To reinstall the door:
Pull out the slides, fit in the door to the slides and secure it with the screws.
This video will be helpful if you still find it difficult to remove your GE fridge and bottom freezer doors…
GE Refrigerator Door Handle Removal – Quick Guide
Removing the door handles of a GE refrigerator may be similar across all model. GE refrigerators come with either a stainless handle or a plastic and painted handle.
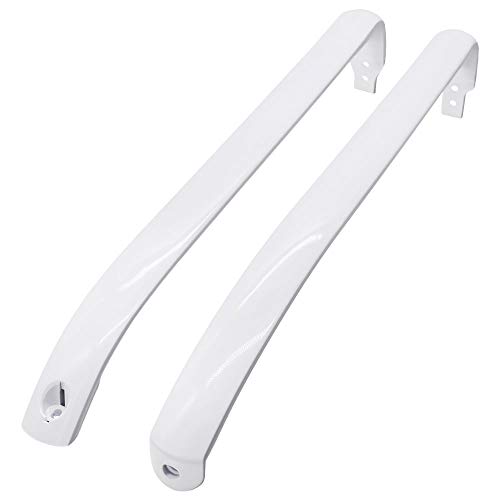
[amalinkspro type=”cta-btn-css” ctabtn-id=”” asin=”” apilink=”https://www.amazon.com/dp/B07ZLSH28V?tag=refrigeratorsreviewed-20&linkCode=osi&th=1&psc=1″ addtocart=”false” new-window=”true” nofollow=”true” alignment=”alignright”]Buy this handle on Amazon[/amalinkspro]
Below are ways you can remove different types of GE refrigerator door handles:
Removing Stainless Door Handles
Use an Allen wrench to loosen the handle’s set screws, and slide the handle off its mounting fasteners.
The set screws can be found on the inner side of the handle, at the top and bottom. The size of the Allen wrench should be either a 3/32” or 1/8”, depending on the model.
Reverse this step to install a new handle.
Watch this video to learn how to remove and replace fridge door handles easily…
Although this video features a french-door refrigerator, the set-up is similar to the side-by-side refrigerator.
Removing a Plastic and Painted Handle with Retaining Tabs
Press on the plastic retaining tab under the handle. While the tab is pressed against the door, lift the handle. Next, pull the handle away from the mounting fastener on the door.
The handle is fixed to the door by two slotted brackets and secured with plastic retaining tabs. These retaining tabs are located on the back of the handle.
To reinstall the handle, fit the mounting fastener into the slotted bracket. Then, push the handle down firmly to lock it in place.
Here is a video guide to getting this task done…
Quick Note
Consult your user manual to get this done. This is important if you are in doubt of these steps.
You also have the option of contacting a GE service center close to you to request assistance. Alternatively, chat with any of our qualified refrigerator technicians right here. They are readily available to assist you.
Get Instant Help — Ask An Experienced Verified Appliance Technician
Need expert help? Click here to use the chat box on this page to speak with a verified appliance technician right away. No need for expensive in-home service calls. No appointments. No waiting.