Knowing how to add Freon to your refrigerator compressor requires expertise because of the health and safety risks involved. This is because Freon is a toxic substance that may cause serious health issues if it is not handled properly.
More so, if you mistakenly add too much Freon or use the wrong type of Freon, you may have to deal with irreversible damage.
Nonetheless, this article provides a stepwise guide on how to add freon to your refrigerator compressor.
However, because of the risks involved in this process, we are hoping that if you are not a technical person, you only need this information for the knowledge.
Now, let’s get right in.
Table of Contents
How to Add Freon to Your Refrigerator Compressor – Step by Step Procedure
Disconnect and empty your refrigerator
Firstly, unplug your refrigerator from the AC socket.
If you have perishable foods in the fridge, transfer them into a cooler filled with ice to keep them fresh.

Then, turn your refrigerator around to have a good view of the back panel.
With a screwdriver, unscrew the bolt and screws on the back panel.
Locate your compressor tank
Your Freon pipe is usually found around the compressor tank.
The compressor tank is large and usually found close to the bottom of the fridge.
It should be the first thing you spot when you open the back panel.
Because it is not unlikely that there are other pipes connected to the compressor tank other than the Freon pipe, you want to avoid feeding the wrong pipe with Freon.
To do this, go back to your refrigerator manual to identify the Freon line.
On some refrigerators, the Freon line has its own pipe while in others, it is attached to the suction line. So, it is important that you check the manual for the right configuration.
Insert a bullet-piercing valve around the Freon line
There are 3 nuts on the bullet-piercing valve. Unlock them with a wrench.
Then, wrap this valve around the Freon line, near the compressor. This valve will help you access the pipe without removing it by puncturing it.
Most importantly, ensure this valve is tightened around the Freon pipe. If it isn’t, make use of your wrench. Else, it might leak Freon and the air which will be dangerous to your health.

[amalinkspro type=”cta-btn-css” ctabtn-id=”” asin=”B015FK1EH2″ apilink=”https://www.amazon.com/dp/B015FK1EH2?tag=refrigeratorsreviewed-20&linkCode=osi&th=1&psc=1″ addtocart=”false” new-window=”true” nofollow=”true” alignment=”alignright”]Click here to check out and buy this Freon Leak Detector on Amazon[/amalinkspro]
Remove the cap on your bullet-piercing valve
On the side of your bullet-piercing valve, there’s a cap.
To access the pipe easily, unscrew this cap by turning it counterclockwise. You can do this with your hands.
After unscrewing the cap, attach your conversion valve to the opening where the cap used to be.
Then, screw it in place.
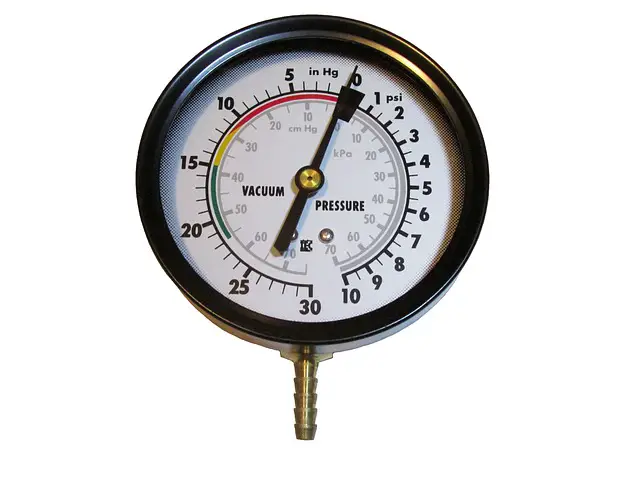
Get a reading
To get a Freon reading from your compressor, plug your refrigerator back into the socket.
Then, wait for about 10-15 seconds before attaching the air compressor gauge to the adaptor. You would get a value for the pressure and Freon reading.
If you notice that the Freon level is on the blue part of the gauge, then there’s still plenty of Freon left in your compressor.
An appropriate reading is important to know if you should add Freon or not. If you add excess Freon, there’s a high probability that your refrigerator may not work again.
Check the pressure
If there’s enough Freon in your refrigerator, the gauge should read 0 psi. This implies that there is no pressure in your Freon line.
If it gives a value between 0 and 1 psi, you’re still okay.
But if it is higher than 1 psi, open the valve for about 4 to 10 seconds to let out some air. Then, check for the pressure again.
Find out how much Freon you need
This can be done by checking the label inside or at the back of your refrigerator. Also, you shouldn’t use the Freon specifications for another refrigerator for your own.
If the reading you got from your gauge falls within the Freon range on the guide, then the problem may be more complicated than adding freon to your compressor.
In such a case, you may want to escalate the issue to the manufacturer or an expert.
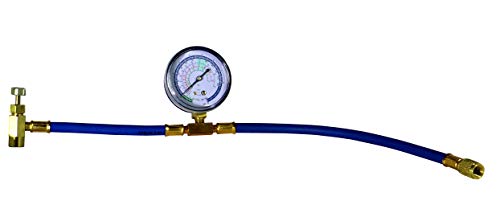
[amalinkspro type=”cta-btn-css” ctabtn-id=”” asin=”B008BLBKCC” apilink=”https://www.amazon.com/dp/B008BLBKCC?tag=refrigeratorsreviewed-20&linkCode=osi&th=1&psc=1″ addtocart=”false” new-window=”true” nofollow=”true” alignment=”alignright”]Check out this hose with pressure gauge on Amazon[/amalinkspro]
Connect your Freon tank to the adaptor
So, you should have gotten another tank containing the ‘same kind’ of Freon on the refrigerator label.
This tank will come with a hose.
Connect this tank to the hose and then connect the hose to an adaptor on the valve attached to the Freon pipe.
Ensure the hose is fitted on both the valve adapter and the replacement tank.
To add Freon to your refrigerator compressor, open the valve on top of the replacement tank.
Some tanks come with gauges to show you how much you’re releasing, but some don’t.
So, try to release within the range of your Freon levels.
Close the valve
After transferring Freon to the Freon line attached to your compressor, turn the valve on the replacement tank clockwise.
Then, remove the hose from the adaptor and remove the adaptor from your Freon line.
Place the cap back on your adaptor and keep it for another time.
Your bullet-piercing valve has already pierced your Freon pipe, so you can’t remove it again.
Lastly, reattach the back panel and screw tight.
Then, plug in your refrigerator and see if it works fine now.
Need a visual guide Freon how to add freon to your compressor, check out this video to learn:
You can also check out our post on Freon leaks to know when your fridge is leaking Freon and what to do about it.
Check out these other in-depth articles/reviews…
- Kalamera 18-Bottle Wine Cooler — Detailed Review
- How to Transport a Refrigerator [Detailed Guide]
- How Much Does A Sub-Zero Refrigerator Cost?
- Whynter 34-Bottle Wine Cooler — In-depth Review
- Koldfront 24-Bottle Dual Zone Wine Cooler — Extensive Review
- How to Test a Refrigerator Thermostat [Detailed Guide]
Get Instant Help — Ask An Experienced Verified Appliance Technician
Need expert help? Click here to use the chat box on this page to speak with a verified appliance technician right away. No need for expensive in-home service calls. No appointments. No waiting.
