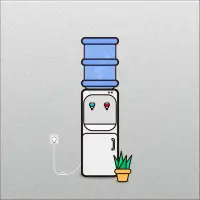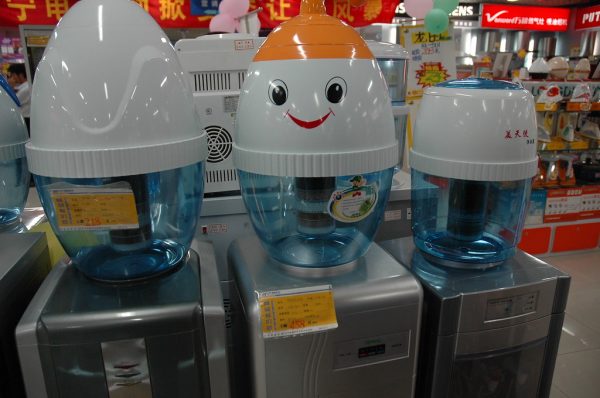
Cleaning a water cooler is not as difficult as one may think. In fact, it only takes 30 minutes to clean one. You only need to know the essential steps on how to clean a water cooler and what you need to clean it with. Then you can rest assured that your dispenser will always supply fresh-tasting water.
Water coolers are grouped into two major categories – the point-of-use (POU) water coolers and bottled water coolers.
The POU water coolers are connected directly to a water supply, while the bottled coolers are usually picked up from or delivered by vendors. They can either be mounted on top or at the bottom of the unit depending on the model design.
Either way, a good knowledge of how to clean the water cooler is important; which is what we are going to address in this article.
So, at the end of this article not only will you learn how to clean a water cooler, but you will also learn how to clean a top-loading or bottom-loading cooler as well as identify the essential items for cleaning any water cooler.
But let’s start with the essential cleaning items first.
Table of Contents
What You Need To Clean Water Cooler
Here is a list of the materials you need to clean your water cooler
ii. Clean, warm water
iii.Cleaning gloves
iv.Waterproof apron, overalls, or smock.
v. Safety goggles with side shields.
vi. Long-handled brush with soft bristles
What To Do Before Cleaning The Cooler
Before you clean your water cooler, you need to have a cleaning or disinfecting solution ready.
You can decide to use chemicals, but vinegar has been used by various people and has proven effective.
However, irrespective of the cleaning solution you eventually choose, ensure that you stay protected while using it.
You can protect yourself by wearing your safety goggles, apron or large overalls, and hand gloves.
By the way, it is not often advisable to use chemicals. But if you must use any, make sure it can be used on food contact surfaces without posing any health risks.
Also, ensure that it is stored under appropriate conditions and that the right amount and concentration of the solution is used.
After cleaning with chemicals, rinse your water cooler properly with clean potable water.
How To Clean A Water Cooler – Top Loading
[amalinkspro type=”cta-btn-css” ctabtn-id=”” asin=”B0125S2K0M” apilink=”https://www.amazon.com/dp/B0125S2K0M?tag=refrigeratorsreviewed-20&linkCode=osi&th=1&psc=1″ addtocart=”false” new-window=”true” nofollow=”true” alignment=”alignright”]Click here to check out this Avalon Top-Loading Water Cooler on Amazon[/amalinkspro]
Here are a few steps on how to clean a top-loading water cooler:
Unplug the power cord
Before you commence cleaning, ensure you remove the power cord from the AC outlet so that you don’t trip on the cables or get electrocuted during the cleaning process.
Remove the bottle carefully
If the bottle is not empty before you clean the dispenser, carefully remove it to avoid spilling the remaining water.
Then check the bottle holder and valve for a buildup of dirt or mildew. If you haven’t cleaned your water cooler in a while, you will most likely notice some there.
In the event that that’s the case, use a paper towel to wipe it away. If the dirt is still stuck, make a small solution of baking soda and water and scrub off the dirt with a brush.
Clean the drip guard
For some water coolers, the drip guard is removable. If yours can be removed, rinse it under a running tap and clean it with the disinfecting solution.
If there are stubborn stains, scrub properly with a brush and the baking soda solution. Then, rinse properly and leave it to dry.
Clean the water guard
Some water dispensers have water guards that puncture the top of the water bottle when you install it. Remove this guard, wash it properly under a tap and then apply your cleaning solution. Rinse it properly and leave it to dry.
Clean the reservoir
If you still have some of the cleaning solution left, you can use that to clean the reservoir. Otherwise, make some more and ensure that it has the right concentration while you are at it.
Pour the solution into the reservoir and let it sit for about five minutes before draining it through the spigots. Make sure you use both spigots to drain the reservoir to ensure that they are both clean.
Thereafter, pour two gallons of clean water to rinse the reservoir. When this is emptied, pour a gallon of water into the reservoir and smell it (if you used bleach solution) or taste it (if you used vinegar).
If there are still traces of your cleaning agent, you will need to repeat the rinsing process to remove traces of the solution.
Once the unit is thoroughly cleaned, allow the parts to dry completely.
Return removed parts
As soon as the parts are dry, replace them and place a new bottle on your water cooler.
Plug the water cooler to an AC outlet and allow your water to cool for thirty minutes to an hour before using it.
Fontis Water advises water cooler owners to clean their units thoroughly at least once in every 6 months. In this video, it shows how to clean a water cooler thoroughly. Check it out.
How To Clean A Water Cooler – Bottom Loading
Cleaning a bottom-loading water cooler is similar to cleaning a top-loading cooler. You will need a cleaning solution, a funnel, and an empty water bottle to clean the cooler.
Here are easy steps on how to clean a bottom loading water cooler:
i. After unplugging the power cord to prevent safety hazards while cleaning, remove the bottle from the bottom of the cooler and open your spigots to drain the water left in the reservoir.
ii. Mix the cleaning (disinfecting) solution in your empty bottle and connect your bottle filled with cleaning solution back to the water cooler.
iii. Your cleaning mixture should move to your reservoir. Let it sit there for about 5 to 10 minutes to get it clean.
iv. If you pull it out too quickly, you might not get all the dirt off.
v. Drain your reservoir by opening the spigots. This way you’re also passing the cleaning solution through the spigots.
vi. Fill your empty bottle with clean water and install it in your water cooler. Rinse the reservoir and drain the water through the spigots.
vii. Continue the process until there’s no trace of your disinfecting solution left in the water.
viii. After cleaning your water cooler (both top and bottom-loading types), remove the water dip tray cover and drain excess water from it. Use a clean cloth and your disinfecting solution to clean it.
[amalinkspro type=”cta-btn-css” ctabtn-id=”” asin=”B01AKTFK6Y” apilink=”https://www.amazon.com/dp/B01AKTFK6Y?tag=refrigeratorsreviewed-20&linkCode=osi&th=1&psc=1″ addtocart=”false” new-window=”true” nofollow=”true” alignment=”alignright”]Click here to check out this Avalon Bottom-Loading Water Cooler on Amazon[/amalinkspro]
Check out these other in-depth articles/reviews…
- How To Keep Ice Cream Frozen In A Cooler [Detailed Guide]
- Westinghouse 8-Bottle Wine Cooler — Detailed Review
- How Long Does It Take to Defrost a Refrigerator Freezer?
- Tibek 12V Mini Fridge/Warmer with Automatic Locking Handle — In-Depth Review
- How To Change The Water Filter In A Kenmore Refrigerator
- Haier 150-Can Beverage Center — In-depth Review
How to Clean A Water Cooler — A Quick Recap
Now you know how to clean a water cooler easily. But before you go, let’s do a quick recap of what cleaning a water cooler entails.
For starters, cleaning your water cooler is not a difficult task. All you need is a cleaning agent, bottle, brush, and clean water.
Every removable part of the cooler should be cleaned with the solution and rinsed thoroughly before focusing on the reservoir which takes the largest quantity of cleaning solution.
If there are tough stains on parts of your cooler, use a baking soda solution and a soft brush to scrub them off.
Meanwhile, remember to unplug your water cooler before you begin the cleaning task.

By the way, if you have a fridge that has stopped working and you are wondering how to fix it, find out the likely cause and how to fix a faulty refrigerator in this detailed article.


Pingback: How Much is a Water Cooler? - In-depth Refrigerators Reviews