Read this article if you want to find out ways to solve the problem of your Jenn Air refrigerator leaking. We discuss how to solve water leaks from various parts of the refrigerator. And these solutions are written in easy-to-follow steps to ensure that you have no issue as you go through the repair.
 Jenn Air Refrigerator Leaking – Possible Problems and How to Solve
This section discusses the possible reasons your Jenn Air refrigerator is leaking and how to solve them. Most of these repairs are so easy that you can do them by yourself with no hitch. However, stop any repairs immediately it appears too complex and call a professional.
1. Defective Water Inlet Valve
The most common reason Jenn air refrigerators leak water underneath is a defective water inlet valve. The water inlet valve is responsible for supplying water to the entire appliance. And it does this by opening and closing as required.
But the valve can fail to close off if the water pressure is lower than the required minimum 20 psi or if the valve gets defective. Therefore, if the leak is traced to the valve, the first thing to do would be to troubleshoot the water pressure.
You may do this using a water pressure regulator. Or you may also do the following if a pressure regulator is not handy:
i. Switch off the water supply and disconnect the water line from the valve.
ii. Then hold the water line over a bucket and turn the water supply back on.
iii. If the water jets out strongly then the pressure is okay, if the flow is low then the water pressure is low.
The water supply line or the water source itself may be the cause of the low water pressure. Disconnect the water supply line from the water source and the valve and put a new one in its place. If the problem persists, then consider changing your water source.
The water inlet valve is defective if the water pressure checks okay. In which case, the inlet valve has to be replaced to fix the leak.
How to Replace Jenn Air Refrigerator Water Inlet Valve
Do the following to replace your Jenn Air refrigerator water inlet valve:
Step 1: Take the necessary precautionary step of disconnecting the unit from the power source. The repair may include water spillage so also shut off the water supply valve from the water source.
Step 2: Adjust the refrigerator to a position that enables you to have full access to the back of the refrigerator.
Step 3: Unthread the screws holding the back access panel in place. And then, take off the access panel.
Step 4: Locate the inlet valve at the bottom of the refrigerator. And remove the water supply line from it. Then, unthread the screws holding the mounting brackets and bring the inlet valve forward.
Step 5: Disconnect the wire harness from the valve. You can do this with the help of a flat head screwdriver. Also, remove the water lines from the valve. The valve should be free at this point.
Step 6: Put the new inlet valve in place and reattach the water line to it. Plug the wire harness back to the inlet valve. And thread the screws holding the valve back in place.
Step 7: Turn the water supply back on and inspect the valve installation. Ensure there is no loose connection and leak from any area.
Step 8: Put the access panel back in place and thread the screws holding it. Then, reattach the water supply line to the new inlet valve.
This water inlet valve is compatible with your Jenn Air refrigerator replacement number AP6021208 [amalinkspro type=”cta-btn-css” ctabtn-id=”” asin=”” apilink=”https://www.amazon.com/dp/B07JBMPG2P?tag=refrigeratorsreviewed-20&linkCode=osi&th=1&psc=1″ addtocart=”false” new-window=”false” nofollow=”true” alignment=”aligncenter”]Click Here to Get yours Now![/amalinkspro]
2. Leaking Drain Tray
The drain tray sits at the back bottom of the refrigerator. It has the role of collecting water that is produced during the defrosting process. Water will leak out of the tray if it gets damaged, begins to overflow, or the refrigerator is not leveled.
To troubleshoot this problem, remove the refrigerator’s back access panel and locate the drain tray. If the tray is overflowing, then slide it out and empty it.
However, the water in the tray is meant to be automatically evaporated by the compressor. And so the tray overflowing may be an indication of another problem. We, therefore, advise you to consult a technician if the tray keeps overflowing.
Inspect the tray for cracks or any form of damages. Replace the drain tray if any damage is found in it.
Finally, if the refrigerator is not leveled, it may rock back and forth. When this happens, the water in the drain tray may spill out. The solution to this problem is to level the refrigerator.
How to Level Jenn Air Refrigerator
Do these steps to level your Jenn Air refrigerator:
Step 1: Remove the screw holding the kick plate at the bottom of the refrigerator and take it out. Skip this step if your model does not have a kick plate.
Step 2: The leveling legs will be visible with the kick plate removed. Turn them clockwise to raise them and counterclockwise to lower them.
Step 3: If reaching the nuts proves difficult, ask someone to help tilt the refrigerator a bit backward. And then adjust the legs to get the required tilt.
Step 4: Finally, use a level to confirm if the refrigerator is properly leveled. And then put the kick plate back on.
3. Blocked Defrost Drain
The defrost drain is what carries the melted water to the drain pan. The drain can get clogged with food particles, debris, or ice. When this happens, water will overflow the drain and cause your Jenn Air refrigerator to leak water from the bottom.
The solution to this is to unclog the tube. The first step is to locate the entrance of the defrost drain inside the refrigerator. The location of the drain’s entrance is peculiar to models. So, you can use your manual to find out the location.
Or you can also check the most common places which the drain entrance is often located. These common places are, under the drawers, the back of the refrigerator of the floor of the freezer.
You need the help of a service technician if you cannot find the entrance to the drain. However, if you find the entrance, do these steps to unclog the drain:
Step 1: Push a straight plumber snake down the drain hole, twist, and pull out the clog.
Step 2: If the plumber snake won’t go through then the blockage is likely ice. Set a hairdryer to the minimum temperature. Open the back access panel of the refrigerator and locate the defrost drain. Use the hairdryer to heat the drain until the ice is thawed. Or you may simply defrost the appliance. This article will show you how to defrost your Jenn Air refrigerator.
Step 3: Finally, make a mixture of warm water and baking soda. Flush the mixture down the drain using a turkey baster. This will ensure the drain is completely clean.
4. Worn-out Door Gasket
A worn-out door gasket will result in excess condensation in the refrigerator. The excess condensation will then likely make its way out of the refrigerator’s door. Or it will settle at the bottom of the refrigerator.
The solution to this problem is to replace the gasket.
How to Replace Jenn Air Refrigerator Door Gasket
Do the following to replace your Jenn Air refrigerator door gasket:
Step 1: Open the refrigerator and use your fingers to pry off the top corner of the door gasket.
Step 2: Still holding on to the top corner, drag the gasket off the track. Inspect the door track and ensure there is no remnant of the gasket on the track.
Step 3: Get the new gasket, ensure it is a perfect fit for your refrigerator. Start fitting the new gasket in place from either of the top corners.
Step 4: Work your way around the track, press the gasket firmly to the track to make sure it locks in place.
Step 5: Finally, double-check and ensure there is no excess fold or bumps around the gasket track.
Check out these other articles…
Lec Refrigerator Leaking [Quick Fix]
Labcold Refrigerator Leaking [How to Fix]
Norcold Refrigerator Leaking [How to Fix]
Neff Refrigerator Leaking [Quick Fix]
Uline Refrigerator Leaking [Solved]
Jenn Air Refrigerator Leaking from Water Dispenser – Solution
Do the following solutions to stop your Jenn Air refrigerator from leaking from the water dispenser:
1. Secure the Water Connections
The water line supplying water to the dispenser may be loosely fitted hence the leak. Consult your user’s manual to locate the water connections and tighten them to solve the problem.
2. Empty the Dispenser Drip Tray
The dispenser drip tray collects water that comes out of the dispenser before it shuts off completely. If the drip tray gets so full that it begins to overflow, the leak will appear like it is from the dispenser.
An insert is at the rear end of the drip tray, press this down to take out the tray. And then empty it and put it back in its place.
3. Flush the Water System
When you replace the water filter of your unit, there is a possibility of air getting stuck in the water system. When this happens, there will be a pressure buildup in the water line that will cause water to spill out of the line.
The solution to this is to flush the water system. Do the following to flush the system:
i. Place a bucket underneath the dispenser.
ii. Press and hold on to the dispenser trigger for about 5 seconds. Then release the trigger and repeat after a 5 seconds interval.
iii. Keep at this until you have dispensed about 3 gallons of water. This should be enough to flush out the air and solve the problem.
Repeat this procedure after each filter change to prevent this problem from reoccurring.
Jenn Air Refrigerator Water Filter Leaking – Why and What to Do
The following are the major reasons your Jenn Air refrigerator water filter is leaking and how to solve them:
1. The Water Filter is Damaged
Remove the water filter and inspect it. The filter may have a crack or scratch that is causing it to leak. In which case, it should be replaced to solve the leak.
2. The O-Rings is Missing or Damaged
Inspect the O-rings at the top of the filter as they may be missing or damaged. Replace the filter if they are.
3. The Water Filter Not Installed Properly
If you recently replaced your water filter, then this may be the problem. In which case, uninstalling and reinstalling the filter properly should stop the leak. You may check your owner’s manual for a complete guide on how to replace your unit’s water filter.
Quick note: Ensure you replace your water filter as often as recommended. An old filter can become so clogged it would result in a leak. Also, always buy the right filter for your refrigerator when you shop for water filters.
Buy this water filter for your Jenn Air JCD2389GES refrigerator.
 [amalinkspro type=”cta-btn-css” ctabtn-id=”” asin=”” apilink=”https://www.amazon.com/dp/B00YD2VKY6?tag=refrigeratorsreviewed-20&linkCode=osi&th=1&psc=1″ addtocart=”false” new-window=”false” nofollow=”true” alignment=”aligncenter”]Click Here to Get Yours Now![/amalinkspro]
Jenn Air Refrigerator Ice Maker Leaking – What to Check
Check all water connections of your unit if your Jenn Air refrigerator ice maker is leaking. As there may be some loose water connections somewhere. You may consult your owner’s manual for the locations of the water connection points if you are uncertain about this.
Also, troubleshoot the water inlet valve. The valve may be the cause of the leak if it is defective. A section of this article gives detailed instructions on how to replace your Jenn Air refrigerator water inlet valve.
If the valve and water connections check out then the ice maker assembly may have a faulty part. In which case, the entire assembly has to be replaced to solve the leak.
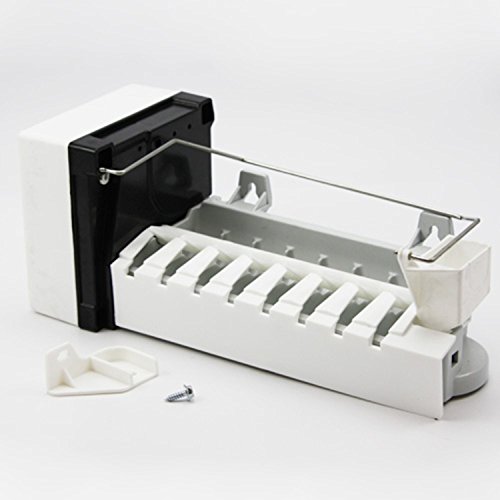
This ice maker is compatible with your Jenn Air refrigerator models: JFC2089HES and JCB2285KES
 [amalinkspro type=”cta-btn-css” ctabtn-id=”” asin=”” apilink=”https://www.amazon.com/dp/B078RSXWPJ?tag=refrigeratorsreviewed-20&linkCode=osi&th=1&psc=1″ addtocart=”false” new-window=”false” nofollow=”true” alignment=”aligncenter”]Click Here to Get Yours Now![/amalinkspro]
How to Replace Jenn Air Refrigerator Ice Maker Assembly
Do the following to replace your Jenn Air refrigerator ice maker assembly:
Step 1: Press and hold the “Cooling” button inside the refrigerator till it turns red to switch off the cooling to the refrigerator. This will prevent excess condensation as you do the repairs.
Step 2: Get the ice maker replacement part. Ensure the replacement is compatible with your refrigerator.
Step 3: Open the refrigerator door and remove the top shelves to make more workspace. If you have a French door model, you may have to remove the door to get direct access to the ice maker. Simply remove the screws attaching the doors to the mounting stands. Also, pull out the ice drawer.
Step 4: Use a nut driver to remove the screws holding the ice maker in place. And then release the wire harness connected to the ice maker.
Step 5: The ice maker should be completely free at this point, so move it to a work table. The new ice maker assembly does not come with a shut-off arm, so you need to remove the shut-off arm from the old assembly.
Step 6: Attach the shut-off arm to the new ice maker and take it to the refrigerator. Connect the wire harness back to the ice maker.
Step 7: Put the ice maker in place. Ensure the fill tube goes in its right place and then rethread the screws to hold the ice maker in place.
Step 8: Slide the ice drawer and shelves back in. If you had removed the door, put it back in place and rethread the screws.
Step 9: Finally, turn the cooling back on.
This video is a visual guide on how to replace a Jenn Air French door model ice maker
We believe you have your refrigerator back in perfect working condition at this point. If you don’t, then the problem may be a lot more complex and you need to consult a repair technician.
If you have had your appliance for a long while then you may consider simply replacing it. Check out this excellent model below.
[amalinkspro type=”showcase” asin=”B01ND50KSJ” apilink=”https://www.amazon.com/dp/B01ND50KSJ?tag=refrigeratorsreviewed-20&linkCode=osi&th=1&psc=1″ new-window=”true” addtocart=”true” nofollow=”true” sc-id=”6″ imgs=”LargeImage” link-imgs=”false” specs=”” btn-color=”#ff9900″ btn-text=”Click Here to Get Yours Now!” alignment=”aligncenter” hide-prime=”0″ hide-image=”0″ hide-price=”0″ hide-button=”0″ width=”600″]Jenn-Air Pro-Style Counter-Depth Stainless Steel French Door Bottom Freezer Refrigerator[/amalinkspro]
Get Instant Help — Ask An Experienced Verified Appliance Technician
Need expert help? Click here to use the chat box on this page to speak with a verified appliance technician right away. No need for expensive in-home service calls. No appointments. No waiting.