Imagine coming home to find your Uline refrigerator leaking; such a scenario can spoil one’s day. If this is your reality, then you need to read this entire article to learn how to solve this problem. Also, we will show you how to fix the U-line wine cooler, and U-line ice maker leaking problems.

Table of Contents
Uline Refrigerator Leaking – Possible Reasons and Solutions
1. Issues with the Defrost Drain
The defrost drain in your U-line refrigerator is responsible for collecting condensate water and sending it to the drain pan where it gets evaporated. The defrost drain is usually located at the bottom part inside the refrigerator.
These two possible issues with the defrost drain could cause the leaking problem:
i. Frozen Defrost Drain
Once the defrost drain is frozen, then you need to defrost the ice. You can do this with the aid of a hand dryer. Remove your food items and then set the hand dryer to the medium heat settings. Then point it to the defrost drain until the ice thaws.
[amalinkspro type=”cta-btn-css” ctabtn-id=”” asin=”” apilink=”https://www.amazon.com/dp/B07TT9XH98?tag=refrigeratorsreviewed-20&linkCode=osi&th=1&psc=1″ addtocart=”false” new-window=”false” nofollow=”true” alignment=”aligncenter”]Click Here to Buy Yours Now![/amalinkspro]
Or, you can allow it to defrost normally by unplugging the refrigerator and keeping it open. This, however, might not be advisable if you have food items stored in your U-line refrigerator.
ii. Clogged Defrost Drain
Once the defrost drain has clogged no thanks to debris or foodstuff, then you have to unclog it. To do so, you will need a pipe cleaner or any flexible but thick wire.
Plunge the pipe cleaner into the drain and push and pull it severally to dislodge any blockage. We also recommend you flush the defrost drain with hot water. This will aid in releasing the blockage.
2. Issues with the Water Filter Head
If the water filter head has a torn or missing seal, or it is cracked, you can expect a leak from your refrigerator. The filter housing might have cracks as well. And the only solution is to replace the water head or the housing depending on which has the crack.
How to replace your Uline Refrigerator Water Filter Head and Housing
Follow the steps below to replace your Uline Refrigerator water head:
Step 1: Unplug your U-line refrigerator from the electric outlet to save yourself from electric shock while you work on the refrigerator. You need to turn off the water supply as well.
Step 2: Locate the water filter head and its housing. In most cases, it is inside the refrigerator at the bottom part where the food compartment is. We recommend you consult your user manual if you can’t find yours.
Step 3: Take out the food items and the shelves within that compartment.
Step 4: Inspect the water filter head and the housing for cracks. If you don’t, then this isn’t the reason your Uline refrigerator is leaking. If you see any then you can start with the replacement.
Step 5: Remove the water filter. The removal method depends on the type of water filter your refrigerator uses. You might have to rotate the water filter or push it in, to unspring the lock mechanism.
Step 6: Loosen the screws that hold the filter housing and pull it away to give you access to the water lines.
Step 7: Go to the front bottom of your refrigerator and remove the kick plate.
Step 8: After removing the kick plate. Disconnect the couplings holding the water line.
Step 9: Remove the cover and brackets holding the water lines to the refrigerator.
Step 10: Move to the back of the refrigerator and remove the back access panel.
Step 11: Locate the nuts securing the water line to the inlet valve and loosen it. Then disconnect the water line from the valve. And pull the water lines from the inlet valve.
Step 12: Head back to the food compartment in the refrigerator and pull out the water filter head.
Step 13: Re-insert the water lines from the back wall as well as the bottom of the refrigerator.
Step 14: Fit the new water filter head and the new housing back in place.
Step 15: Reconnect the water line at the bottom by attaching it to the coupling.
Step 16: Fix back the kick plate.
Step 17: Reconnect the water line to the inlet valve. And reconnect the inlet valve back in place.
Step 18: Reinstall the back access panel.
Step 19: Fit in the water filter back in the housing.
Step 20: Plug your refrigerator back into the outlet.
We recommend you watch the video below for a visual explanation of the steps above.
3. Issues with the Water Filter
Apart from the water filter head and the housing having issues, the water filter itself can be responsible for your Uline refrigerator leaking. If it is damaged or not properly fit, it might result in a leak.
From the steps above, we’ve shown you how to access and remove the water filter. All you need to do is confirm if it is well-fitted or damaged. If it is the former, then you need to fix it properly. If it is the latter, you need to replace it.
This article will show you how to replace the water filter.
4. Issues with the Water Inlet Valve
The inlet valve supplies water to your refrigerator’s dispenser as well as the icemaker. Any crack or slack fitting will cause a leak.
Use the steps discussed under “How to replace your Uline Refrigerator Water Filter Head and Housing” to locate the water inlet valve and confirm that it is very tight to the water line.
5. Issues with the Drain Pan
The drain pain collects water from the defrost drain before it is evaporated thanks to the warm air from the condenser fan. This means you don’t have to worry about emptying the pan. However, if this pan is dirty or cracked, you will have to worry about cleaning leaking water.
The drain pan can be accessed through the kick plate.
To remove the drain pan, do the following:
Remove the kick plate and any other part that prevents you from reaching the pan. You might need a screwdriver to loosen some screws.
Then move to the back access panel and remove the tape that holds it in place the same way it does in the front.
Go back to the access in front and pull out the drain pan. Inspect if it is dirty or cracked to determine your next step.
If it is dirty, you need to clean it. If it is cracked, you need to replace it.
[amalinkspro type=”showcase” asin=”B08232PLM5″ apilink=”https://www.amazon.com/dp/B08232PLM5?tag=refrigeratorsreviewed-20&linkCode=osi&th=1&psc=1″ new-window=”true” addtocart=”true” nofollow=”true” sc-id=”6″ imgs=”LargeImage” link-imgs=”false” specs=”” btn-color=”#ff9900″ btn-text=”Click Here to Buy Yours Now!” alignment=”aligncenter” hide-prime=”0″ hide-image=”0″ hide-price=”0″ hide-button=”0″ width=”600″]U-Line UHRE524SS01A 5 Class Series 24 Inch Compact Refrigerator, Right Hinge with Reversible Doors, Energy Star Certified, Stainless Steel[/amalinkspro]
Uline Wine Cooler Leaking Water – Solutions
The following are solutions to stop your Uline wine cooler from leaking water:
1. Don’t Open the Wine Cooler Frequently
Opening the wine cooler frequently will cause the condensate water to leak out whenever you open it up.
2. Absorb the Condensation
You can also reduce the condensation in the cooler by placing a bowl of baking soda, or a silica packet, or a calcium chloride packet in the wine cooler.
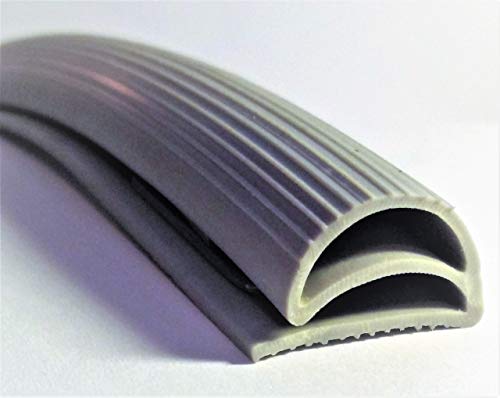
3. Check the Door Seal
The door seal is designed to prevent the entry of warm air into the wine cooler. If it has gaps, cracks, tears, or is even dirty, it might not perform its duties as expected. And the result is a leaking wine cooler.
If it is dirty, all you need to do is clean it with warm water and baking-soda solution.
And if it is damaged, you need to replace it. Just buy a new seal, yank the old one off the door and insert the new seal: Easy peasy lemon squeezy.
[amalinkspro type=”cta-btn-css” ctabtn-id=”” asin=”” apilink=”https://www.amazon.com/dp/B07X9VL6YQ?tag=refrigeratorsreviewed-20&linkCode=osi&th=1&psc=1″ addtocart=”false” new-window=”false” nofollow=”true” alignment=”aligncenter”]Click Here to Buy Yours Now![/amalinkspro]
4. Unclog the Drain Pipe
If the drainpipe is clogged, you have to unclog it as it can be responsible for the leak.
You can do this using these simple steps:
Step 1: Use a plumbing snake to try and remove the clog
Step 2: Sprinkle baking soda into the pipe.
Step 3: Pour hot water into the pipe.
This should free up the clog, but if it doesn’t, you might need a professional.
Check out these other articles…
Jenn Air Refrigerator Leaking [Solved]
Lec Refrigerator Leaking [Quick Fix]
Labcold Refrigerator Leaking [How to Fix]
Norcold Refrigerator Leaking [How to Fix]
Neff Refrigerator Leaking [Quick Fix]
Uline Ice Maker Leaking – Quick Fix
The following are the most common reasons your Uline ice maker is leaking:
1. Water Inlet Valve Issues
Once the water inlet valve is not properly connected or is defective, the ice maker will begin to leak out water.
The solution to this problem is to replace the valve.
2. Low Pressure from the House Water Supply
For water to be supplied to the ice maker, the water pressure must be 20psi minimum. If it is lower than this, the water inlet valve won’t close completely. This will cause water to leak into the ice maker and out of it.
To fix this, you need to determine if the pressure is low and find a way to increase it.
3. Defective Ice Maker Assembly
When it is defective, the only solution is to replace it.
Check out the video below to learn how to replace your defective ice maker assembly:
Conclusion – Uline Refrigerator Leaking
This article we believe has been able to help you in fixing your Uline Refrigerator Leaking problem.
If you have further issues, do not hesitate to contact our appliance technicians. They are always ready to help out.
Get Instant Help — Ask An Experienced Verified Appliance Technician
Need expert help? Click here to use the chat box on this page to speak with a verified appliance technician right away. No need for expensive in-home service calls. No appointments. No waiting.