Norcold is one of the most popular and great brands of RV refrigerators. However, despite being a wonderful brand, Norcold refrigerators are also prone to common refrigerator problems. But water leaks in fridges are not so difficult to fix. Therefore, in this article, we will discuss ways to stop your Norcold refrigerator leaking problem.
 Norcold RV Refrigerator Leaking Water – What to Check
Check the following parts if your Norcold refrigerator is leaking water:
1. Drain Tube
The drain tube runs from inside the refrigerator to behind the refrigerator where it is directed into the drain pan. The drain tube takes out condensate water from the refrigerator. This tube can get clogged and cause water to go back into the refrigerator.
In this case, locate the drain hole inside the refrigerator and insert a long thick piece of wire or a drain cleaning tool to clean the drain. Afterward, sprinkle baking powder into the hole and use a syringe to pour warm water down the drain.
Is your Norcold refrigerator freezing up? Then read this our article.
2. Drain Tube Plug
At the end of the drain tube is a little rubber plug inserted into the tube. The plug helps to keep warm air, critters, and tiny insects out of the tube. This plug has a tiny opening through which the water comes out from. But the plug can become clogged and so the water will begin to go back up the drain tube.
To stop the leak, the plug has to be removed and cleaned. The steps below will guide you on how to do this:
Step 1: Go to the back of the RV and remove the refrigerator back access panel.
Step 2: The drain tube is mostly white and made of rubber. So it should be easy to tell it apart. Look at the end of the tube and you will see the plug. Pull out the plug from the tube.
Step 3: You can apply several methods to clean out the plug. You could clean it with warm water and baking soda. You can also blow on the bottom of the plug to remove the clog. Or simply run water down the plug.
Step 4: Once the plug is completely clean, take it back to the drain tube and reinsert it. Go back inside the refrigerator and flush water down the drain hole. Ensure the water is going down the tube as it should.
Step 5: If all is working well, put the access panel back in place.
3. Door Seal
Condensation is one major reason your Norcold refrigerator can start leaking water. And one way condensation occurs is if the refrigerator is not sealed off properly. That is where the door seal comes in, as it is responsible for ensuring the door is sealed properly at all times.
However, the seal may fail at its job if it is dirty or has holes and leaks in it. Open the fridge and inspect the door seal. If it is dirty, then you can clean it up using any of the following methods:
i. Alcohol, gauze, and a card
Dip the gauze in the alcohol. And then, place the gauze on the card, put the card and gauze on the door seal, and swipe around it.
ii. Mild Detergent, Water, and a Dishtowel
Ensure the detergent is not mild as one too harsh can damage the seal. Dab the dishtowel in the detergent and water solution and then clean the seal as best as possible.
If the detergent is not dirty then it most probably is damaged. To check this, place a dollar bill or any flat piece of paper on the refrigerator’s door and close the door. Try to pull out the bill or paper. If it pulls off without any resistance then the seal is bad and should be replaced.
How to Replace Norcold RV Refrigerator Door Seal
Do the following to replace your Norcold refrigerator door seal:
Step 1: Remove the old seal by peeling it off the track. If peeling it is difficult, place a putty knife at the top corner of the seal and run it around the track. This should effortlessly peel off the track.
Step 2: Inspect the track and ensure there is no remnant of the old seal on it.
Step 3: Take the new seal; it should be a perfect fit with your refrigerator. Clip it around the door. Press it in firmly to ensure it stays put.
Step 4: Finally, check the seal and ensure it has no bumps or folds.
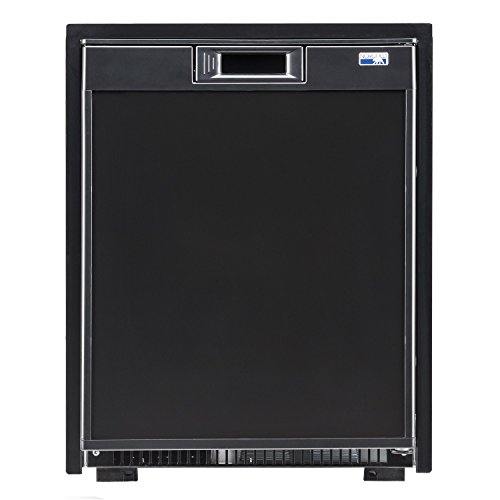
Consult a repair technician if your Norcold refrigerator keeps leaking after you have tried out these solutions. If you have had the unit for a while then it may be time to have it replaced. Check out this wonderful Norcold RV refrigerator below:
[amalinkspro type=”showcase” asin=”B0002F684A” apilink=”https://www.amazon.com/dp/B0002F684A?tag=refrigeratorsreviewed-20&linkCode=osi&th=1&psc=1″ new-window=”true” addtocart=”true” nofollow=”true” sc-id=”6″ imgs=”LargeImage” link-imgs=”false” specs=”” btn-color=”#ff9900″ btn-text=”Click Here to Buy Yours Now!” alignment=”aligncenter” hide-prime=”0″ hide-image=”0″ hide-price=”0″ hide-button=”0″ width=”600″]Norcold 323T R/L 323 Small RV Refrigerator[/amalinkspro]
Check out these other articles…
Jenn Air Refrigerator Leaking [Solved]
Lec Refrigerator Leaking [Quick Fix]
Labcold Refrigerator Leaking [How to Fix]
Neff Refrigerator Leaking [Quick Fix]
Uline Refrigerator Leaking [Solved]
Norcold Ice Maker Leaking – Solutions
The following are solutions to your Norcold ice maker leaking:
1. Reset the Water Volume
To reset the water volume, the ice maker has to be removed since the set screw is behind the ice maker.
To do this, unthread the screws holding the ice maker in place and gently pull it out. Use a Philip or flat head screwdriver to turn the set screw clockwise to reduce the water volume. Put the ice maker back in place and see if the leak is fixed.
2. Replace the Water Inlet Valve
If resetting the water volume does not stop the leak, then the water inlet valve may be defective. To troubleshoot the valve, go behind your RV and take off the refrigerator’s panel. Use a multimeter to test for resistance in the valve. If there is none, the valve is defective and most properly stuck open.
The water inlet valve has to be replaced to solve the leak.
How to Replace Norcold RV Refrigerator Water Inlet Valve
Do the following to replace a Norcold RV refrigerator water inlet valve:
Step 1: Unplug the refrigerator to avoid electrocution.
Step 2: Go outside the refrigerator to where you have the refrigerator access panel. Unthread the screws or nuts holding the panel in place and take it off.
Step 3: The inlet valve is obvious once you have the panel removed. Remove the inlet valve by taking off the wire harness, the ice maker water line. And then, unthread the screws of the valve’s mounting bracket.
Step 4: Bring in the new valve and reconnect all that was removed from the old valve to it.
Step 5: Go inside the RV and plug the fridge back on. Check and ensure there is no loose water connection to the valve.
Step 6: Put the access panel back in place and rethread the screws to hold it down.
3. Replace the Ice Maker
If the water inlet valve checks out then a part of the ice maker may be defective. This would require the entire ice maker assembly to be replaced.
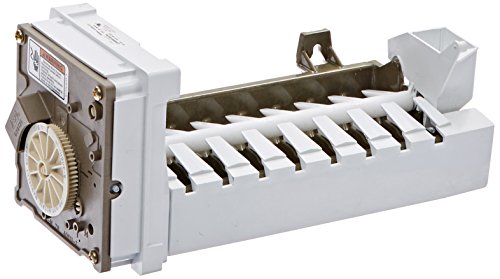 [amalinkspro type=”cta-btn-css” ctabtn-id=”” asin=”” apilink=”https://www.amazon.com/dp/B0031XQRE6?tag=refrigeratorsreviewed-20&linkCode=osi&th=1&psc=1″ addtocart=”false” new-window=”false” nofollow=”true” alignment=”aligncenter”]Click Here to Buy Yours Now![/amalinkspro]
Watch this instructional video on how to replace your RV refrigerator ice maker
Get Instant Help — Ask An Experienced Verified Appliance Technician
Need expert help? Click here to use the chat box on this page to speak with a verified appliance technician right away. No need for expensive in-home service calls. No appointments. No waiting.