This article discusses the problem of Haier refrigerator leaking and how to solve it. Some of these solutions are uncomplicated and can be done without the help of a service technician. However, if you find any too complex then pause and call a professional.

Table of Contents
Haier Refrigerator Leaking – Solutions
The following are ways to solve the most common reasons your Haier refrigerator is leaking:
1. Unclog the Defrost Drain
The defrost drain takes the water produced during the defrost process to the drain pan under the unit. The defrost drain can get clogged with food particles or ice.
To resolve this issue, the drain has to be unclogged. Start by defrosting the refrigerator since ice may be the reason for the clog. This article is a detailed guide on how to defrost your Haier refrigerator.
If the problem persists, then locate the drain hole inside the refrigerator. If the drain hole is not visible, then do not attempt the repair by yourself. Instead, call a repair technician to check out your unit.
If you locate the drain hole, then make a mixture of hot water and baking soda. And flush the mixture down the drain with a turkey baster. Stop doing this when you hear water dripping into the drain pan, this is an indication that the drain is clean.
2. Check the Drain Pan
The drain pan is underneath the refrigerator and it collects the water produced during defrosting. However, the pan may get cracked and result in water pooling under your unit. In this case, the drain pan should be replaced.
If the pan is so full it is overflowing then you may have a more serious problem at hand. This is because the water in the pan is meant to automatically evaporate after a while. Hence, we advise you to consult a repair technician in this case. However, to stop the leaking problem, manually empty the pan while you wait for the professional.
This drain pan is compatible with Haier refrigerator model number 20122990586
 [amalinkspro type=”cta-btn-css” ctabtn-id=”” asin=”” apilink=”https://www.amazon.com/dp/B01FO2IOAQ?tag=refrigeratorsreviewed-20&linkCode=osi&th=1&psc=1″ addtocart=”false” new-window=”false” nofollow=”true” alignment=”aligncenter”]Click Here to Buy yours Now![/amalinkspro]
3. Check the Water Filter
If your Haier refrigerator is leaking water inside the unit then the water filter may be damaged. Uninstall the filter and inspect its head. If the seal is missing or appears torn, then the filter should be replaced.
Also, the filter may have been installed wrongly. In which case, simply uninstalling and reinstalling the filter properly will resolve the problem. You may consult your user’s manual for how to properly install the water filter.
If the filter is old, then it is most likely clogged. Cleaning the filter will not solve the issue so just have the filter replaced. And always ensure the filter is replaced as often as recommended.
Finally, be sure to buy a water filter that is the right fit for your refrigerator.
4. Replace the Water Filter Housing
The water filter housing may be the cause of the leak if it has a crack. So, take out the water filter and inspect the filter housing. If any crack is found in the housing, then it should be replaced.
How to Replace Haier Refrigerator Water Filter Housing
To replace the water filter housing of your Haier refrigerator, do the following:
Step 1: Disconnect the refrigerator from the power supply. Turn off the water filter as well.
Step 2: Take out the water filter. Remove the screw holding the water filter housing in place and then pull it forward to release the locking tab.
Step 3: Adjust the refrigerator so that the back of the appliance is accessible.
Step 4: Next, unthread the screws holding the back access panel in place and then take off the panel.
Step 5: Locate the water inlet valve and remove the water lines from it using an open-end wrench.
Step 6: Go back to the front of the appliance and gently pull out the filter housing. Remove the water line from the old housing and attach it to the new filter housing.
Step 7: Install the new filter housing and couple the refrigerator by doing the steps in reverse order.
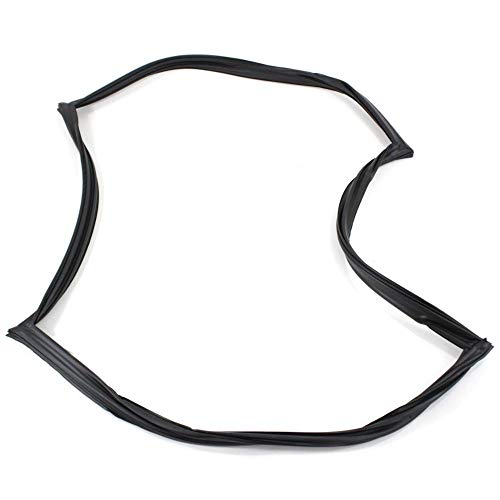
5. Replace the Door Seal
The door seal keeps moisture out of the refrigerator by making sure the door is always properly sealed. However, the door seal can get worn out such that it no longer seals properly. When this happens, moisture will gather inside the refrigerator and later form as liquid outside the refrigerator door.
To resolve this, the door seal has to be replaced.
How to Replace Haier Refrigerator Door Seal
Do the following to replace the door seal of your Haier refrigerator:
Step 1: Open the refrigerator. Remove the old seal by putting your thumb, under the seal and then run it around the seal track.
Step 2: The seal should be completely off the track at this point so take it off.
Step 3: Get the new seal, but ensure it is a perfect fit for your refrigerator. Start fitting the new seal in place from either of the top corners.
Step 4: Work your way around the track, press the seal firmly to the track to make sure it locks in place.
Step 5: Finally, double-check and ensure there is no excess fold or bumps around the seal track.
 [amalinkspro type=”cta-btn-css” ctabtn-id=”” asin=”” apilink=”https://www.amazon.com/dp/B001ICTIMK?tag=refrigeratorsreviewed-20&linkCode=osi&th=1&psc=1″ addtocart=”false” new-window=”false” nofollow=”true” alignment=”aligncenter”]Click Here to Buy yours Now![/amalinkspro]
6. Check the Water Inlet Valve
The water inlet valve supplies water through-out the refrigerator. The valve can get defective and stay stuck open. The inlet valve has to be replaced in this case.
How to Replace Haier Refrigerator Water Inlet Valve
The following steps will guide you on how to replace the water inlet valve of a Haier refrigerator:
Step 1: Unplug the refrigerator to avoid electrocution and shut off the water supply.
Step 2: Turn the refrigerator from the wall to have full access to the back of the appliance.
Step 3: Disconnect the water line from the valve using an open-end wrench. Next, use a ¼ nut driver to remove the screws holding the back panel in place and take it off.
Step 4: With the back panel removed, locate the water inlet valve and disconnect the wire harness connected to it. You may use a small flat head screwdriver to pop the wire harness out.
Step 5: Use a ¼ nut driver to remove the screws holding the inlet valve in place. Next, carefully pull out the valve.
Step 6: Disconnect the water line from the valve. The valve should be completely free at this point.
Step 7: Put the new inlet valve in place and reattach the water line to it. Plug the wire harness back to the inlet valve. And thread the screws holding the valve back in place.
Step 8: Put the access panel cover back on. Finally, attach the water line back to the valve using an open-end wrench.
Check out these other articles…
Panasonic Refrigerator Leaking [How to Fix]
Hitachi Refrigerator Leaking [Quick Fix]
Daewoo Refrigerator Dispenser Problems [Solutions]
How to Remove a Samsung Ice Maker [Quick Guide]
How to Turn a Samsung Ice Maker On and Off [Quick Guide]
How to Change an Ice Maker on a Samsung Refrigerator [Quick Guide]
Haier Fridge Water Dispenser Leaking – What to Do
Try the following quick fixes if your Haier fridge water dispenser is leaking:
1. Level the Refrigerator
The refrigerator is meant to be leveled such that the front part is about ¼ inches higher than the rear part of the unit. One of the downsides of the refrigerator not being properly leveled is that water may leak out of any opening, like the dispenser.
To level your refrigerator, do the following:
Step 1: Remove the screw holding the grille at the bottom of the refrigerator and take it out. If your model does not have a grille, skip this step.
Step 2: The leveling legs will be visible with the grille removed. Turn the leveling nuts or legs clockwise to raise them and counterclockwise to lower them.
Step 3: If reaching the nuts is difficult, then you may ask someone to help tilt the refrigerator a bit backward. And then adjust the legs to get the required tilt.
Step 4: Finally, use a level to confirm if the refrigerator is properly leveled. And then put the grille back on.
 [amalinkspro type=”cta-btn-css” ctabtn-id=”” asin=”” apilink=”https://www.amazon.com/dp/B014S94CHA?tag=refrigeratorsreviewed-20&linkCode=osi&th=1&psc=1″ addtocart=”false” new-window=”false” nofollow=”true” alignment=”aligncenter”]Click Here to Buy yours Now![/amalinkspro]
2. Flush the Water System
Air bubbles can sometimes get into the waterline and get trapped, this occurs typically during a filter change. When this happens, the pressure will build up and cause water to drip out of the dispenser.
To remove the air bubbles from the line, the water system has to be flushed. Fortunately, you can do this simply by dispensing about 3 gallons of water. Also, ensure you flush the water system after each filter change.
3. Secure the Water Connection
The leak may be due to loose water connections. To rectify this, simply check the water lines and secure them properly.
4. Replace the Water Line
The water line may be the cause of the leak if it is bent or has a tear. Inspect the line for cracks or tear and replace it if necessary.
This video is a step by step guide on how to replace your refrigerator’s water line
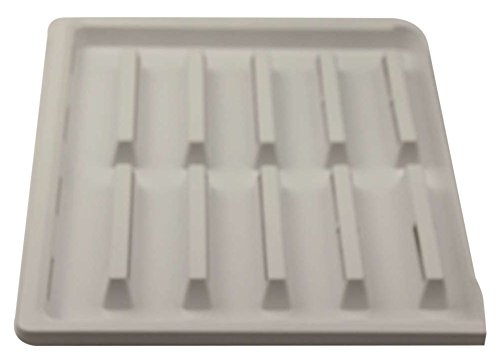
5. Empty the Dispenser Tray
The dispenser tray collects the water that drips out of the dispenser before it completely shuts off. The dispenser tray can collect so much water that it gets too full and begins to spill out.
You simply have to take out the tray and empty it to resolve this problem.
Conclusively, if your Haier refrigerator keeps leaking water from the water dispenser after you have tried all of these fixes then we advise that you contact a repair technician
[amalinkspro type=”showcase” asin=”B01B7V39TE” apilink=”https://www.amazon.com/dp/B01B7V39TE?tag=refrigeratorsreviewed-20&linkCode=osi&th=1&psc=1″ new-window=”true” addtocart=”true” nofollow=”true” sc-id=”6″ imgs=”LargeImage” link-imgs=”false” specs=”” btn-color=”#ff9900″ btn-text=”Click Here to Buy Yours Now!” alignment=”aligncenter” hide-prime=”0″ hide-image=”0″ hide-price=”0″ hide-button=”0″ width=”600″]Haier 15-Cu.-Ft. French-Door Refrigerator 28″ width Stainless Steel HRF15N3AGS[/amalinkspro]
Get Instant Help — Ask An Experienced Verified Appliance Technician
Need expert help? Click here to use the chat box on this page to speak with a verified appliance technician right away. No need for expensive in-home service calls. No appointments. No waiting.