Have you been using your LG refrigerator for a while now and have noticed that you’re not getting top-quality ice or water from your refrigerator as you used to? Then it is very likely that you need to change your LG refrigerator water filter.
The process of changing the water filter is not a difficult one. In fact, it only takes approximately 5 minutes to get a change done.
LG recommends that your water filter should not remain in the refrigerator for more than six months. You may even be required to change it sooner depending on the type of water that flows in your area.
In this article, we will guide you on how to change the water filter in your LG refrigerator so that you can enjoy clean water and ice cubes from your refrigerator.
How to Change LG Refrigerator Water Filter –The Process
Before you make a replacement, ensure that the new filter is not only from LG but that it is still valid for use.
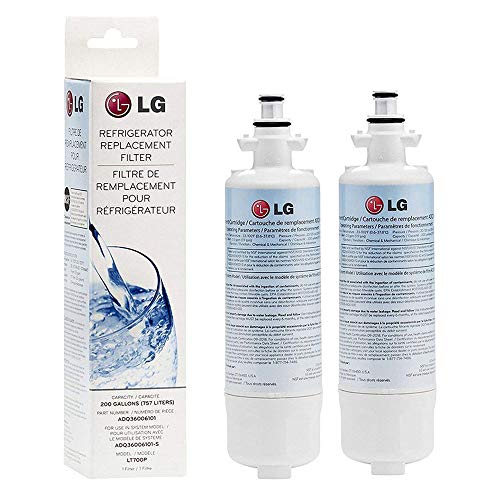
[amalinkspro type=”showcase” asin=”B074HLRXMP” apilink=”https://www.amazon.com/dp/B074HLRXMP?tag=refrigeratorsreviewed-20&linkCode=osi&th=1&psc=1″ new-window=”true” addtocart=”true” nofollow=”true” sc-id=”4″ imgs=”LargeImage” link-imgs=”false” specs=”Compatible with several LG side-by-side and French door refrigerators that have slim space Plus ice system.~~~Provides fresher and cleaner ice and drinking water; certified and tested by NSF/ANSI standards 42 and 53~~~Filters up to 200 gallons of water before a replacement is required~~~Gives users the benefits of drinking bottled water without the heavy price tag.~~~Reduces sediment, rust, and chlorine odor and taste.~~~” btn-color=”#ff9900″ btn-text=”View on Amazon” alignment=”aligncenter” hide-prime=”0″ hide-image=”0″ hide-reviews=”0″ hide-price=”0″ hide-button=”0″ width=”1000″]LG LT1000P Vertical Refrigerator Water Filter[/amalinkspro]
To change the water filter in your LG Refrigerator:
- Turn off the water valve
The water valve connects your refrigerator to the waterline.
Turn it off in order to stop the flow of water to your refrigerator. You can then proceed to remove the old water filter.
- Locate the water filter housing
The compartment that houses the water filter of an LG refrigerator is usually located behind the left side refrigerator door.
Open the left side door and remove the bottom door bin by lifting it up and out with both hands. You’ll find the water filter housing right there.
- Remove the old water filter
Open the water filter housing and grab the bottom of the water filter.
Remove it by turning it in an anticlockwise fashion until it comes free.
After removing the filter, write down the model number written on it. This will be required to purchase the right water filter from your local or online store.
If there were any spills during the process of removal, wipe them off using a dry, soft towel.
- Replace with the new filter
Once you’ve got the right filter, the next process is to install it into your refrigerator.
Firstly, remove the packaging and the cap covering.
Then, place the new filter in the water filter slot.
Afterward, turn it clockwise until it is locked in place.
Cover the filter housing and the bottom door bin. Make sure the door bin is fully seated on the mount and that it supports and protects your filter compartment properly.
- Reconnect the water line
Turn the water valve on. This allows water to flow into the refrigerator.
Use about 2 ½ gallons of water or more to flush the new water filter.
- Reset the indicator light
Your indicator light changes as soon as the water filter needs to be changed.
Now that you have replaced the filter, you need to reset the light by holding down the button beside it for about three seconds.
Check out these other in-depth articles/reviews…
Garage Refrigerators: How to Buy the Best
Igloo 12-Bottle Wine Cooler — Detailed Review
NewAir 12-Bottle Wine Cooler — Extensive Review
Westinghouse 6-Bottle Wine Cellar — Detailed Review
Wagan 24-Liter 12V Cooler/Warmer — Extensive Review
Wine Enthusiast 12-Bottle Wine Cooler (Black) — In-depth Review
A Quick Recap!
Changing your LG refrigerator water filter is easy.
You only need to remove and discard the old one, get the recommended replacement, and then insert the new one into the same position.
Remember to pass several gallons of water through your new filter after installing it, to remove the carbon granules from the water.
Check out this video for a visual guide on how to change your LG water filter:
You can also take advantage of our post on how to change the air filter in an LG Refrigerator to change yours.
Get Instant Help — Ask An Experienced Verified Appliance Technician
Need expert help? Click here to use the chat box on this page to speak with a verified appliance technician right away. No need for expensive in-home service calls. No appointments. No waiting.