The vents in any refrigerator allow air circulation from the freezer into the refrigerator and back into the freezer. This article explains possible issues with KitchenAid refrigerator vents, how to solve them, and how to use the vents.
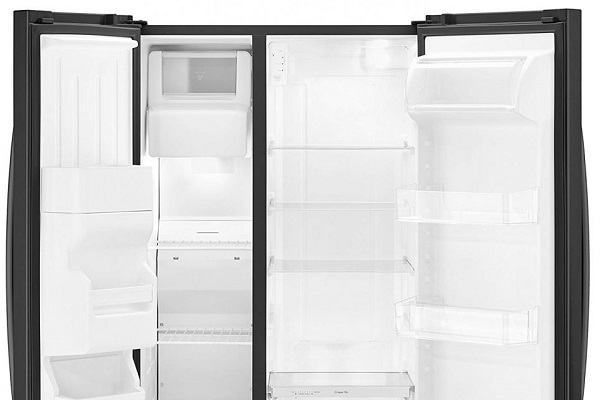
Table of Contents
KitchenAid Refrigerator Vents Frozen – Quick Fix
If you find the air vents in your Kitchen Aid refrigerator frozen, you must rearrange the contents and maximize airflow. Turn off the refrigerator for some time, and allow the ice on the vents to thaw, or use a hair dryer to melt the ice. Obstructing the vents restricts airflow and makes it difficult for the cold air to enter or leave the refrigerator. Consequently, it causes moisture to build in the refrigerator, and the moisture eventually freezes.
If you recently loaded the refrigerator, ensure you have nothing directly in front of the vents. Give a few inches of space between the contents and the vents to increase the airflow. Do not overload the refrigerator or freezer, as this may restrict air circulation. Also, items directly in front of the vents will freeze due to the constant stream of cold air. Therefore, avoid placing perishable or water-rich foods, such as vegetables, eggs, and meat, in front of the vents.
In addition, ensure the temperature for the refrigerator and freezer are correctly set. Your refrigerator is preset to 37 degrees Fahrenheit for the refrigerator section and 0 degrees Fahrenheit for the freezer section. These are the mid-point and recommended settings for the appliance. However, you may need to adjust the settings to the desired point, depending on the refrigerator’s location or the weather in your area. Setting the temperature too low can cause the vents and other parts of the appliance to freeze.
Other Possibilities
There may also be a problem with the defrost system. If your KitchenAid refrigerator has an automatic defrost function, it should help warm the freezer and prevent the vents from icing up. So, troubleshoot the defrost system components if the vents are not obstructed, but ice keeps forming over them.
Start with the defrost timer because it should advance the system in and out of a defrost cycle. Use the manual to find the timer’s location on your model and turn it. It should click and begin functioning, but you may have to replace it if it does not respond. However, check the defrost thermostat and heater if you see that the timer works well. These components can also stop the system from running, causing an ice buildup. Get a multimeter and run a continuity test on the heater and thermostat; replace them if they register no continuity.
You may also want to check the door gasket and condenser coils. If the gasket is worn, it lets warm in and cold air out. The same applies if it is kinked. The warm air, which is usually laden with moisture, especially on humid days, causes condensation inside the refrigerator. This is particularly true for the coldest points inside the refrigerator, such as the vent area.
The more condensation builds near the vents, the more ice accumulates. Eventually, the vents are completely blocked. Therefore, straighten the gasket if kinked; warm air from a hairdryer should loosen it so you can straighten it. Clean the gasket if it is dirty; dirt can prevent total sealing and allow warm air into the unit. But if worn, replace the gasket.
Clean the condenser coils if dirty; dirt on them causes the refrigerator to run constantly and produce too much cold air. As a result, the freezer and refrigerator sections freeze, including the vent area. Use a vacuum or condenser coil cleaning brush to remove the dirt on the coils, and repeat the cleaning process every six to twelve months.
Additionally, check the thermostat. A poorly functioning thermostat can cause the refrigerator to have more cold air than necessary, freezing everything in it. The thermostat reads the temperature to determine when to turn on the cooling system and turn it off. So, if it becomes defective, the cooling system may run more than is required and lower the internal temperature.
Test the thermostat by turning it from the lowest temperature to the highest point. If it clicks, you may not need to test it further. But if there is no audible click, run a continuity test on it using a multimeter. Replace the thermostat if there is no continuity.
Location of the Air Vents in a KitchenAid Refrigerator
There is no standard location for the air vents in all KitchenAid refrigerator models. However, you can check the user manual for the exact location of the vents for your specific model. You may find it on the back wall or the demarcation between the freezer and refrigerator.
Water Dripping from the Vent
Ice on the vent can cause water to drip, which may eventually leak from under the refrigerator. If the refrigerator vent is dripping water, check to see if there is an accumulation of ice in front of or behind the vents. Also, check the evaporator section to see if the fan or coils are frozen. Turn off the refrigerator and find the ice; use a hair dryer to melt it, or leave the door open until the ice melts.
Furthermore, ensure nothing is leaking close to the vents. You may want to check the water reservoir or tank at the back of the refrigerator and see if the water line is intact. Additionally, check the water inlet valve; the valve may leak water, and although it is at the bottom back of the unit, it may cut the refrigerator’s water supply and cause other issues with the ice maker and water dispenser. Schedule service for your refrigerator if nothing else seems to work; contact the KitchenAid Service Center for further assistance, or hire an independent technician.
Check out these other articles…
KitchenAid Refrigerator Not Working [Problems Solved]
KitchenAid Refrigerator Door Adjustment – Steps
KitchenAid Refrigerator Door Not Closing Properly
How to Remove a KitchenAid Side-by-Side Refrigerator Door
Can You Switch the Door Swing on a KitchenAid Refrigerator?
How to Remove the Vent Cover on a KitchenAid Refrigerator
The vents in a KitchenAid refrigerator do not have covers. In other words, you cannot remove the covers. But the air filter compartment has a vented cover that you remove before replacing the air filter. All you have to do is lift one side of the vented cover before lifting the other side. Carefully do this to avoid damaging the cover during removal. Realign the cover over the filter compartment and gently snap it into place after replacing the filter.
KitchenAid French-Door Refrigerator Air Vent Cleaning
You can clean the air vent with a little dishwashing soap and water, and baking soda also works when cleaning the entire refrigerator thoroughly. The user manual may also contain instructions on cleaning and maintaining the air vents. Mix a little baking soda in water to make a paste and clean the vents. Otherwise, mix some dishwashing liquid in warm water and clean the vents and other parts of the refrigerator.
Use a vacuum cleaner on the bottom vents or toe grill if you want to clean it. It helps to remove the dust and debris before wiping the dirt with a microfiber cloth. Remove the grill and thoroughly clean it before replacing it. Additionally, clean the area around the grill for the best results. The lower vent may be clogged with debris, and regularly cleaning it prevents air circulation issues from clogging.
Water Drips from Vent Whenever You Use the Water Dispenser on a KitchenAid Refrigerator
It may be a design problem, but check the water line supplying water to the dispenser from the filter. It may have a hole in it; if it does, you must replace it. This may not be a job to do yourself, so hire an appliance technician or contact the KitchenAid Center to report the issue and request service, especially if your appliance is under warranty.
You may also check the water tank for the dispenser. There is a small plastic tank that holds water for the water dispenser. The water is stored and cooled in the tank and activates when you press the dispenser lever or button. However, the tank can crack over time, especially if it constantly freezes. And if it cracks, it may cause water to leak from the vents when you use the water dispenser. Inspect the tank for cracks and replace it if damaged. Again, you may need professional assistance to service the refrigerator and find other possible causes of the problem.
Get Instant Help — Ask An Experienced Verified Appliance Technician
Need expert help? Click here to use the chat box on this page to speak with a verified appliance technician right away. No need for expensive in-home service calls. No appointments. No waiting.