A KitchenAid refrigerator door is vital to how well the appliance functions. Learn how to adjust the door, replace the handle, and other issues you may have with the door.
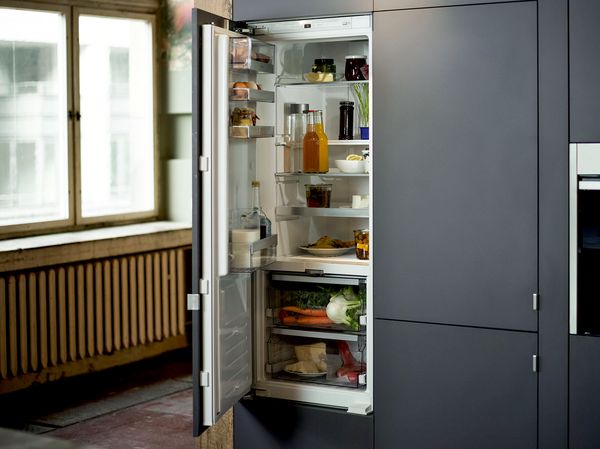
Table of Contents
KitchenAid Refrigerator Open Door Reset
If the door alarm on your KitchenAid refrigerator goes off, reset it by closing the door. The alarm goes off when the door or drawer is open for up to five minutes or longer, and the cooling function is active. It is a method of alerting you that the internal temperature is rising. The door alarm may have a dedicated reset button, so check the control panel or consult the user manual for instructions.
Temporarily shut off the audible alarm by pressing any button on the control panel. The door can remain open when you do this, and the audible alarm should go off. However, this is only a temporary solution, and the door open light will remain lit until you shut the door.
Important Note
Reset the refrigerator if you find that the Door Open light stays on after shutting it. The control board may malfunction and cause the light to stay on without cause. Turn off the refrigerator for about ten minutes; disconnect it from electric power by unplugging it or turning off the circuit breaker. Turn it on again, ensure the cooling function is on, and the doors are tightly shut. The control board may have a few issues that a reset can fix. But if the light stays on, replace the control board.
How to Replace the Door Seal on a KitchenAid Refrigerator
Disconnect the refrigerator from electric power before you begin. You can do this by unplugging it from the wall outlet or turning off the breaker if it is a built-in model. Open the affected door, and you can proceed if it does not have a mullion. But if it has a mullion, open the mullion rail and take out one of the screws using a quarter-inch nut driver. Leave the rail assembly up so that you can disengage the bottom and top hinges and the clips at the back.
Hold it gently and disconnect the wire harness connecting the mullion rail to the door. Set the rail aside with the screw, and use a flat-head screwdriver to pry the door seal out of the door to remove it. Once removed, clean the track where the seal sits with mild detergent before installing the new one. Dirt can find its way under the seal over time, and it can make a new installation difficult,
Sometimes, the door seal comes twisted and kinked due to the packaging during shipping. It does not mean the seal is damaged; all you have to do is leave it out in the sun for the heat to soften it. Alternatively, put it in a sink or bathtub and add hot water to soften it. Then, you can manually straighten it to the shape and size you need. Note that you must always purchase a refrigerator door seal using the model number to ensure you get the correct size.
When the seal loosens to the correct size and shape, place it on the door and start the installation from the top. It is easier to fit a refrigerator door seal from the top instead of the sides. The seal’s flappers must face outward, not inward. Push the seal into the top of the door and press it down; move slowly from the top down to the sides as you continue pushing the seal into the track. Use a small rubber mallet if you have difficulty pushing the seal into place with your fingers.
Afterward, use a heat gun to release kinks on the seal, but this step is unnecessary if there are no kinks. However, if you do use a heat gun, keep it some distance away from the seal to avoid burning or melting it with the intense heat. Once done, you can close and check the seal to see how well it works. If you removed a mullion rail, fix it back in place.
Note: These steps also apply if you are looking for how to replace the freezer door gasket on a KitchenAid refrigerator.
This video demonstrates how to remove and replace the door seal on a KitchenAid refrigerator…
Check out these other articles…
KitchenAid Refrigerator Not Working [Problems Solved]
KitchenAid Refrigerator Beeping [Proven Solutions]
KitchenAid Refrigerator Door Adjustment – Steps
KitchenAid Refrigerator Door Not Closing Properly
How to Remove a KitchenAid Side-by-Side Refrigerator Door
KitchenAid Refrigerator Door Stop Adjustment
Some KitchenAid refrigerator models have issues with the doors swinging too far when you open them. Many have a built-in door stop, but it is not always enough. Your user manual may have instructions on adjusting the door stop so that the door opens at a narrower angle. But if there are no instructions or the manual is unavailable, contact KitchenAid for assistance.
Users have gotten creative while looking for solutions to this problem. One method to use is reversing the door swing, although it is a complex task. Before deciding on this method, check the user manual to see if your refrigerator model has reversible doors. If not, you may have to make your own door stop.
Using soft-cushioned furniture to keep the door from swinging too wide may be good, especially if you have no other option to try. However, this method may not be ideal for everyone because of the refrigerator’s position in the house. Moving furniture around to keep the door from opening wide may cause obstruction around the unit. Therefore, consider using a floor stop or bumper to keep the door from opening more than 90 degrees. It will also keep the door from hitting any object or wall behind it.
KitchenAid Refrigerator Door Handle Replacement
To replace the door handle on a KitchenAid refrigerator, you must have a one-eight-inch Allen wrench. Open the refrigerator door and use the wrench to loosen the set screws holding the handle to the refrigerator door. You can remove the handle when the screws are loose. Some models allow you to remove the handle, while others require you to lift it up and off the mounting studs.
Get the new door handle and check the set screws on it. They must be in place, partially loose, to allow you to mount the handle before tightening them. Next, position the handle so that the screws face inward and align the handle to the mounting studs. Tighten the screws on the door using the wrench, but do not make them too tight to avoid damaging the handle. Close the door and test the handle; tighten it further if it is still loose on the door.
Note: Put some tape on the door close to the screws before using the hex key to remove the set screws. The tape protects the refrigerator door from accidental scratches that may damage its finish, especially if it is stainless steel.
KitchenAid Refrigerator Door Adjustment
Fixing a misaligned KitchenAid refrigerator door may seem like a difficult task, but it does not have to be. Check out this article on a KitchenAid refrigerator door adjustment to find instructions for fixing the refrigerator in quick and easy steps.
How to Tighten the Door Handle on a KitchenAid Refrigerator
If you only want to tighten the door handle because it is loose, get a ⅛-inch hex key. The refrigerator should have a set of hex keys for the door handle installation. You can purchase a set from any hardware store if necessary.
Next, insert the short end of the hex key into the screw hole until it fits. Turn the key to the right to tighten the screws fully. When they are tight, give each one another quarter turn to ensure complete tightness. The handle is not secure without the last turn. This process applies to every refrigerator door handle with screws.
KitchenAid Refrigerator Door Bin Replacement
To replace the door bin in your KitchenAid refrigerator, remove every item stored in the door. The door typically does not hold perishable food apart from eggs due to its temperature. So, you may not have to store food items removed from the door bin in another refrigerator unless it is necessary. Once free, lift the old door bin up and out of the refrigerator.
If it seems stuck, give it a gentle tug or push it from underneath to free it from the mounting tabs. Get the new door bin and position it inside the refrigerator door, ensuring the secure it on the mounting tabs. Close the door and check the bin; if it sticks out or the door does not close well, adjust the bin until it sits well inside the door. Do the same for other bins in the door, and consult the user manual for further instructions if these steps do not apply.
KitchenAid Refrigerator Door Not Closing Properly – What to Do
Sometimes, you may find that your KitchenAid refrigerator door does not close properly. What do you do in such a situation? Click on this link: KitchenAid refrigerator door not closing properly to learn more about possible issues and common solutions.
KitchenAid Refrigerator Door Frame Hot – Fixed
The door frame may be hot due to the mullion between the doors. Some KitchenAid refrigerator models have a mullion, which is a heater inside the frame between the doors to keep condensation from building in that area. If condensation or moisture builds between the doors, it may freeze and cause issues with opening the door. Moreover, it may cause issues with how the refrigerator functions.
Check for a switch to turn the mullion on and off; you can consult the user manual for the switch location. You can turn off the heater occasionally if the door frame becomes too hot. But do not leave it off for too long because of the possibility of moisture buildup, especially on hot and humid days. Another possible reason for the door frame getting hot is the condenser coils. Dirty coils cause the refrigerator to become warm due to their inability to dissipate heat from the system.
This causes the compressor and fans to run constantly, making the refrigerator hot. The loss of cool air in the refrigerator can also cause it to run all the time and become hot. You may also notice that the compressor runs too hot at this point. Clean the condenser coils with a vacuum or condenser coil cleaning brush. Ensure the door seals are working and the doors are not left open for too long.
Additionally, create enough space around the refrigerator so that the condenser coils can transfer heat out of the system. Trapped hot air can compromise the refrigerator’s cooling capacity, which makes the unit run hot. However, if the refrigerator gets hotter between the doors and other areas, schedule a service with KitchenAid to fix the problem.
KitchenAid Refrigerator In-door Ice Maker Not Working – Solutions
Ensure the temperature is correctly set for the ice maker to work. It must be low enough to freeze the water in the ice mold. Also, check the water filter status; a clogged filter restricts the water flow and compromises the water pressure. Furthermore, the fill tube feeding the ice maker with water must not be blocked with ice, and the water line must not be kinked or twisted.
You may also want to check the water inlet valve since it controls how much water flows into the ice maker. In addition, the ice maker assembly may be faulty, so it is best to test it. Check out this article on a KitchenAid refrigerator ice maker not working for troubleshooting and repair instructions.
KitchenAid Refrigerator Door Ice Dispenser Broken – Quick Fix
One or more of the ice dispenser parts may be faulty. But before testing the dispenser parts, check the Control Lock to see if it is active. The dispenser becomes inactive when the lock function is active. While doing that, ensure the ice maker produces ice; if there is no ice in the machine, there will be nothing to produce from the dispenser. You may also want to check the ice bucket; ice clumps in the bucket may prevent the ice from dispensing.
Also, if ice clogs the dispensing area under the ice bucket, there will be no ice from the refrigerator. The ice chute may also have ice fragments, making it impossible for ice to pass through. Check the door switch since it controls when the dispenser works if the door is open. But if these do not apply, check the dispenser parts, such as the ice chute door, dispenser actuator, ice bucket auger, and dispenser lever. Find helpful resources in this article on KitchenAid refrigerator ice dispenser not working to fix the door dispenser problem.
KitchenAid Refrigerator Freezer Door Leaking – Solved
There may be a defrost issue with the freezer. If the door is leaking, check the items stored in the door. Ensure everything is tightly sealed, and no heavy item sits on another. Open the door for a few minutes and monitor the water flow. If the door keeps leaking, empty it to find the source of the leak. It is not likely not to originate from the door but from inside the freezer.
If the leak comes from inside the freezer, the defrost drain may be clogged, or the freezer is not cooling as it should. And if there is a cooling problem, the ice in the freezer melts fast and leaks out from the unit. Follow the instructions in this article on a KitchenAid refrigerator leaking to locate the source of th leak and fix it. Alternatively, make an appointment for the refrigerator to be serviced.
KitchenAid Refrigerator Door Closes Too Hard – Fixed
Check the weight of the items in the door bins. Typically, the doors on a KitchenAid refrigerator have different heights, one slightly higher than the other. This takes the weight of food to be stored in the doors into consideration so that it does not misalign the doors or affect the hinges. But if you overload the door bins, the weight affects the doors and causes them to slam shut. Therefore, reduce the number of items in the door bins and see if it solves the problem.
If it persists, check the door hinges. The top hinge must be perfectly aligned, and the bottom hinge with the door closing cam must not be out of place. The door cam allows the doors to move smoothly and close tightly with the smallest nudge. The door may have trouble closing if the cam is broken or out of place. Adjust the hinges if they are out of place, and replace them if broken.
Note that the door closers may not work well if you remove the refrigerator doors without opening them at a 90-degree angle. In other words, you must keep the doors open to an angle of 90 degrees to the front of the cabinet before removing them for any purpose. Otherwise, you must reset the bottom door hinge.
Poor Leveling
Improper refrigerator leveling is another reason the door closes too hard. Various issues can occur in the refrigerator due to poor leveling, one of which is the door closing too hard. Typically, the refrigerator should slightly tilt to the back, but if it leans too much to the back, the door will have difficulty staying open.
As a result, you will find it slamming when it should be open or closing too hard with the smallest nudge. Place a level on top of the refrigerator and check the bubble; if it is not at the center, you must adjust the leveling legs until the refrigerator is properly balanced. Use the manual for instructions on correctly leveling the refrigerator.
KitchenAid Refrigerator Stopped Cooling After Door Was Left Open for a While
Manually defrost the refrigerator if it stops cooling after leaving the door open for a while. After defrosting it, you must create a way for it to cool again. So, leave the refrigerator door shut for at least 24 hours without any disturbance. Limit the number of times you open it within this period to help it retain the cool air and improve the cooling function. Also, try the door switch and monitor the evaporator dan’s functionality. This article on a KitchenAid refrigerator not cooling after being left open all night has instructions on defrosting and fixing the cooling issue in your refrigerator.
KitchenAid Refrigerator Door Cam Repair
If the door closing cam on a KitchenAid refrigerator is bad, the only repair is to replace it. To replace the door cam, remove the affected door. Turn off the refrigerator by unplugging it from the wall outlet. Remove the hinge cover and unscrew the top hinge screws to loosen the hinge. Pull the hinge off the top of the door and set it aside. Open the door and lift it off the bottom hinge; you may need someone to help you move it to a work surface.
Use a quarter-inch nut driver or socket to remove the screws on the door stop, pull it out, and remove the damaged door closing cam. Set the old one aside and insert the new one in its place. Secure it with the single screw and put the door stop over it. Next, thread the screws onto the door stop and ensure the cam is set. To check how well you fixed the cam, remove the middle or bottom hinge and insert the hinge pin and bushing into the door cam hole. Now, turn the hinge so that its base is at a 90-degree angle with the door; this resets the door cam.
Remove the hinge and fix it back on the refrigerator cabinet. Carry the door with your assistant and set it on the middle hinge pin and bushing, ensuring you position the door at a 90-degree angle while doing so. Align the top hinge on the door and secure it with the screws. Put the hinge cover back in place and thread the single screw to secure it. Now, open and close the door a few times to test the door cam before reconnecting the refrigerator to electric power.
Note: These steps apply to all KitchenAid refrigerator models. Check and replace the door closing cam if you hear a loud popping noise whenever you open the door.
Here is a video showing how to remove and replace the door closing cam on a KitchenAid 5-door French-door refrigerator…
KitchenAid Refrigerator Freezer Door Pops Open – What to Do
Check the arrangement of the freezer contents, especially if you recently loaded it. One or more items may obstruct the door’s path, keeping it from closing. So, when you attempt to shut it, the items quickly push it open again. But if that does not apply, the issue may be normal. Sometimes, the air quickly moves from one area to another.
You may find the freezer door popping open when you shut the refrigerator door, especially if you slam the door shut. Try closing it gently and see if the freezer door pops open. Also, avoid slamming the freezer door shut; closing the door forcefully may apply pressure from the inside and force it open. Moreover, it may prematurely damage the refrigerator.
There is a chance that the door gasket is dirty or weak. If you did not load the freezer and it is not an issue of the air quickly moving from one area to another, inspect the door gasket. The freezer door opens without much pressure when it fails to seal tightly. The smallest movement around it pops it open. A dirty gasket is easy to fix; use warm soapy water and a soft sponge or brush to clean it. But if it is weak and does not seal tightly, replace it.
When none of the above applies, check the refrigerator’s leveling. Several minor issues can be corrected if the leveling is proper, so use a level to check the refrigerator. Follow the leveling instructions in the user manual to correct the issue if necessary. Additionally, ensure the freezer door hinge is not damaged; a damaged hinge keeps the door from closing and sealing. Consider replacing the hinge if it is bent or broken, and ensure you do not overload the freezer door to prevent a future occurrence.
How to Replace the Water Line in a KitchenAid Refrigerator Door
Disconnect the refrigerator from the electric power and turn off the water supply. Next, go to the top hinge on the door with the dispenser. Remove the screw on th hinge cover and lift off the cover. Unlock the locking clip on the water line under the hinge cover and disconnect it. Be prepared to catch any leftover water in the pipe.
Get two small pieces of painter’s tape and apply them under and by the side of the dispenser’s display. The tape prevents scratching on the refrigerator’s finish while you remove the dispenser’s display panel. Next, get two putty knives; insert one under the display and the other on one side. Begin to pry the panel loose, ensuring you are not forceful to avoid damaging the panel. Once out, remove the clips securing the actuator paddle wire connectors to the dispenser panel. Also, disconnect the wire harnesses so you can remove the panel.
Next, use a small flat-head screwdriver to detach the nozzle of the water line out of the separator. It may be a little difficult, but do not force it loose or risk damaging the part. Once detached, pull the water line out of the door. Now, get the new water line and feed it into the channel in the door until it comes out of the top door hinge. Next, snap the water line nozzle into place in the separator and reconnect the wire harnesses to the correct terminals on the dispenser panel.
Use the clips to secure the actuator paddle connectors and align the top tabs on the panel with the slots in its housing. Push them in and gently snap the entire panel into place. Go to the top of the door and connect the other end of the new water line to the main water supply line, securing both with the clip. Replace the hinge cover and secure it with its screw. Lastly, reconnect the refrigerator to electric power and test the water line.
Follow the instructions in this video to replace the in-door water line in your KitchenAid refrigerator…
KitchenAid Water Line Freezing In Door – Quick Fix
Check to see if the ice maker is connected to the water supply. Inspect the water line and water fill tube, and ensure the water inlet valve is open. If the ice maker is on but does not receive water, it will continue to try making ice, lowering the freezer temperature. Over time, the water line freezes, and you may find the inlet valve, ice maker, and freezer contents freezing. Turn off the ice maker if it is not in use or connect the machine to the water supply.
You may also want to check the water reservoir to ensure it is not frozen. Low refrigerator temperatures cause the reservoir to freeze, so increase the temperature a few degrees and close the door for about half an hour. Check the water reservoir and water line for any improvements. If the problem is resolved, slowly lower the temperature, one degree at a time, until you achieve the recommended temperature again.
Additionally, check the air damper, especially if nothing else seems to fix the problem. The damper is a small electrically-controlled door that allows the proper amount of cold air to flow into the refrigerator from the freezer. Afterward, it closes to cut off the cold airflow to prevent freezing in the fresh food section. But if the damper is broken, it may remain open, allowing too much cold air into the refrigerator and causing the water line to freeze. This may also affect the water reservoir and other refrigerator contents. Replace the damper if it does not work.
How to Remove the Dispenser Drip Tray from a KitchenAid Refrigerator Door
Push the inside rear edge down to remove the dispenser drip tray from under the dispenser nozzle. This action pushes up the front edge so that you can lift the tray up and out. Check the user manual for other instructions on removing the drip tray from under the dispenser for your specific model.
KitchenAid Refrigerator Ice Chute Door Stuck Open – Fixed
If the ice chute door in the ice dispenser of a KitchenAid refrigerator is stuck open, check for ice fragments. Pieces of ice can stick between the door and housing, keeping it open. As a result, the ice dispenser or ice door will be dripping due to ice melting when warm air flows into the compartment.
Use a clean cloth dipped in warm water to clean the ice chute and door area to remove ice fragments that may be stuck there. Check to see if the door closes properly afterward. If the problem persists, check the ice door solenoid; the solenoid controls how the door functions. Test the solenoid with a multimeter and if there is no continuity, replace the solenoid.
How to Replace the Freezer Door Switch on a KitchenAid Refrigerator
Disconnect the refrigerator from the electric power and locate the door switch. You can check the user manual for the exact location, but it is usually visible near the door because the door activates it once it is closed. Remove the screw when you find it; how you remove it depends on the model.
Some may have one screw holding them in place, and if that is the case, unthread the screw and remove the switch. But if there is no screw, get a small putty knife and pry the switch loose from its housing. You may want to apply a small piece of painter’s tape on the frame next to the switch before using the knife so that you do not scratch the panel. Once the switch is loose, you will find wires attached to it from inside the freezer.
Disconnect the wire harnesses, ensuring you label each one accordingly. Discard the old door switch and put the new one in its place. Reconnect the wire harnesses to the new one and align the switch in the housing. Snap it into place or secure it with the screw. Finally, reconnect the refrigerator to electric power and test the new switch.
Magnetizing a KitchenAid Refrigerator Door Seal
The door seal on any refrigerator door, including KitchenAid refrigerators, works with a flexible magnet behind the rubber covering. Over years of use, the magnet may lose its ability to attract the steel refrigerator frame.
You can remagnetize the magnet by rubbing a strong magnet, preferably a neodymium magnet, along the seal until it works again. Apply the magnet on each seal’s side at least fifty times, going in the same direction for each side. This usually restores the door seal’s magnetizing attribute.
However, using this method on the door seal is not advisable because it can cause the seal to lose whatever little magnetic property it has. That means you will have to buy a new door seal. Do not remagnetize the door seal unless you know exactly how to use it. Let a technician do the job or replace the entire door seal.
KitchenAid Refrigerator Freezer Door Frosting Up – Quick Fix
It is not common to see the door of a KitchenAid refrigerator frosting up; the same is true for every refrigerator. The door is typically not cold, so non-perishable foods and others that do not need too much cold air are stored there. If you find the door with ice accumulating on it, it may be because it was left open for too long. Condensation builds on the door and other parts inside the refrigerator and eventually freezes. This is especially true for the freezer because of the extremely cold temperature.
Inspect the door gasket and see how well it creates a seal. If the gasket is damaged, it cannot keep the warm, humid air out, leading to moisture buildup and eventual frosting. To be sure, close the freezer door on a piece of paper and try pulling the paper out without opening the door. If you can, the gasket is weak and needs a replacement.
There is also the possibility that the ice maker is not working as it should. If the machine is not connected to water and is on, it will lower the freezer temperature and cause items to freeze, including the door. You will find it applies more to in-door ice makers. Connect the ice maker to the water supply or turn it off if it is not in use. Otherwise, the freezer and refrigerator will keep freezing.
Ensure the freezer defrost drain is not clogged. A clogged freezer defrost drain keeps the defrost water from flowing out of the section, and over time, the cold temperature freezes it and builds the temperature. A clear sign that the drain is clogged and water is not draining is if the refrigerator leaks water, even from the door. Clear the drain of debris and ice to allow the water to flow out and prevent an ice buildup.
KitchenAid Refrigerator Water Dispenser in the Door Not Working – Fixed
The solution may be as easy as selecting the right option and correctly depressing the lever. Sometimes, you may not fully depress the lever, and the dispenser will not work without doing it right. But if not, check to see if the dispenser control lock is active or if the water filter is clogged with dirt.
Also, check to see if the water line is kinked, twisted, or damaged, and ensure the in-door water line is not frozen. Furthermore, check the water inlet valve and test the door switch. In addition, ensure the dispenser parts are in good working condition. This article on a KitchenAid refrigerator water dispenser not working has details on troubleshooting and repairing these parts.
KitchenAid Refrigerator Freezer Fan Works Only When Door Is Open
The evaporator fan, which is the fan in the freezer section, typically runs when the freezer door is closed. On some models, the door switch activates the fan to get it running whenever the door closes and activates it. You may want to check the refrigerator’s cooling function, but ensure the door switch is in good working condition before that. Open the door and test the switch with a multimeter; replace it if there is no continuity.
The most probable reason is that the refrigerator is not cooling. The fan runs all the time if the evaporator coils are frozen, the condenser coils are clogged with dirt, the condenser fan is faulty, the start relay is defective, or the thermostat is malfunctioning. You must determine what is causing the cooling problem and fix it. Follow the detailed instructions in this article to fix the cooling issue. Otherwise, consider replacing the fan motor or the entire fan assembly.
Water Dispenser on KitchenAid Refrigerator Squirting Water
The water pressure may be too high, causing a significant increase in the water flow from the dispenser. If you recently replaced the water filter and did not dispense a few gallons to clear the water lines of trapped air, it may explain the sudden leakage from the dispenser. Trapped air builds pressure and causes the dispenser to leak. Dispenser water for a few minutes to clear the system if this applies.
There may also be a problem with the water filter. Ensure you use the correct type for a KitchenAid refrigerator and follow the installation steps in the user manual or the product packaging. Otherwise, you may damage the filter head or leak if it is not the right product. A faulty water inlet valve can cause a water leakage problem with the dispenser if it is faulty. Since it controls the amount of water flowing into the refrigerator, a faulty valve can cause an overflow from the dispenser and ice maker. Check and replace the valve if it is defective.
Changing the In-door Ice Maker on a KitchenAid Refrigerator – Steps
First, turn off the ice maker and refrigerator to change or replace the in-door ice maker in your KitchenAid refrigerator. You can turn the refrigerator off by unplugging it from the wall outlet or turning off the circuit breaker. Always disconnect any electric appliance from electricity whenever you have to perform repairs or cleaning services. The refrigerator may be without power for half an hour or a little more, so you may not have to store frozen foods in another cooling appliance.
Next, remove the ice bucket from under the ice maker. Usually, you do this by grabbing the bucket and lifting it out of the unit. Once the bucket is out, check to see if there is any ice in it; dump it out in the sink and run warm water into the bucket to clear it of ice clumps. Inspect the ice maker in the door for mounting screws or tabs. Release the tabs or loosen the screws using a screwdriver.
Set the screws aside and gently lift the ice maker down. Turn it to reach the ground wire and other wire connections. Disconnect the green ground wire and detach the wire harness; you may need to remove a screw holding the ground wire and use needle-nosed pliers to unlock the harness. Lift the ice up and out of the refrigerator door.
Next, set the new ice maker into the housing in the door and reconnect the ground wire; use the screw if you removed any. Connect the wire harness to the back of the ice maker, ensuring it locks in place. Carefully position the machine in the door to align with the screw holes, and secure it with the mounting screws.
Tighten the screws without making them too tight, and check to ensure the ice maker is secure. Install the ice bucket under the machine, pushing it in until it sits securely in place. Close the door to test how well you installed the machine before reconnecting the refrigerator to electric power. Test the ice maker afterward.
KitchenAid Refrigerator Has a PO Code on the Door After Power Came Back On – Fixed
Whenever there is a power outage, and it comes back on, your KitchenAid refrigerator displays PO as an error. The error code alerts you that power has been out for a while, and the refrigerator’s internal temperature has risen up to 18 degrees Fahrenheit or -8 degrees Celsius.
A beep or chime usually accompanies the displayed error code, and the beeping will continue until the temperature drops or you confirm the outage. Press Measured Fill or any button on the control panel to stop the beeping noise and confirm the outage. The error code will disappear from the display as it returns to the home screen.
How to Repair the Ice Dispenser Door on a KitchenAid Refrigerator
Disconnect the refrigerator from the electric power and turn off the water supply. Next, go to the top hinge on the door with the dispenser. Remove the screw on th hinge cover and lift off the cover. Unlock the locking clip on the water line under the hinge cover and disconnect it.
Be prepared to catch any leftover water in the pipe. Get two small pieces of painter’s tape and apply them under and by the side of the dispenser’s display. The tape prevents scratching on the refrigerator’s finish while you remove the dispenser’s display panel. Next, get two putty knives; insert one under the display and the other on one side.
Begin to pry the panel loose, ensuring you are not forceful to avoid damaging the panel. Once out, remove the clips securing the actuator paddle wire connectors to the dispenser panel. Also, disconnect the wire harnesses so you can remove the panel.
Next, unhook the wires from the retaining clip and use a ¼-inch nut driver to remove the bolts securing the ice door to the dispenser. Detach the door motor’s wire harness to free the old ice door from the dispenser. Remove and discard the door, and put a new one in its place. Connect the wire harness to the motor and mount the screws to secure the door.
Push the wires behind the retaining clip to move them out of the way, and reconnect the wire harnesses to the dispenser’s panel. Ensure you secure the actuator paddle wire connector with its retaining clip. Now, position the dispenser panel to align its upper tabs with the slots and snap the bottom into place. Remove the pieces of painter’s tape on the panel and reconnect the refrigerator to electric power. Then, test the ice dispenser door to see how it works.
How to Tighten the Freezer Door on a KitchenAid Refrigerator
To tighten or adjust the freezer door on a KitchenAid refrigerator, start by opening the freezer and locating the hex-head bolts on each side of the drawer. You will them where the slide assembly meets the drawer. Get a ⅜ socket tool and loosen the bolts, but do not completely remove them. Simply give each bolt three turns and stop. Do this for all six bolts to allow you to fix the freezer drawer, even if the problem is only on one side.
Next, look for the set screw fixed to the drawer front and facing inward. Get a hex key to turn this screw, slightly lifting the drawer while doing so. Give the screw two turns counterclockwise or to the left if you need to tighten the gap at the bottom, and give it two turns to the right or clockwise to reduce the gap at the top. Close the freezer and check the gap.
If necessary, repeat the steps on the screw on the other drawer side to tighten the gap further. Do not turn more than two revolutions without checking the gap; otherwise, you may tighten the freezer door more than required. Afterward, tighten the bolts on both sides without making them too tight. Then, clean the gasket to remove any moisture and close the freezer door. You can employ the services of an appliance technician to fix this freezer door problem if you are unsure of the steps.
Can’t Turn Off Light on Kitchen Refrigerator Door – Quick Fix
The refrigerator may be in demo or showroom mode. Before checking the mode, ensure there was no recent power outage. A power outage can keep the control panel on the door illuminated by turning on the power outage light. If you find the display showing PO, it means there is a power outage, and you must confirm it to turn off the light.
Press the Measured Fill button or any other control panel button to confirm it and return the display to the home screen. But if there is no power outage, check to see if the display shows Showroom. And if it does, consult the refrigerator’s user manual for steps to exit the mode. Although this is unlikely, the showroom mode can turn off all functions, but it will light up the door with ‘Showroom’ on display.
However, if that does not apply, reset the refrigerator. Unplug it from the wall outlet, wait about ten minutes, and reconnect it to electric power. Turn on the cooling function, and check the door for any improvement. If the problem persists, you may have a faulty electronic control board. Have a technician test it and recommend a permanent solution.
New KitchenAid Refrigerator Door Alarm Goes Off
If you find the door alarm on a new KitchenAid refrigerator going off, ensure the door is fully closed and sealed. Since it is a new installation, the door gasket should be in good working condition. However, it may not be the door alarm going off but the temperature alarm. It takes about 24 hours or more for a new refrigerator to cool, so the alarm may occasionally go off while the unit cools to the desired temperature.
This is normal, but you can temporarily shut off the loud beeping by pressing the temperature alarm button or any control panel button. The beeping will resume after some time, so be ready to shut it off again. If these do not apply, contact the KitchenAid Center or reach the installation team for further assistance.
KitchenAid Refrigerator Door Seal Hot – What to Do
Feeling some warmth on the door seal is normal. As the refrigerator runs, it generates some heat, and you can feel it on the refrigerator cabinet and door seal. However, it should not be excessively hot; if it is, you must check specific parts of the appliance. Check the condenser fan, coils, compressor, and evaporator coils.
The refrigerator may run all the time due to functionality issues. Overheating from the condenser coils can lead to high internal temperatures, which leads to the compressor running to maintain a cool temperature. Consequently, the refrigerator cabinet becomes hot, affecting the door seal. The same applies if the evaporator coils are frozen, becoming unable to produce cold air, or if the condenser fan does not pass air over the coils and compressor. Additionally, the compressor may malfunction and generate heat that causes the refrigerator to run hot.
Clean the condenser coils with a vacuum or a condenser coil cleaning brush. Also, clean the area around it. Inspect the evaporator coils for ice accumulation; manually defrost them if they are frozen. If the refrigerator has an automatic defrost system, troubleshoot each component to find the faulty one and replace it. Furthermore, ensure the condenser fan works to circulate air in the condenser compartment. Replace the motor or entire fan assembly if it stops working.
Lastly, check the compressor. The compressor is the center of the refrigerator and circulates the refrigerant. It is also part of the cooling system; the refrigerator will have trouble cooling if it becomes bad. Age, over-usage, and other issues can damage the compressor, but it is best to use the services of a qualified technician to test the compressor and determine whether or not to replace it.
How to Replace a Door Shelf Trim on a KitchenAid Refrigerator
First, disconnect the refrigerator from electric power to replace the door shelf trim or bar on a KitchenAid refrigerator. Open the refrigerator door and pull the side locking tabs on the shelf trim to release it. Remove the bar and install the new one, aligning it with the holders and snapping it into place. Do this gently to avoid damaging the new part. Ensure you purchase the shelf bar using the refrigerator’s model number to get the correct replacement.
Cleaning the Gasket Around the Door on a KitchenAid Refrigerator
Start by turning off the refrigerator and unloading the door shelves. Removing items from the door bins is not absolutely necessary, but you do not want to get dirty water on food items. It is best to remove them out of the way. Mix dishwashing detergent into warm water, and scrub the gasket using a clean cloth or soft sponge.
It may take some time to clean it thoroughly, depending on the refrigerator size and the extent of the grime. Afterward, rinse the gasket using another cloth dipped in clean water to remove the soap residue. Dry the gasket with a lint-free cloth and apply a thin layer of petroleum jelly or paraffin wax to encourage lubrication.
How to Change the Bushing on the Door of a Side-by-Side KitchenAid Refrigerator
Unplug the refrigerator or turn off the breaker. Remove the hinge cover on the top hinge; you may have to remove a screw before taking the cover out. Next, remove the screws securing the top hinge and lift the hinge away from the door. Now, you have to hold the door steady after removing the top hinge; find someone to help you lift it down to expose the bottom hinge.
The bushing is usually on the hinge pin, so slide it off and slide on the new bushing. Position the door on the bottom hinge pin and while holding it steady, put the top hinge in place and secure it with the screws. Then, slide the cover on and mount the holding screw.
The steps are easier if the bushing is on the left door with a water dispenser. Remove the hinge cover following the same steps above and expose the bushing on the water line in the door. Lift the bushing off and insert the new one in its place. Replace the hinge cover and secure it with a screw.
KitchenAid Refrigerator Ice Dispenser Door Cleaning
Disconnect the refrigerator from the electric power and turn off the water supply. Next, go to the top hinge on the door with the dispenser. Remove the screw on th hinge cover and lift off the cover. Unlock the locking clip on the water line under the hinge cover and disconnect it.
Be prepared to catch any leftover water in the pipe. Get two small pieces of painter’s tape and apply them under and by the side of the dispenser’s display. The tape prevents scratching on the refrigerator’s finish while you remove the dispenser’s display panel. Next, get two putty knives; insert one under the display and the other on one side.
Begin to pry the panel loose, ensuring you are not forceful to avoid damaging the panel. Once out, remove the clips securing the actuator paddle wire connectors to the dispenser panel. Also, disconnect the wire harnesses so you can remove the panel.
You can opt to push the wires out of the way at this point and clean the ice door. However, you may not do a thorough job without completely removing it from the dispenser. So, unhook the wires from the retaining clip and use a ¼-inch nut driver to remove the bolts securing the ice door to the dispenser. Detach the door motor’s wire harness to free the ice door from the dispenser.
Clean it with warm soapy water and a soft cloth until it is thoroughly clean. Afterward, thoroughly rinse it to remove every soap residue and dry it before reinstalling it. Doing this ensures the ice is not contaminated with the taste of soap or dirt. Retrace your steps to reassemble the ice dispenser and test it afterward to ensure it is working.
Can’t Unlock KitchenAid Refrigerator Door
Several issues can cause the door of a KitchenAid refrigerator to lock. If you or someone else opened and closed the door shortly before you tried to open it, it might explain the difficulty. Typically, warm air flows into a refrigerator when you open the door, replacing the cold air that flows out. And when you close the door, the cold and warm air mix, creating a vacuum that temporarily locks the door. Give the refrigerator a minute or two for the vacuum pressure to equalize and release the door. It is nothing to worry about, as it is a normal part of a refrigerator operation.
However, if this does not apply, you may have a problem with a dirty door gasket. Food crumbs and spills from drinks, especially sugary drinks, can cause the gasket to become sticky ot the point of locking the door. If the dirt is excessive, it may stick the door to the refrigerator frame and make it difficult to open. Soak a towel in warm water and clean the edges of the door. The water and warmth may release the door; if that happens, ensure you thoroughly clean the gasket.
Another possibility is that the refrigerator is not level or the floor is uneven. This can cause functional problems with the refrigerator, so put a level on top of the appliance and check its balance. Adjust the leveling legs or screws to fix the issue. If the floor is uneven, use shims to create a balance so that the door can open and shut without issues. Follow the instructions in the user manual to complete the leveling process.
Ice may have accumulated on the door frame and gasket. This usually occurs if there is a condensation issue between the doors, which builds and freezes as the refrigerator continues to run. Most KitchenAid refrigerators have mullions between the doors to prevent moisture buildup, but if the mullion is off or faulty, it may cause frost issues. A cloth soaked in warm water may melt the ice and allow you to open the door if applicable. Otherwise, unplug the refrigerator for an hour to allow the ice to melt.
Get Instant Help — Ask An Experienced Verified Appliance Technician
Need expert help? Click here to use the chat box on this page to speak with a verified appliance technician right away. No need for expensive in-home service calls. No appointments. No waiting.