Your refrigerator leaking can result in a lot of long-term damages to both your floor and the refrigerator itself. This is why it is a problem that should be resolved immediately and not left alone. Therefore, in this article, we will discuss various ways to fix the problem of your Thermador refrigerator leaking water.

Table of Contents
Thermador Refrigerator Leaking – Solutions
Before we go into the solutions, you need to know that some of these repairs are very easy, while others may be quite complex. So, if you find yourself struggling with any, stop the repair and call a service technician.
Below are the most common solutions for a leaking Thermador refrigerator:
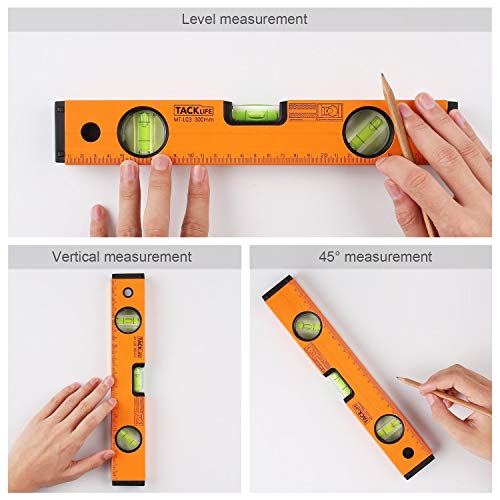
1. Level the Refrigerator
The first step to take to stop your Thermador refrigerator from leaking is to ensure the refrigerator is leveled. And if it isn’t, water may spill from any available opening or the drain pan underneath the unit.
Check if the refrigerator is moving back or forth. Or use a level to check if the fridge is leveled properly. If it is not, then do the steps below to level your refrigerator:
Step 1: Remove the screw holding the grille at the bottom of the refrigerator and take it out. Skip this step if your model does not have a grille.
Step 2: The leveling legs will be visible with the grille removed. Turn the leveling legs clockwise to raise them and counterclockwise to lower them.
Step 3: If reaching the legs is difficult, ask someone to help tilt the refrigerator a bit backward. And then adjust the legs to get the refrigerator leveled.
Step 4: Finally, use the level to confirm if the refrigerator is properly leveled. And then put the grille back on.
2. Check the Water Line
If you trace the leak to the water line, then the line may be loosely fitted, bent, or has a tear or crack.
If the line is loosely fitted, simply tighten the compression fitting to resolve the problem. If the line is torn or cracked, then it should be replaced. Do this by disconnecting the line from each end and then put a new one in its place.
3. Release Trapped Air from the Water Line
After each filter change, air bubbles can get trapped in the water line. There is no actual method to troubleshoot this problem. However, releasing the trapped air is no big deal so you may try it and see if it fixes the problem.
To release the trapped air, put a bucket under the water dispenser. Then dispense about 3 gallons of water. This will flush the water system and release the trapped air. The refrigerator will stop leaking if this was the problem. Also, ensure you do this after every filter change to avoid the reoccurrence of this issue.
4. Clean the Defrost Drain
If you notice water leaking underneath your Thermador refrigerator, then a clogged defrost drain may be the problem. The defrost drain is responsible for taking the water produced during the defrosting process to the drain pan.
Sometimes, the drain can get clogged with food particles, debris, or ice. This will then result in the drain overflowing and water spilling out of it.
To resolve this problem, the defrost drain has to be unclogged and cleaned. Thankfully, you can do this yourself in these easy steps:
Step 1: Locate the defrost drain hole inside the refrigerator. The location of the defrost drain hole is peculiar to models so you can use your manual to find out the drain hole’s location.
If you have difficulty locating the hole, we recommend you get the help of a service technician.
Step 2: Once you locate the drain hole, check what is causing the blockage. If it is ice; you may defrost the fridge.
Or you may set a hairdryer to the lowest degree and melt off the ice.
Step 3: If other debris like food is what is clogging the drain, make a mixture of warm water and baking soda. Then use a turkey baster to flush the mixture down the drain. Do this until the tube is clean or until you hear water running into the drain pan.
5. Check the Drain Pan
The drain pan is located underneath the refrigerator and it collects water produced during the defrosting process. The pan can be the cause of the leak if it is overflowing, cracked, or not properly installed.
In the case of the pan overflowing, simply take out the pan and empty it. Inspect the pan for cracks and if any is found, replace the pan.
Lastly, if you had recently taken out the pan for maintenance then it may have been installed incorrectly. Take out the pan and put it back properly to resolve this issue.
6. Inspect and Replace the Door Seal
When the door seal gets worn-out or dirty, it becomes unable to seal off properly. This often results in warm air entering the refrigerator and sometimes forming in liquid form on the refrigerator’s door.
To resolve this, inspect the door seal. If it is dirty, then clean it using a dishcloth and mild detergent. The seal should be replaced if it appears worn-out or is leaking.
How to Replace Thermador Refrigerator Door Seal
To replace a Thermador refrigerator door seal, follow these steps:
Step 1: Open the refrigerator door. Peel off the top corner of the door seal with a putty knife or a flat-head screwdriver.
Step 2: Grab the already removed top corner of the seal and pull it to pry off the door seal from the track.
Step 3: Place the new seal on the track, ensure the seal is compatible with your refrigerator.
Step 4: Work your way around the track and clip the seal firmly to the track. Double-check the seal to ensure there are no bumps around it.
Check out this video for additional information on how to replace your refrigerator’s door seal
Check out these other articles…
Beko Refrigerator Leaking [Solved]
Hotpoint Refrigerator Leaking [How to Fix]
Miele Refrigerator Leaking [Solved]
Daewoo Refrigerator Leaking [Solved]
RCA Refrigerator Leaking [Quick Fix]
7. Check the Water Inlet Valve
The water inlet valve may be defective and stuck open. When this happens, you will find water pooling under your unit. Another reason the water inlet valve may be leaking is if the psi is below 20.
Check the water pressure with a water pressure regulator. Or you may do the following in the absence of a pressure regulator:
i. Turn off the water supply and then remove the water line from the valve.
ii. Next, hold the line over a bucket and then switch the water supply back on.
iii. Observe the water flow from the line. If it is strong, the water pressure is okay. And a weak water flow means a low water pressure.
The water pressure being low is caused by either the water line or the water source itself. However, the first thing would be to replace the water line. If the problem persists, then change the water source.
If neither of these stops the valve from leaking then the valve is defective and should be replaced. Unfortunately, replacing the valve may be too complicated unless you have ample technical knowledge. We, therefore, advise that you call a service technician.
8. Replace the Water Filter
If the leak is traced to the water filter, then the water filter may be damaged. Remove the filter and inspect its head. If the seal is missing or torn then the filter has to be replaced.
Also, if the filter is old then it may be clogged. Cleaning the filter will not solve the issue so the filter has to be replaced. Make sure you replace the filter as often as recommended.

9. Uninstall and Reinstall the Water Filter
If the water filter is not damaged or old then it may have been installed wrongly. Check your user’s manual for a detailed guide on how to replace your Thermador refrigerator water filter.
10. Inspect and Replace the Water Filter Housing
The water filter housing may be the cause of the leak if it is cracked. So, removed the water filter by turning it counterclockwise and then inspect the filter housing. If you find a crack, then replace the filter housing as this cannot be repaired.
How to Replace Thermador Refrigerator Water Filter Housing
Do the following to replace a Thermador refrigerator water filter housing:
Step 1: Unplug the refrigerator from the power supply to minimize the chances of electrocution. Also, turn off the water supply.
Step 2: Take out the water filter. Remove the screws holding the water filter housing in place and then pull the housing forward.
Step 3: Adjust the refrigerator so that you have access to the back of the appliance.
Step 4: Next, take off the back access panel by unthreading the screws holding it in place
Step 5: Locate the water inlet valve. Remove the water lines from the valve with an open-end wrench.
Step 6: Go back to the front of the appliance and gently pull out the filter housing. Remove the water line from the old housing and attach it to the new filter housing.
Step 7: Install the new filter housing and reassemble the refrigerator by doing the steps in reverse order.
Thermador Refrigerator Ice Maker Leaking – Solution
Check and try out the solutions given in the first section of this article to stop your Thermador refrigerator ice maker from leaking. The ice maker assembly should be replaced if the problem persists after you do the solutions. This is because a part of the assembly may be faulty but the ice maker is sold as a unit.
For this replacement, we advise that you get the help of a service technician.
Get Instant Help — Ask An Experienced Verified Appliance Technician
Need expert help? Click here to use the chat box on this page to speak with a verified appliance technician right away. No need for expensive in-home service calls. No appointments. No waiting.