In this guide, we take a look at GE refrigerator troubleshooting steps. So, if your GE unit has some errors or problems, you will find the right steps to take here.
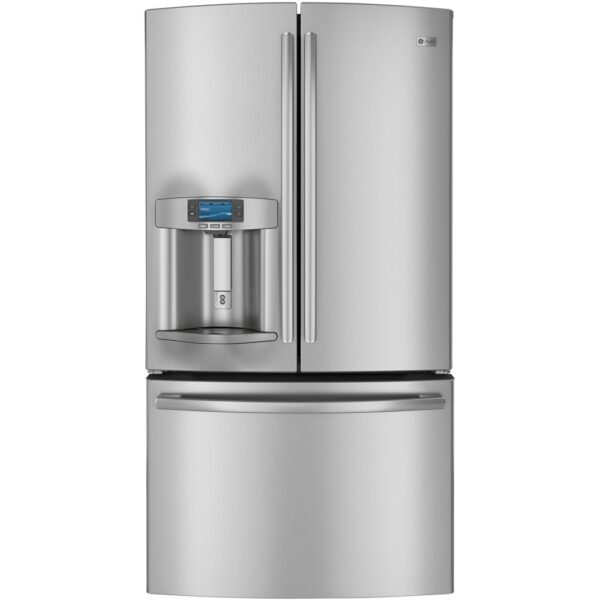
Table of Contents
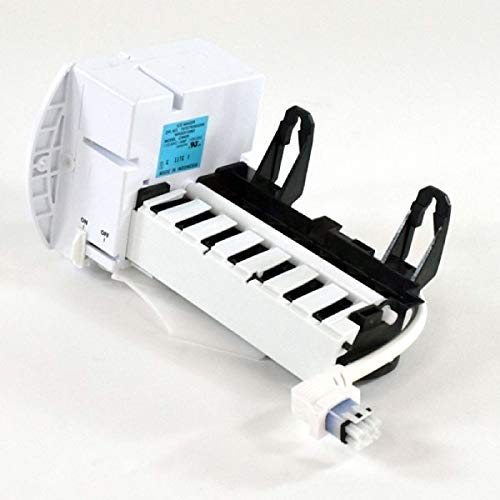
Troubleshooting a GE Refrigerator Ice Maker
There are different issues a GE ice maker could have. Therefore, let us discuss them and how to fix them.
GE Ice Maker Is Not Making Ice – Quick Fix
If you find that the ice maker in your GE refrigerator is not making ice, do one or more of the following in the GE refrigerator troubleshooting guide:
1. Check the Water Inlet Valve
Before checking the valve, be sure that the pressure of water to the ice maker is up to 20psi. This is the least pressure the valve requires to be able to open and allow water into the ice maker.
If you are not sure about checking the pressure accurately, use the water dispensing method. Try to dispense water up to ¾ of a drinking glass in 10 seconds. If the pressure is enough, you should be able to do this.
But if you cannot get that amount of water within that time, you know the pressure is too low. Therefore, find a qualified plumber to adjust it appropriately.
Furthermore, if your refrigerator does not have a water dispenser, dispense the water straight from the water line at the back of the unit. The same ¾ of a drinking glass in 10 seconds rule applies here, too. Inability to do this means the pressure is low.
However, if the water pressure is enough yet the ice maker is not making ice, then the power to the valve may be insufficient. Check it using a multimeter.
If the power is low, have a technician check the electrical connections. But if it is sufficient, the valve is likely to be defective. Replace with a new one compatible with the refrigerator model.
If the valve is unable to fill the ice maker with water, it would be impossible for it to make ice.
2. Check the Temperature
Ensure that the temperature in the freezer of the unit, where the ice maker is, is low enough to freeze water. 0 degrees Fahrenheit or -18 degrees Celsius is the right temperature setting for any freezer. If you have to go higher, it must not exceed 10 degrees Fahrenheit or -12 degrees Celsius.
Therefore, check the setting of your freezer and adjust it appropriately if need be. If the temperature is high, the ice maker won’t be able to cool enough to make ice.
However, if the temperature keeps increasing for no apparent reason, check the condenser coils if they are visible.
Accumulation of dirt on them will cause the unit to overheat as the cooling components work extra hard to maintain the right temperature. Clean the coils thoroughly and repeat the cleaning process every 6 months.
Additionally, check the evaporator coils behind the inside back wall of the freezer section. If there is a buildup of ice or frost on them, it means you have to manually defrost the freezer to thaw the ice.
Frozen coils won’t be able to cool air for the freezer. As a result, the temperature in the freezer will rise and the ice maker won’t cool enough to freeze water to ice.
But this also means you need to check the components of the defrost system. One or more of them have failed, causing ice to build on the cooling coils. Therefore, test the defrost timer, defrost heater, defrost thermostat, control board and sensor.
3. Check the Water Filter
A clogged or overused water filter is capable of preventing water from flowing to the ice machine. If the water filter in your GE refrigerator is older than 6 months, it is due for a replacement. Change it and see if it resolves the problem.
On the other hand, if you recently replaced the ice maker and can’t get the ice maker to make ice, remove it and check for any damage. It can cause the ice maker to malfunction, leading to problems with the ice maker.
In addition, be sure to use the right type of water filter for your GE refrigerator. Using the wrong type can also cause problems with the ice maker.
4. Check the Ice Maker Switch
First, check to see if the switch is off. It could get turned off accidentally. If this is so, turn it back on and wait to see if the ice maker starts making ice.
But if the switch is on yet the ice maker is not making ice, test the switch with a multimeter to check for continuity. And if there is no continuity to the switch, replace it as soon as you can.
A malfunctioning or defective switch can keep the ice maker from working at all. And if the ice maker is not working, it cannot make ice.
5. Check the Ice Maker
If any ice maker assembly components are defective, the ice maker won’t make ice. But before settling for buying a new ice maker, check the fan, the inlet valve, and even the water line.
If they are all in good working condition, then a component in the ice maker is bad. And since it is difficult to find individual ice maker parts, you may have to buy the whole assembly.
Note: These steps work for all GE ice makers, including those in GE Profile ad Monogram refrigerators.
[amalinkspro type=”cta-btn-css” ctabtn-id=”” asin=”” apilink=”https://www.amazon.com/dp/B00PW7ZB9G?tag=refrigeratorsreviewed-20&linkCode=osi&th=1&psc=1″ addtocart=”false” new-window=”true” nofollow=”true” alignment=”alignright”]Buy this ice maker on Amazon[/amalinkspro]
GE Ice Maker Won’t Dump Ice – Quick Fix
If your GE ice maker won’t dump ice, do any of the following in this GE refrigerator troubleshooting guide:
1. Make sure the ice maker is on. Sometimes, you could turn it off accidentally. And if it is off, it won’t dump ice, even if there is ice in it.
2. If you are sure the ice maker is on, then check the water supply to it. Ensure it is turned on fully and the valve is open to allow water into the ice maker. Without water, the ice maker won’t be able to make ice. And if there is no ice in the ice maker, there won’t anything to dump.
3. Be sure that the ice maker is not paused. Take a look at the wire feeler arm to see if it is off or in the up position. You can also check the paddle to see if it is in the back position.
If any of these is the case, it means the ice maker is paused. Turn the arm down or to the on position or turn the paddle to the front. Then, give the ice maker time to dump any available ice into the bucket or make more for dumping.
4. Check the ice bucket. If it is too full or piled up too high, reduce the ice in it or level it by pushing some of it to the back of the bucket.
The ice maker will automatically shut off when it senses that the ice bucket is full, even when it is not. So even if there is still left inside it, it won’t dump the ice until you empty the ice bucket.
5. Look inside the ice maker to see if there is any ice cube caught or stuck in it. This can prevent the ice maker from dumping ice as the ejector won’t be able to move.
If this is the case, switch the ice maker off, dislodge the offending ice cube or cubes, and turn the ice maker on again.
6. In the event you set all the above in order yet the ice maker still does not dump ice, check the temperature in the freezer. If it is too high, set it to the recommended point of no more than 10 degrees Fahrenheit and not less than 0 degrees Fahrenheit.
It may take the ice maker too long to make ice if the temperature is not cold enough. And even when it does make ice, it may not be solid enough to be ejected.
7. Lastly, reset the GE ice maker. To reset it, turn off the shut-off switch, which is right in front of the ice maker. Wait 30 seconds, minimum, before turning the switch on again.
Find the ice maker’s wire feeler arm and push it up 3 times in quick succession. This resets the ice maker.
If it does not work, unplug the refrigerator and leave it unplugged for about 10 minutes. Plug it back in and repeat the reset process.
Note: These steps work for all GE ice makers, including those in GE Profile and Monogram refrigerators.
GE Ice Maker Is Not Making Fast Ice – Quick Fix
The following in this GE refrigerator troubleshooting guide are possible causes why your ice maker is not making fast ice and how to fix them:
1. Warm Freezer Temperature
If the freezer is too warm, the ice maker won’t be able to make ice. The right temperature is 0 degrees but if you want fast ice, you can reduce the temperature setting to -2 degrees.
Obstructed Water Filter
A clogged or obstructed water filter in a model that supports one means that the filter needs to be replaced.
Get a new filter, compatible with your GE refrigerator, and replace the old one with it. Then, run one or more gallons of water from the dispenser to clean the system before dispensing water for drinking.
2. Inadequate Freezer Content
If the content of the freezer is too low or too high, it can affect the ice maker’s capacity to produce ice. This is because the temperature in the freezer is stabilized by the content. Too little could mean too much freezing and too much could mean lack of freezing.
Keep the unit ¾ of the way full. This way, the cold air can circulate without restriction and the ice maker will be able to make ice fast enough.
Contact GE to report the issue and request service if you follow the steps above and the problem persists.
[amalinkspro type=”showcase” asin=”B018A1HCOC” apilink=”https://www.amazon.com/dp/B018A1HCOC?tag=refrigeratorsreviewed-20&linkCode=osi&th=1&psc=1″ new-window=”true” addtocart=”true” nofollow=”true” sc-id=”6″ imgs=”LargeImage” link-imgs=”false” specs=”” btn-color=”#ff9900″ btn-text=”Buy on Amazon” alignment=”aligncenter” hide-prime=”0″ hide-image=”0″ hide-price=”0″ hide-button=”0″ width=”600″]GE Refrigerator Automatic Ice Maker[/amalinkspro]
Troubleshooting a GE Refrigerator
A GE refrigerator can develop different issues. Let us discuss how to successfully troubleshoot and fix them in this GE refrigerator troubleshooting guide.
GE Refrigerator Is Not Cooling – Quick Fix
Do the following if a GE refrigerator is not cooling:
1. Check the Condenser Fan Motor
Take a look at the blades of the fan to see if anything is obstructing them. If there is, remove it and clean the blades. Now, try and spin the blades with your hand. If there is any restriction to their spinning, it means the motor is bad. Replace the motor.
But if the blades spin well and are free of any obstruction, test the motor with a multimeter to check for continuity. If there is no continuity, replace the motor.
Without the fan, the compressor and condenser coils will overheat, reducing the refrigerator’s cooling capacity.
2. Check the Start Relay
Place a multimeter between the start and run terminals of the relay to check for continuity. If there is no continuity, replace the relay. And if the part smells burnt or rattles when you shake it, replace it.
The compressor will have a hard time running without a properly functioning start relay. And if the compressor does not run, the refrigerator won’t cool.
3. Check the Condenser Coils
Clean the coils as soon as possible, especially if you find that they are very dirty. And be sure to maintain this cleaning culture for the coils, cleaning them every six months.
This is because they are responsible for removing heat so that the refrigerator does not overheat. If they are dirty, they cannot play their role. As a result, the refrigerator will have a hard time staying cold. Therefore, clean them when due.
4. Check the Evaporator Fan Motor
As with the condenser fan, try to spin the blades of the evaporator fan. Doing this will help you determine if the motor is functioning well. If there is any stiffness to the blades when you turn them, the motor is likely bad. Replace it.
In addition, if the motor is noisier than it usually is or it doesn’t run, test its windings to check for continuity. And if you find no continuity, replace the motor.
If the motor of the fan is bad, there will be no cold air circulating in the freezer and getting into the refrigerator. So while the freezer may stay cold, the refrigerator will stop cooling.
This video shows more of what to do if you have this problem…
Check out these other articles…
How to Replace a GE Ice Maker [Quick Guide]
How to Take Apart GE Refrigerator Drawers [Quick Guide]
GE Refrigerator Handle [Issues and Fixes]
How to Set Temperature on a GE Refrigerator [Quick Guide]
GE Refrigerator Water Coming Out Slowly [How to Fix]
How Old Is My GE Refrigerator? [Solved]
How to Change the Light Bulb in GE Freezer [Quick Guide]
GE Refrigerator Ice Maker Not Getting Water [How to Fix]
GE Refrigerator Is Warm But Freezer Is Cold – Quick Fix
If you find that the freezer of your GE unit is cold but the refrigerator is warm, do one or more of the following in this GE refrigerator troubleshooting guide:
1. Check the Evaporator Fan Motor
Try to turn the blades with your hand. They should spin well if the motor is working properly. So if they don’t, it is an indication that the motor of the fan is likely to be bad. So replace it.
And if the motor is noisier than it should be or doesn’t run, test the windings with a multimeter to check for continuity. If there is no continuity in the windings, replace the motor.
The evaporator fan circulates cold air inside the freezer and refrigerator. If the motor becomes faulty, it won’t be able to do its job. Consequently, the refrigerator will become warm even if the freezer remains cold.
2. Check the Thermistor
Test the continuity of the thermistor using a multimeter. You should find its resistance changing as the temperature of the refrigerator changes. If the resistance remains the same and there is no continuity, replace the thermistor.
The thermistor is responsible for monitoring the temperature of the refrigerator and sending its results to the control board. Using the result, the control board directs power to the cooling system.
If the thermistor is faulty, the result will be wrong. And if the result is wrong, the board won’t direct the needed power. So, the cooling system may run too much or not enough.
3. Check the Evaporator Coils
Inspect the coils to see if there is an accumulation of ice or frost on them. If there is, thaw it by defrosting the freezer manually. Remove everything in it, unplug the unit and allow all the ice to melt. This takes care of that on the coils.
But it is important to test the components of the defrost system. If ice accumulates on the evaporator coils, it is an indication that something has failed in the defrost system.
4. Check the Damper Control
Take a look at the damper, between the freezer and the refrigerating sections. It should alternate between closing and opening if it is in good working condition. If the damper is broken or damaged, it might not close or open properly.
And if it is stuck in the closed position, it won’t let cold air flow into the refrigerator from the freezer. As a result, the refrigerator won’t cool even though the freezer is cold.
GE Refrigerator Is Freezing Food – Quick Fix
If a GE refrigerator is freezing food, one or more of the following could be the reason for it:
1. Faulty Thermistor
Check the continuity of the thermistor using a multimeter. As you do so, you should see its resistance changing along with the temperature of the refrigerator. If the resistance does not change, and you don’t find continuity with it, replace the thermistor because it is faulty.
The result which the thermistor sends to the control board determines the power regulated to the cooling system.
If the result is not correct as a result of a faulty thermistor, the power regulated may be too much or too little. And if it is too much, the cooling system will run more than is needed, freezing everything inside the unit.
2. Defective Temperature Control Thermostat
Turn the thermostat from the lowest to the highest temperature setting. Wait for it to make an audible click. If it clicks, the thermostat is working fine. But if it does not click, test it using a multimeter to check for continuity. And if there is no continuity, replace the thermostat.
The thermostat sends voltage to the fan motors and compressor. This is to enable the cooling system to run efficiently. But if the thermostat is defective, the system may end up operating longer and more than needed. Consequently, the refrigerator will be so cold as to freeze food.
3. Broken Damper Control
Replace the damper if you discover that it no longer closes and opens at regulated intervals. If it is stuck in the open position, too much cold air will flow into the refrigerator from the freezer. Consequently, the refrigerator will begin to freeze food because of the excess cold air.
GE Refrigerator Is Not Defrosting – Quick Fix
Do the following if your GE refrigerator is not defrosting:
1. Check the Defrost Timer
Move the dial of the timer slowly to get it into the defrost cycle. When you do this, the defrost heater should kick into action as the compressor stops running.
Give it about 30 minutes so that cycle will complete and the timer will advance out of the cycle. This should happen automatically. However, if this does not happen and other defrost parts don’t work, replace the timer because it is defective.
The timer has the job of turning on the defrost heater a few times a day. The heater thaws any ice or frost on the evaporator coils when it comes on. If the timer is not working properly, it cannot perform this duty. As a result, there will be an ice buildup in the refrigerator.
2. Check the Defrost Heater
Test the continuity of the defrost heater using a multimeter. If the heater is in good working condition, the continuity should show on the meter. But if there is no reading, replace the heater because it is bad.
The absence of frost or ice on the evaporator or cooling coils is possible because of the heater. The thermostat closes contacts in order to allow the timer to send power to the heater once the temperature of the coils drops to a certain point.
However, if the defrost heater is defective, it won’t pick up or turn on to warm up the coils. As a result, the temperature of the coils will continue to drop until they freeze. And the unit itself won’t be able to defrost.
3. Check the Defrost Thermostat
With a multimeter, test the thermostat to check for continuity. If you don’t find continuity when the thermostat gets to the lowest temperature within its range of operation, replace it.
The thermostat keeps an eye on the cooling coils while the refrigerator is in the cooling cycle. When their temperature drops to a certain point, the contacts of the thermostat close.
Then, power goes to the heater so it can kick into action and warm the coils. This way, they don’t freeze up.
But if the thermostat is faulty or no longer working, its contacts will remain open. Consequently, the heater won’t get the power it needs to operate. And the cooling coils will keep getting colder to the point of freezing. Additionally, the refrigerator won’t be able to defrost.
4. Check the Defrost Sensor
Test the sensor, along with its fuse, to check for continuity. The sensor usually comes with a fuse for backup, in the event there is sensor failure. If either of the components doesn’t have continuity, replace the defrost sensor.
Much like the thermostat, the sensor keeps an eye on the evaporator to monitor its temperature. But what it does is shut the heater off when it is time. If it fails to do this, the fuse blows to complete the task.
Now, if the fuse blows, the refrigerator will not defrost. This is because the defrost system cannot function if there is a failed component.
5. Check the Defrost Control Board
The board is the brain of the defrost system. It determines when the defrost cycle should run and how often. If it fails to work, the refrigerator will not defrost.
However, because it does not fail so easily, it is best to check other components of the system first before checking it. When every other component checks out fine, replace the board.
GE Refrigerator Water Dispenser Is Not Working – Quick Fix
If the water dispenser of your GE refrigerator is not working, check the following:
1. Water Inlet Valve
First, check the water pressure. It should be at least 20psi. If the pressure of the water going to the valve is lower than 20psi, the valve won’t open. And if it does not open, water won’t flow through to the dispenser.
But if the pressure is enough yet you can’t dispense water, test the inlet valve to check for continuity using a multimeter. If there is no continuity, replace the valve.
2. Water Tube
There is a water tube in the door of the refrigerator, where the dispenser is. If it is frozen or there is ice stuck in it, water won’t flow through. Go to the bottom of the door of the refrigerator and disconnect it. Next, blow air into it to see if it goes through. If it does not pass through, it means the tube is frozen.
Melt the ice by pouring hot water through it or using a hair dryer. But if you are going to use a dryer, be careful so you don’t warp the plastic material of the tube.
To stop the tube from freezing in the future, ensure you keep the temperature in the freezer normal. That is, don’t reduce it below 0 degrees. If it is too cold, everything in it will freeze quickly and easily.
3. Water Filter
Check to see if the change filter indicator on your control panel is blinking. That is if your model has a control or display panel. If it is not or it does not apply to you, be sure to change the filter if it has not been changed in the last 6 months.
A clogged filter has the capacity to keep water from flowing to the dispenser. It can even cause the dispenser not to work as it should.
However, if it has been changed, inspect it for any damage and to be sure it is the right type for the GE refrigerator model you have. Replace it if the type is wrong or there is damage.
In addition to the parts above, you can also check the dispenser switch, the door switch and the dispenser control board. While they are not immediately responsible, they are likely to cause the dispenser not to work if they are defective.
Check out these other articles…
GE Refrigerator Ice Maker Jammed [How to Fix]
GE Refrigerator Icing Up [How to Fix]
How to Level a GE Refrigerator [Quick Guide]
GE Refrigerator Sounds Like…[How to Fix]
GE Refrigerator Making a Knocking Sound [How to Fix]
How to Install a GE Ice Maker [Quick Guide]
GE Refrigerator Just Stopped Working [How to Fix]
GE Refrigerator Ice Dispenser Is Not Working – Quick Fix
To fix a GE refrigerator ice dispenser that is not working, do any or all of the following:
1. Check the Auger Motor
Pull the ice bucket out of the refrigerator and turn the auger with your hand. If it is not stiff, test the motor of the auger with a multimeter to check for continuity.
If there is no continuity and you are sure the motor has power supplied to it yet it does not run, replace it.
The motor of the auger turns the blade so that it pushes ice down the ice chute. If the motor malfunctions, the blades won’t spin to push the ice out. As a result, the dispense won’t have any ice to dispense.
2. Check the Ice Crusher Blades
Inspect the blades to see if there is any ice stuck or jammed in them. If there is, thaw the ice with warm water. But if the blades are broken or even bent, you need to replace them
3. Check the Dispenser Solenoid
Locate the solenoid of the dispenser and test it using a multimeter to see if there is continuity. If there is no continuity, it is likely to have failed. So, replace it.
You can also turn the actuator pin of the dispenser to see if it moves without any stiffness. If it is stiff and does not turn freely, replace it.
The solenoid enables the flap of the dispenser to open so ice can pass through. The flap closes as soon as the dispense is done dispensing ice. If the solenoid fails to work, the flap won’t open and the dispenser won’t dispense ice.
4. Check the Dispenser Control Board
The control board is in charge of the dispenser system. It dictates when and how everything works. If it malfunctions, the system won’t function. But since it hardly fails, it is important to check other parts of the system first before settling for the board to replace it.
GE Refrigerator Is Loud – Quick Fix
The following components are possible reasons why a GE refrigerator is loud and how to fix them:
1. Fan Blades
Check the blades of the condenser fan and evaporator fan if the refrigerator gets loud or noisy. Take a look at the condenser fan to see if the blades are obstructed by anything.
If they are, remove the foreign object and clean the blades. Then, make sure they turn freely and smoothly, making no noise as they do. Otherwise, oil them to reduce friction.
But if the blades of the condenser fan are unobstructed, check the evaporator fan. This is especially needed if the noise gets louder when you open the door of the freezer.
Check for ice around the fan or for any other object that shouldn’t be there. Then, like the condenser fan, check the motor by turning the blades with your hand. If there is any noise, it means the bearings are probably worn and the motor should be replaced.
2. Water Inlet Valve
If the noise increases when the water is going into the ice maker or you are dispensing water, it is likely the inlet valve is responsible. With constant use, deposits can pile up in the valve and reduce the flow of water. So while it is trying to work, its labors produce a lot of noise. The best step to take is to buy a new valve for replacement as repairing it is not possible.
3. Compressor
Move the compressor away from the wall in order to gain access to the bottom rear panel. Remove it to expose the compressor. If the noise is coming from there, then the compressor likely has internal damages.
Replace the compressor. But this can only be done by a licensed refrigerator technician. So, it is important to find one to replace it as soon as possible.
GE Refrigerator Is Running Constantly – Quick Fix
Take the following steps in order to fix a GE refrigerator that is running constantly:
1. Check the Temperature
The temperature in the freezer should not be above 10 degrees Fahrenheit. This is the absolute maximum point. The best setting range is between 0 and 5 degrees Fahrenheit.
If the temperature is too high, you will find the refrigerator running constantly in an effort to maintain a cool temperature.
Therefore, adjust the setting if it is high. And check it from time to time to ensure it remains at the set point.
Condenser Coils
Clean the coils because dirt causes them to lose their efficiency in dissipating heat.
2. Check the Defrost Heater
Test the heater using a multimeter to check whether or not it has continuity. if you don’t find any continuity in the heater, it is time to buy a suitable replacement.
Heat will build up in the refrigerator if the evaporator coils are frozen. This is because they won’t be able to release cold air. As a result, the refrigerator will work to find a way to keep the heat out. So, you find the unit running non-stop.
3. Check the Door Seal
Open and close the door of the refrigerator on a dollar bill or paper. try to pull it out with the door still closed. If you pull it out without a tear, replace the seal because it is weak.
A weak door seal will let humid air into the refrigerator easily. And the moisture in the air will condense and freeze on the cooling coils.
Consequently, heat will build and the unit will try to dissipate it. Under normal circumstances, the defrost heater should melt the frost. But when the seal is broken, it won’t be able to meet up as ice will form faster than it has the capacity to thaw.
4. Check the Fan Motors
The failure of the motors of the evaporator fan and condenser fan can contribute to the refrigerator running constantly.
For the evaporator fan, turn the blades to see if they turn smoothly. If they are stiff, the fan is faulty. And if the motor has a loud noise from it, replace it.
Additionally, if the motor is not responding at all, run a continuity test on it using a multimeter. If there is no continuity, replace the motor.
There will no cold air flowing into the refrigerator if the fan doesn’t run. So, in a bid to cover the gap, it runs constantly.
For the condenser fan, turn the blades just like you did with the evaporator fan. Doing this will tell you if the motor is bad. If the blades are stiff, the fan is not working; the bearing could be worn. So, replace it.
But if the blades move smoothly, check the motor for continuity with a multimeter. If you don’t find continuity, replace the motor.
The compressor may overheat if the fan is not working. And the heat is likely to affect the cooling capacity of the refrigerator. As a result, the refrigerator runs constantly to keep its temperature cold.
5. Defrost Timer
The refrigerator won’t cool if the evaporator coils are frozen. And they will remain frozen if the defrost timer doesn’t work. The timer prompts the heater to warm the coils and melt any ice on them.
Therefore, check the timer’s functionality. Turn it counterclockwise so it advances into the defrost cycle. Then, wait to see if it advances out automatically after 30 minutes.
If it does not, it means it is defective. Replace it with a suitable one.
6. Defrost Thermostat
It is the thermostat that closes its contacts to allow the heater to turn on and warm the coils. If it fails, the heater won’t function even if the timer prompts it. Check the thermostat and replace it if it has failed.
7. Defrost Control Board
This part controls the defrost system, much like the control board controls the refrigerator. So you see its importance. However, it does not fail easily. Because of this, be sure to check other parts first before settling for replacing this board.
Recap
This GE refrigerator troubleshooting guide will help you fix most of the issues a GE ice maker or refrigerator may have.
However, contact the GE Service center if any of the problems continue. Alternatively, chat with any of our qualified refrigerator repair technicians right here. They are available and ready to assist you with fixing the issue permanently.
Remember to unplug the refrigerator from the wall outlet before troubleshooting or fixing it. That is unless you need the power to troubleshoot it. Working on an electrical appliance that is still connected to the power supply is extremely dangerous.